Course Tour
Explore every hole at The Metropolitan Golf Club with our interactive course tour. View images, videos, and key stats for all 19 holes of one of Melbourne’s premier championship courses.

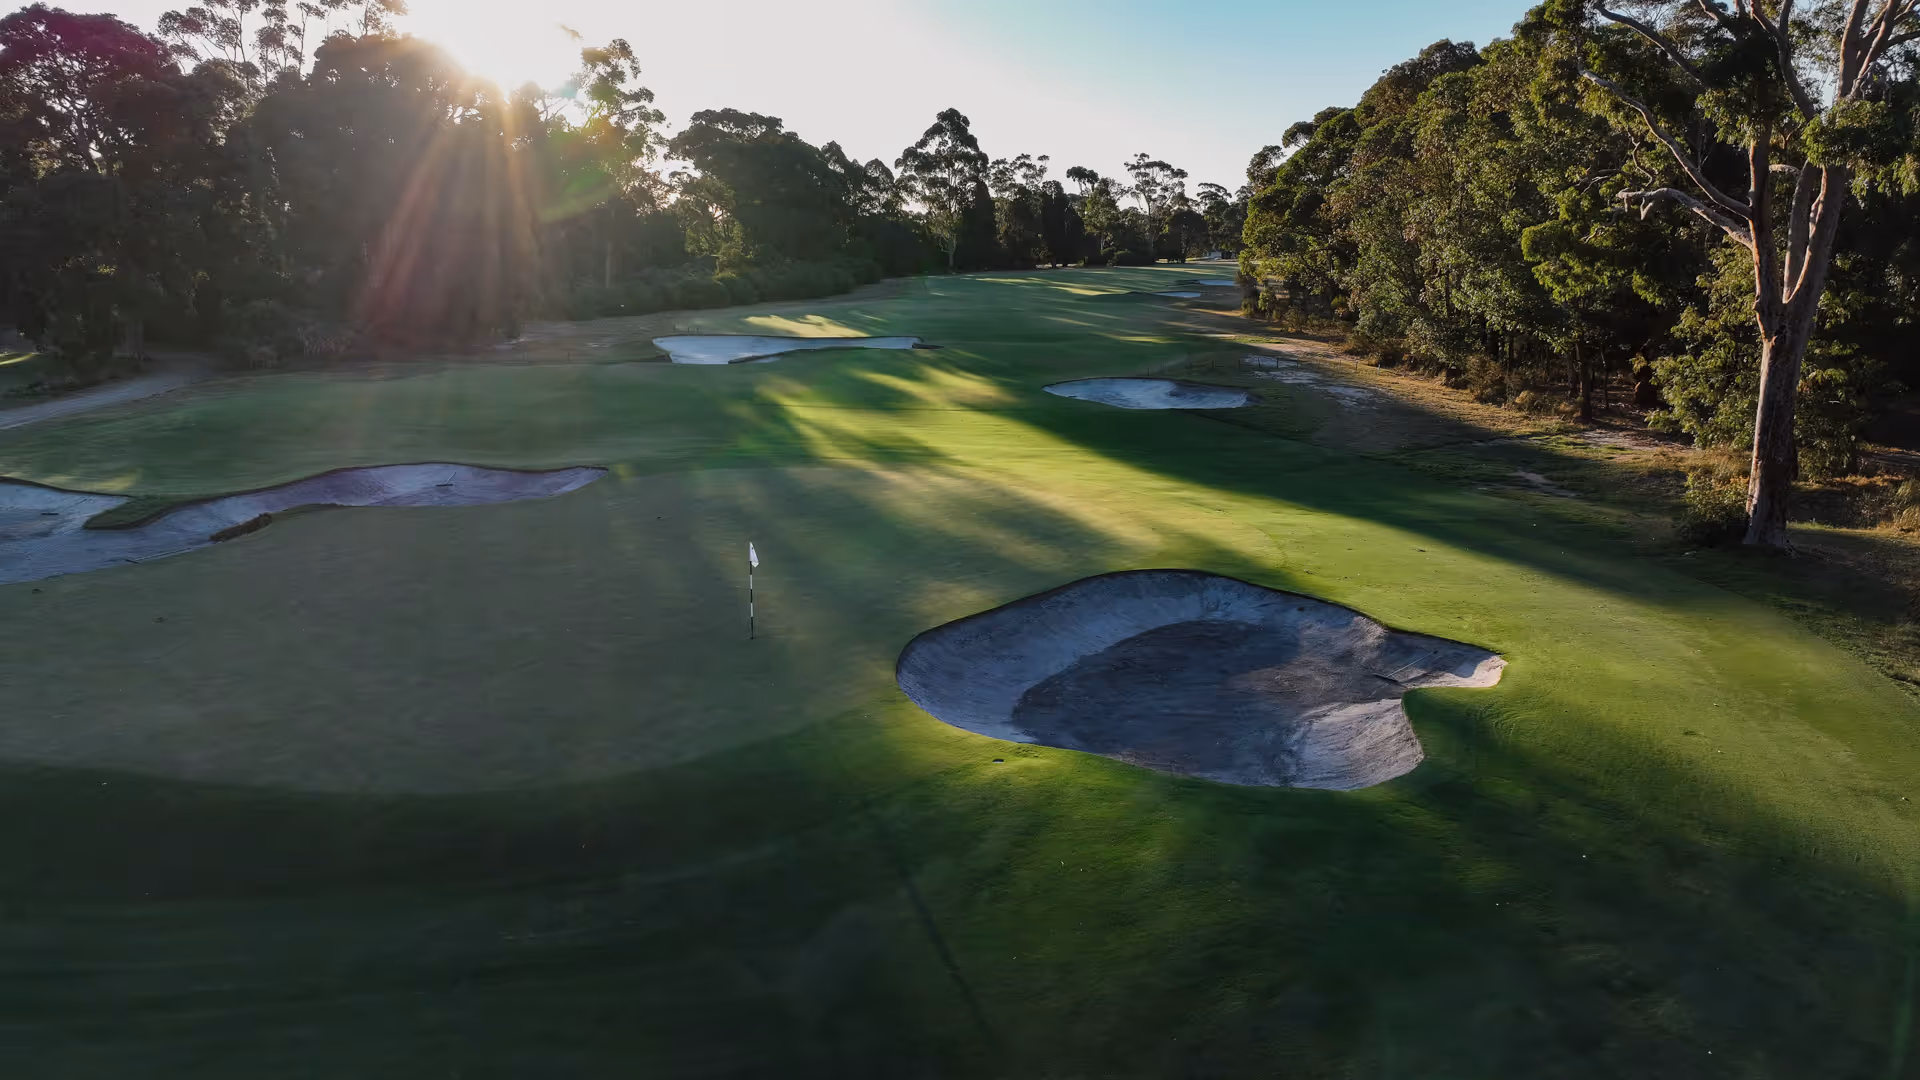
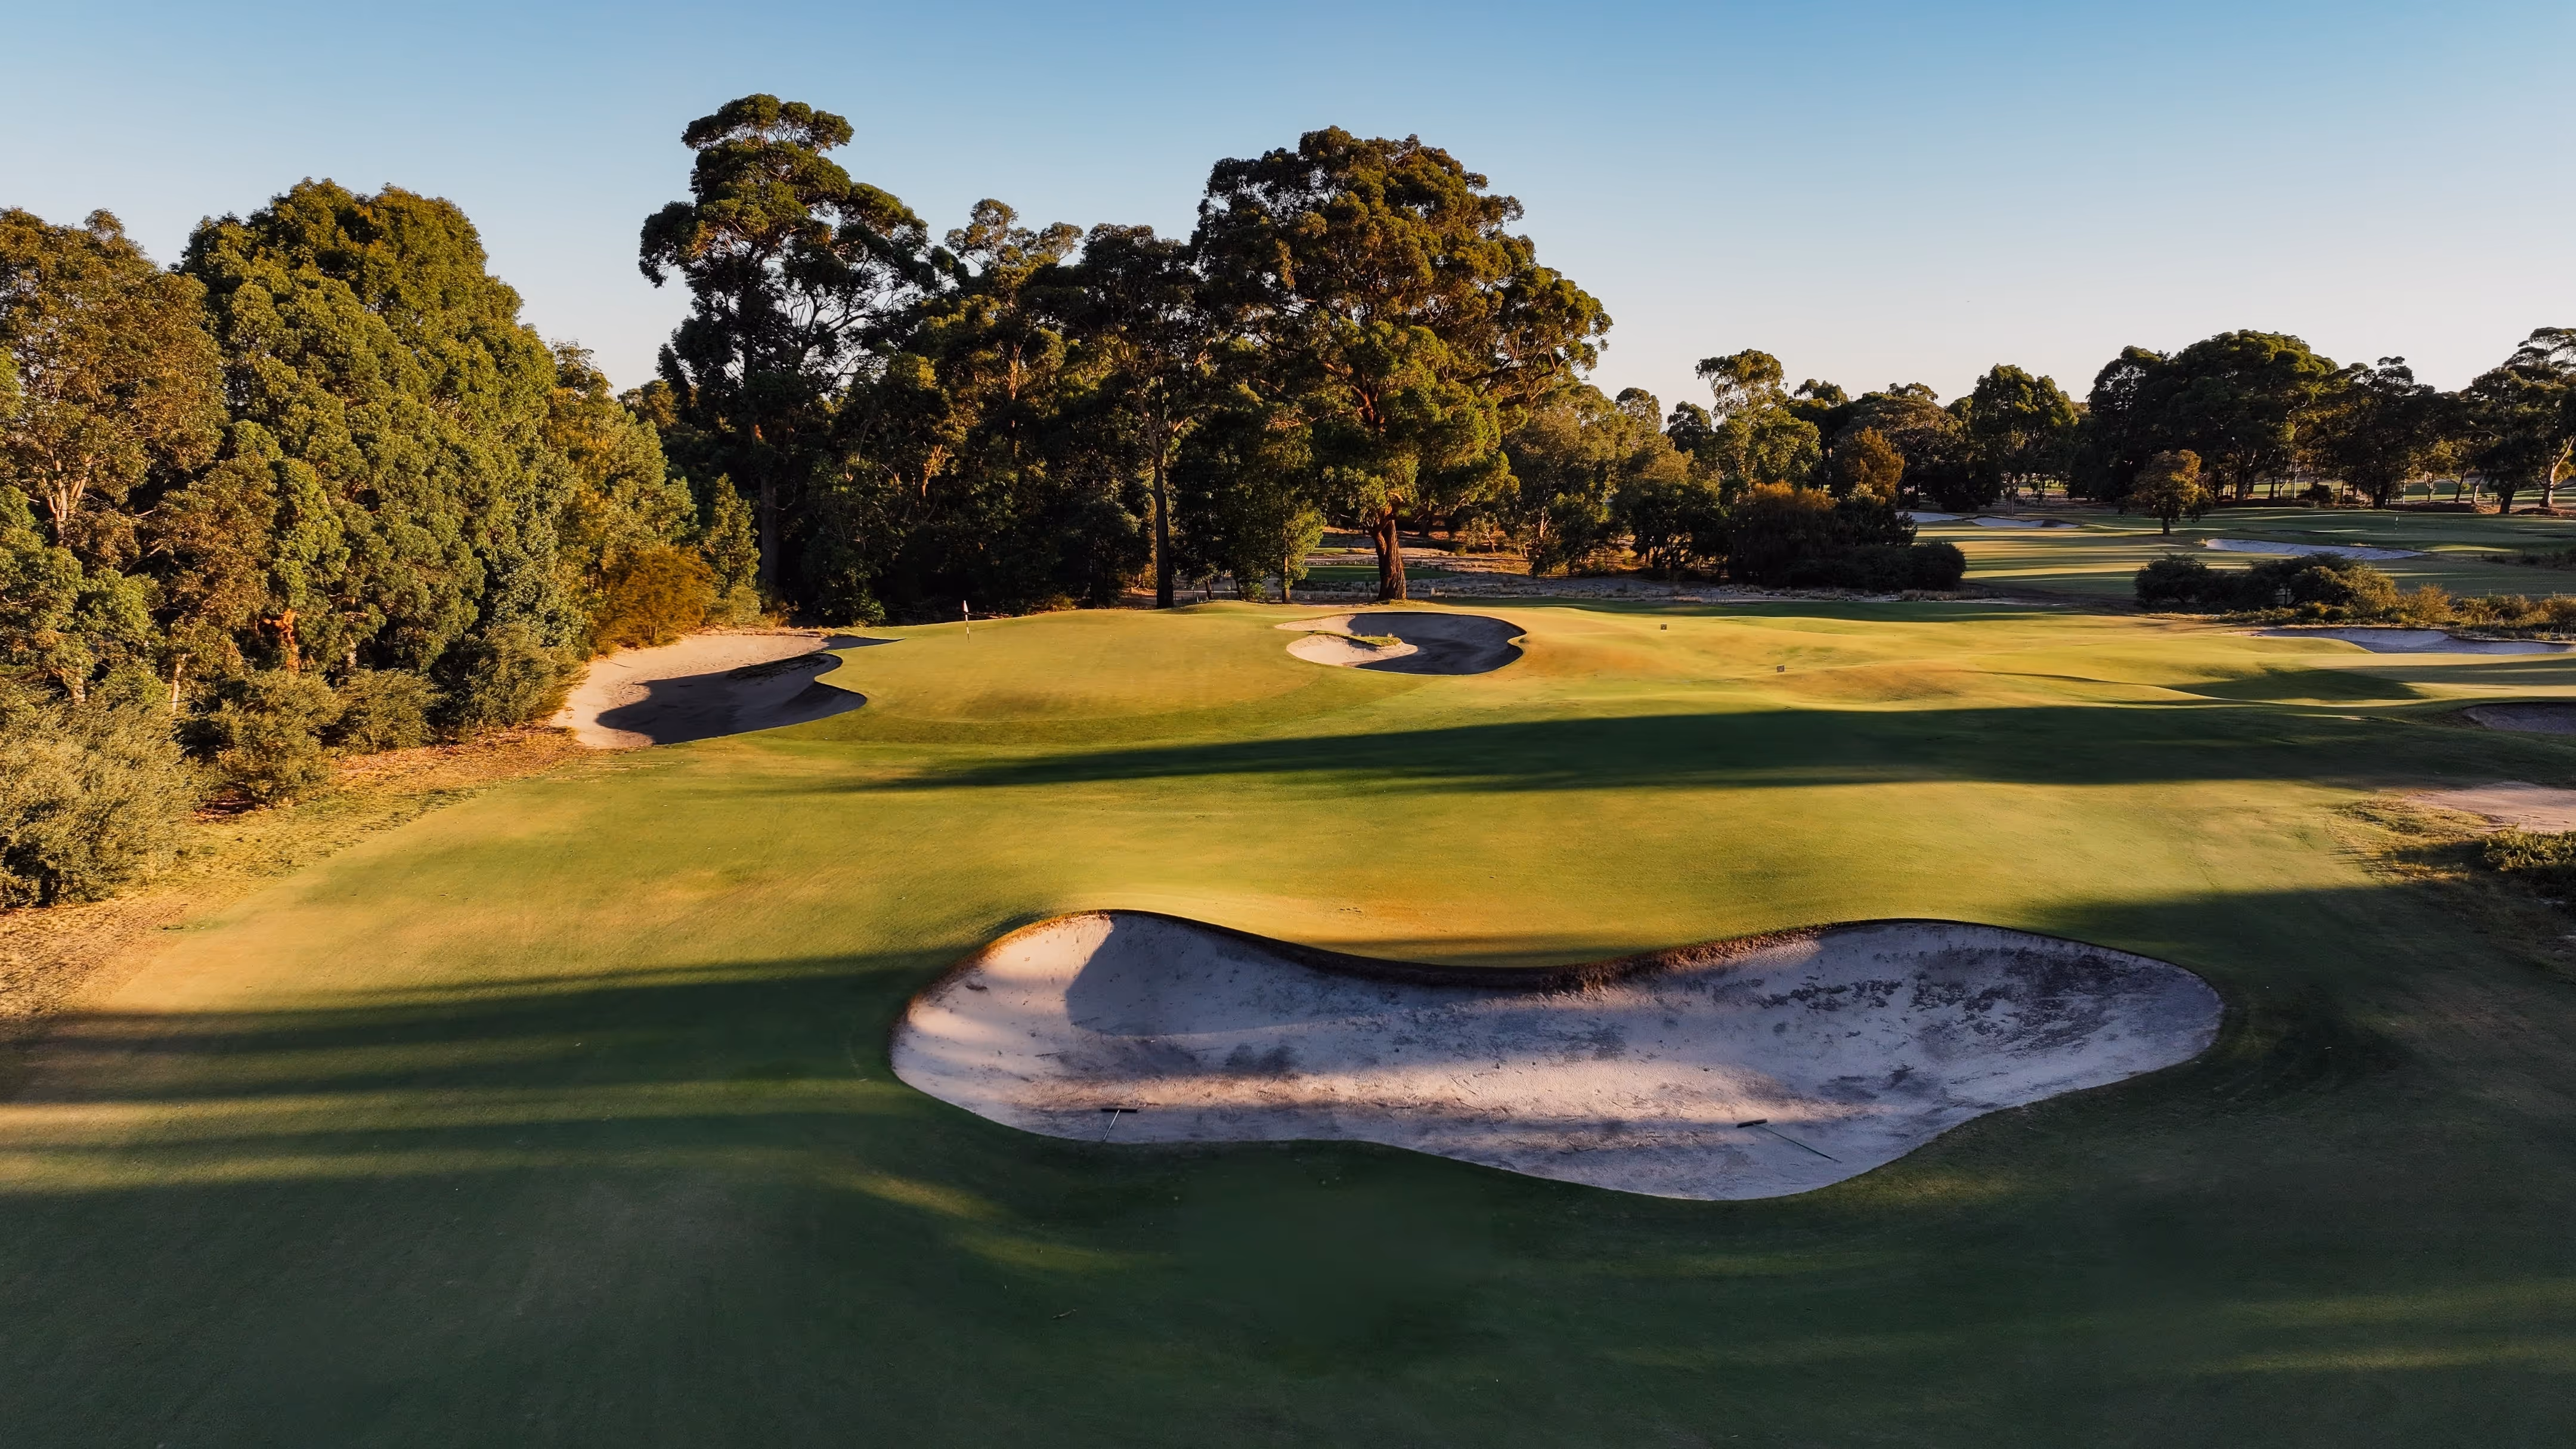
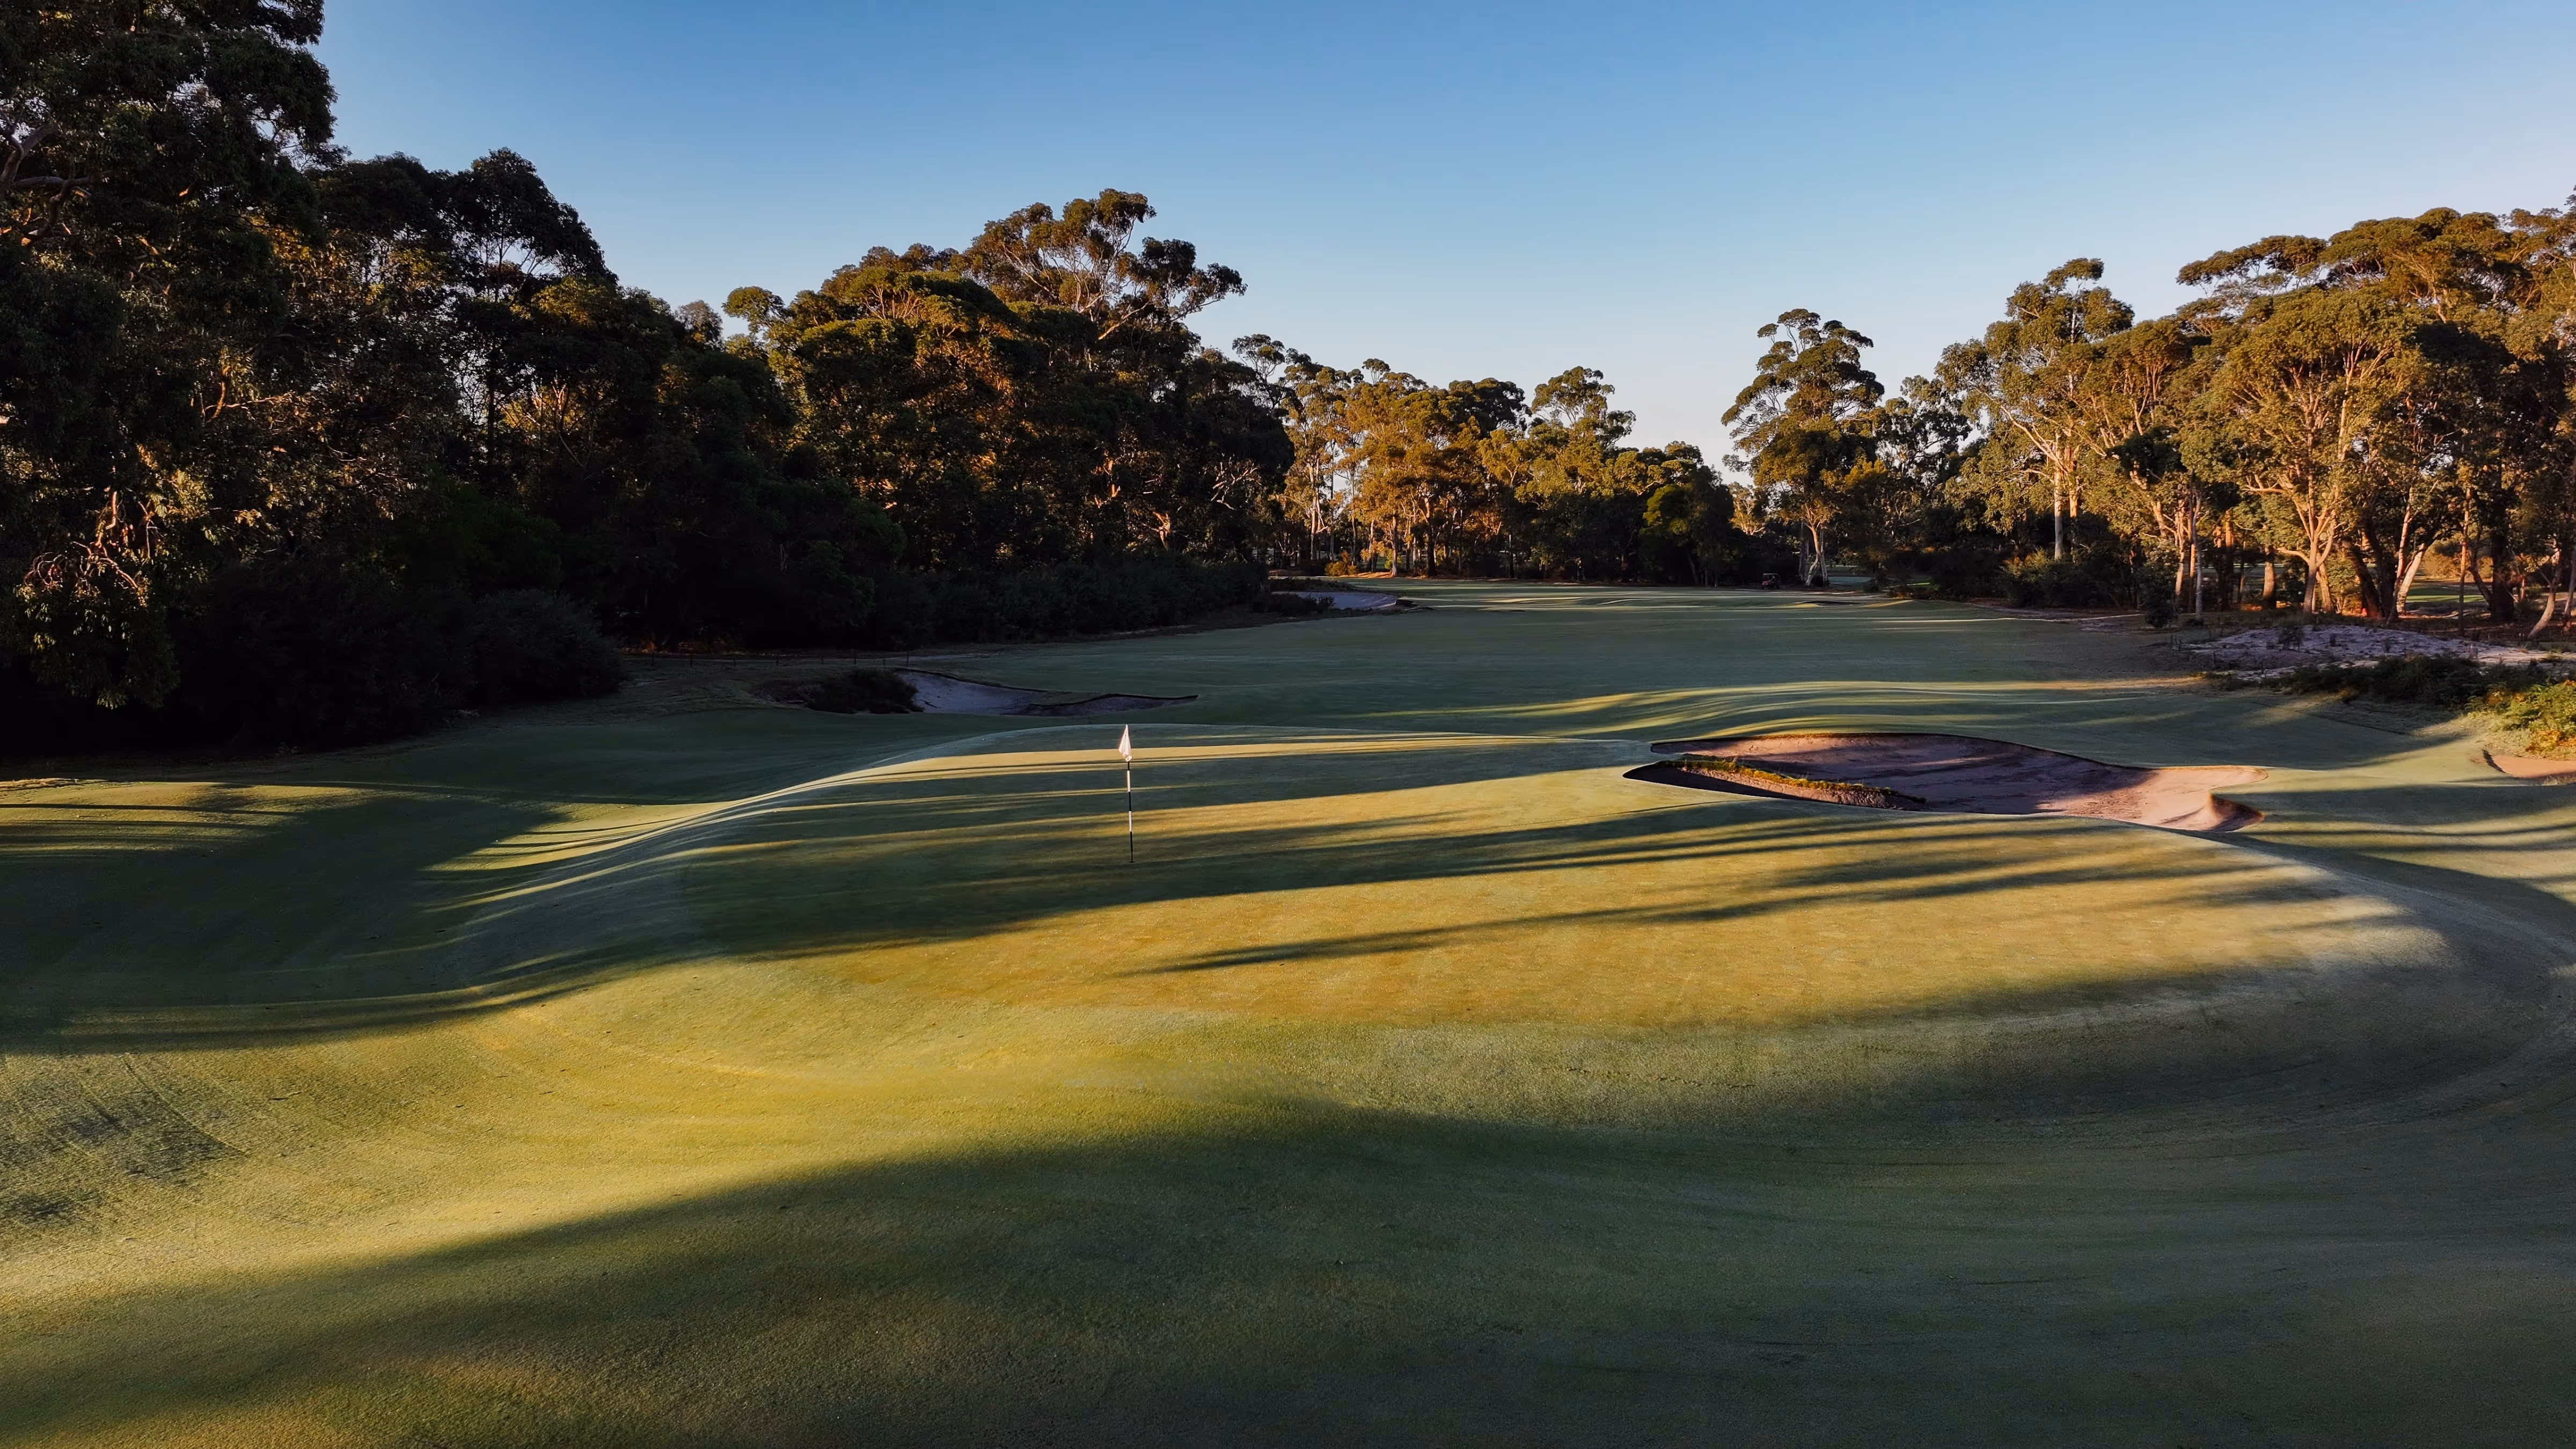
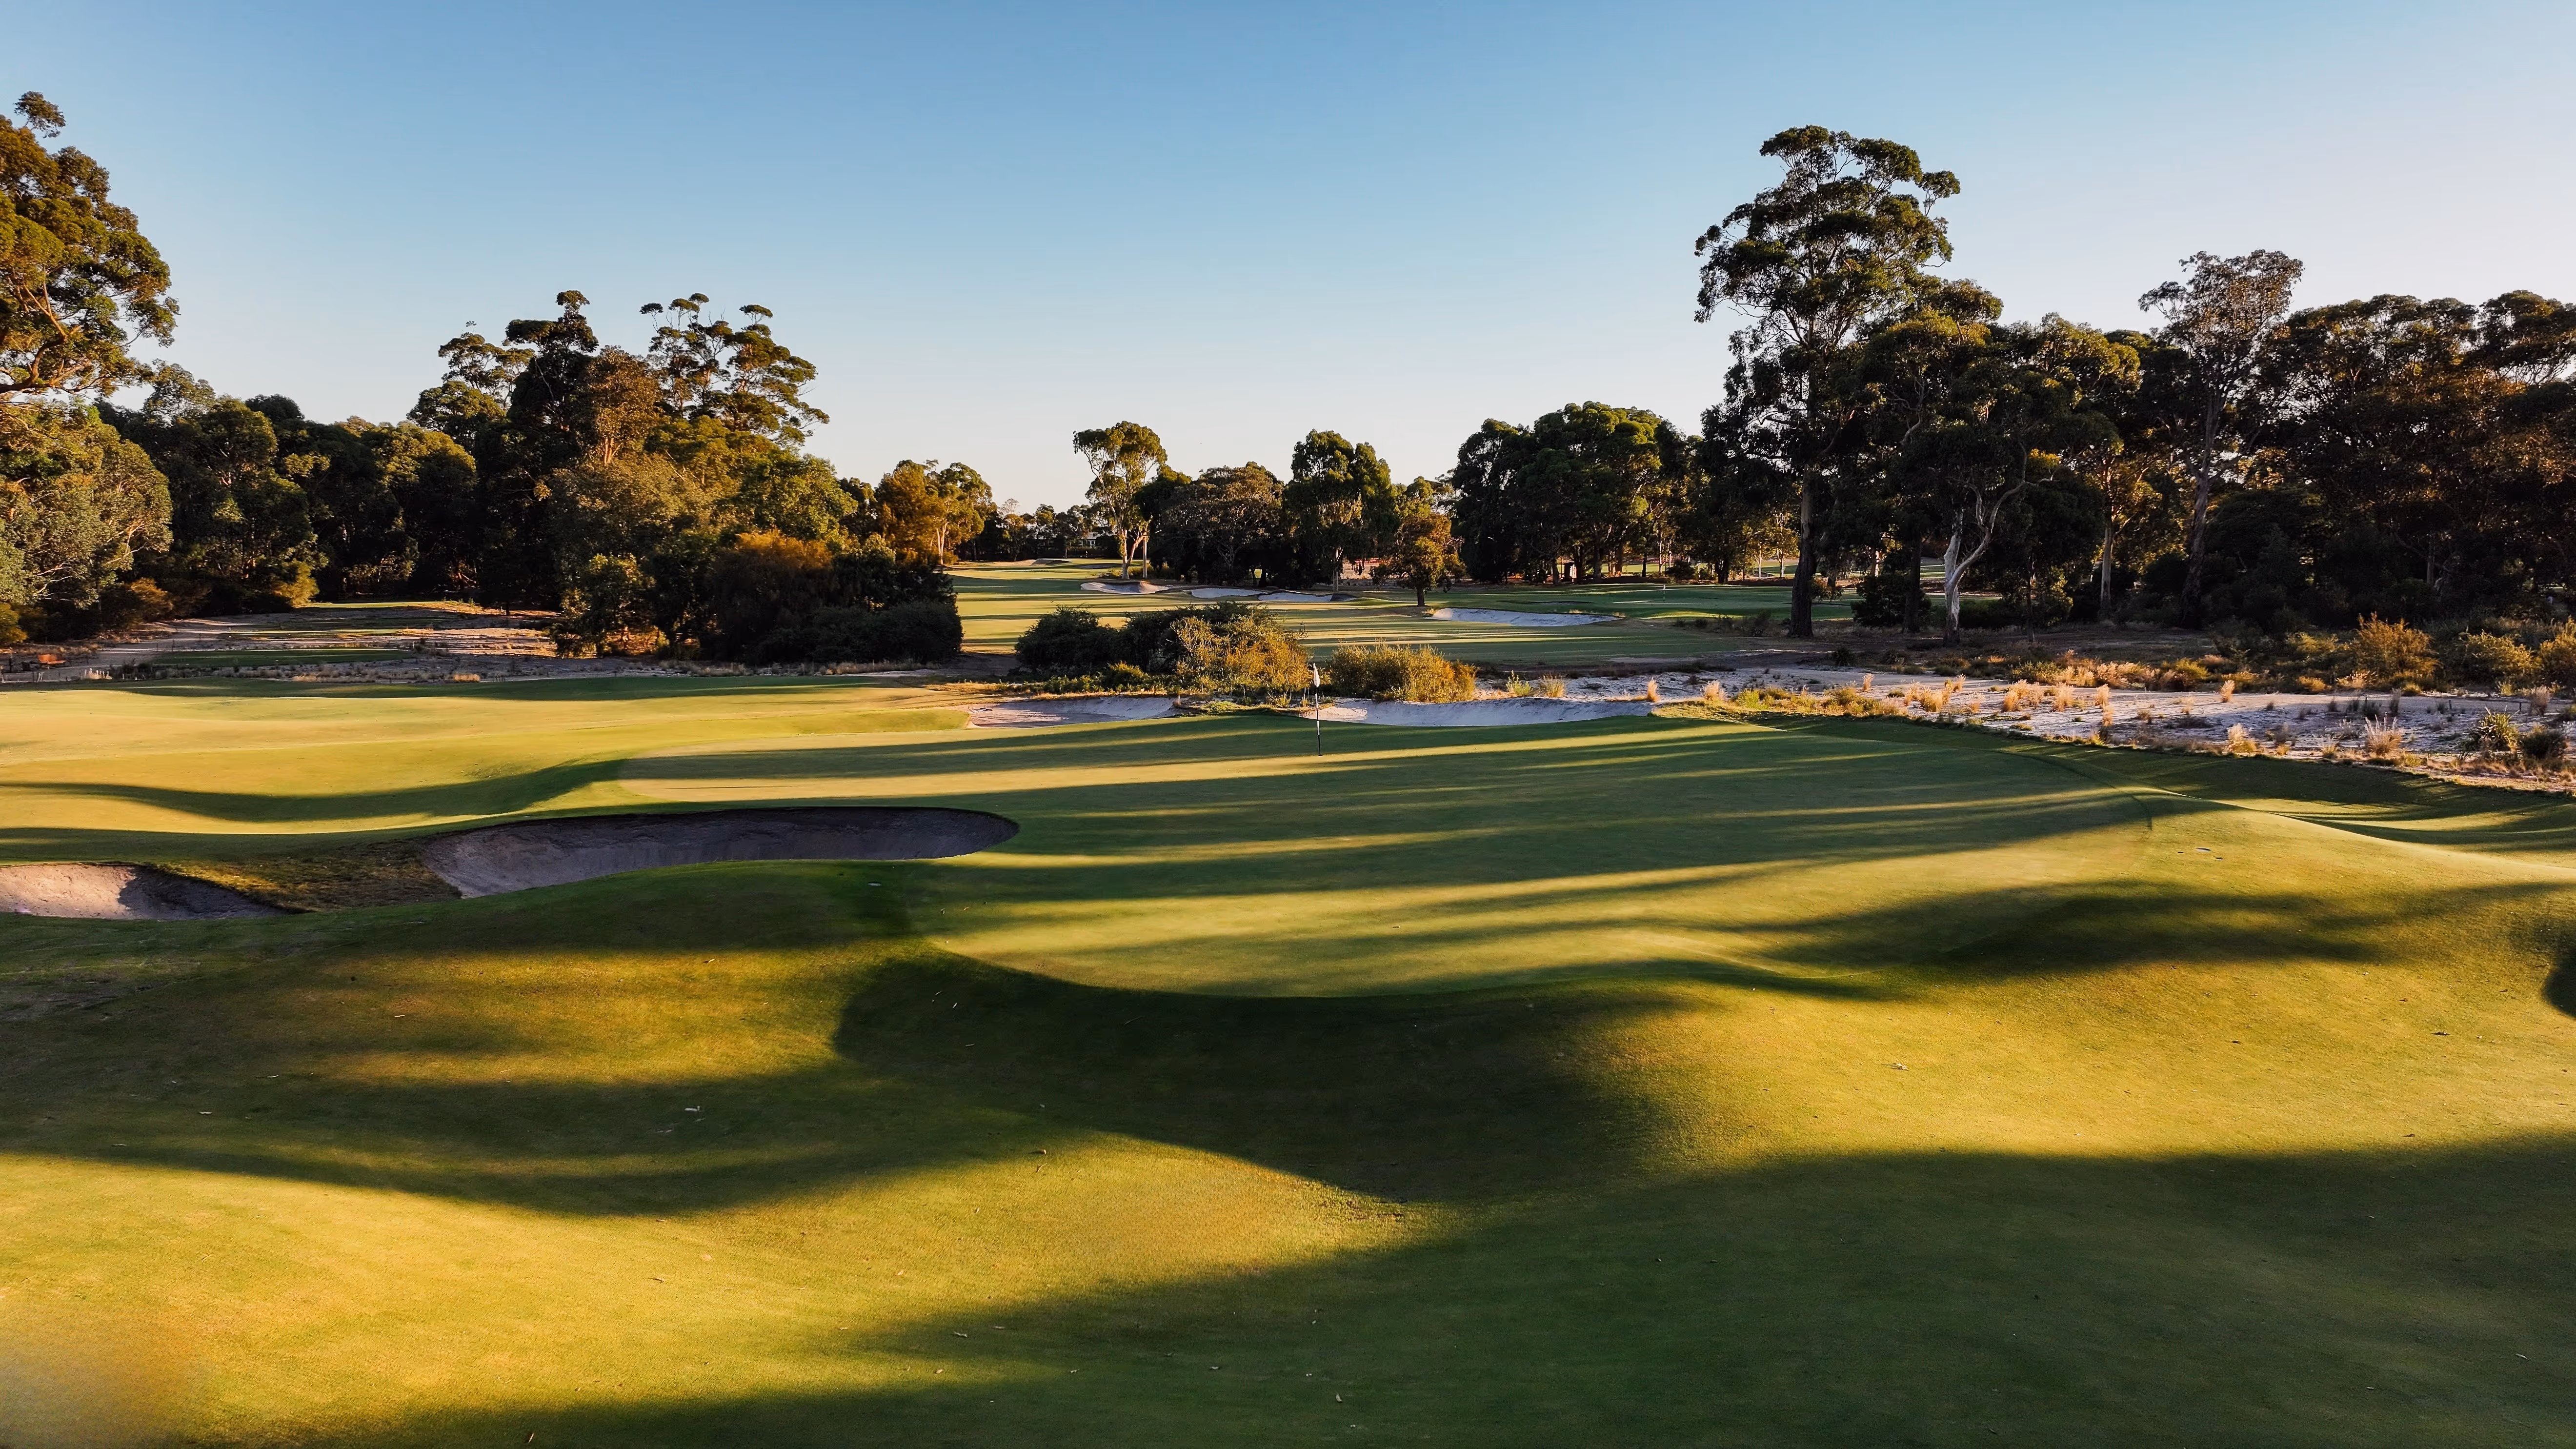
1st Hole
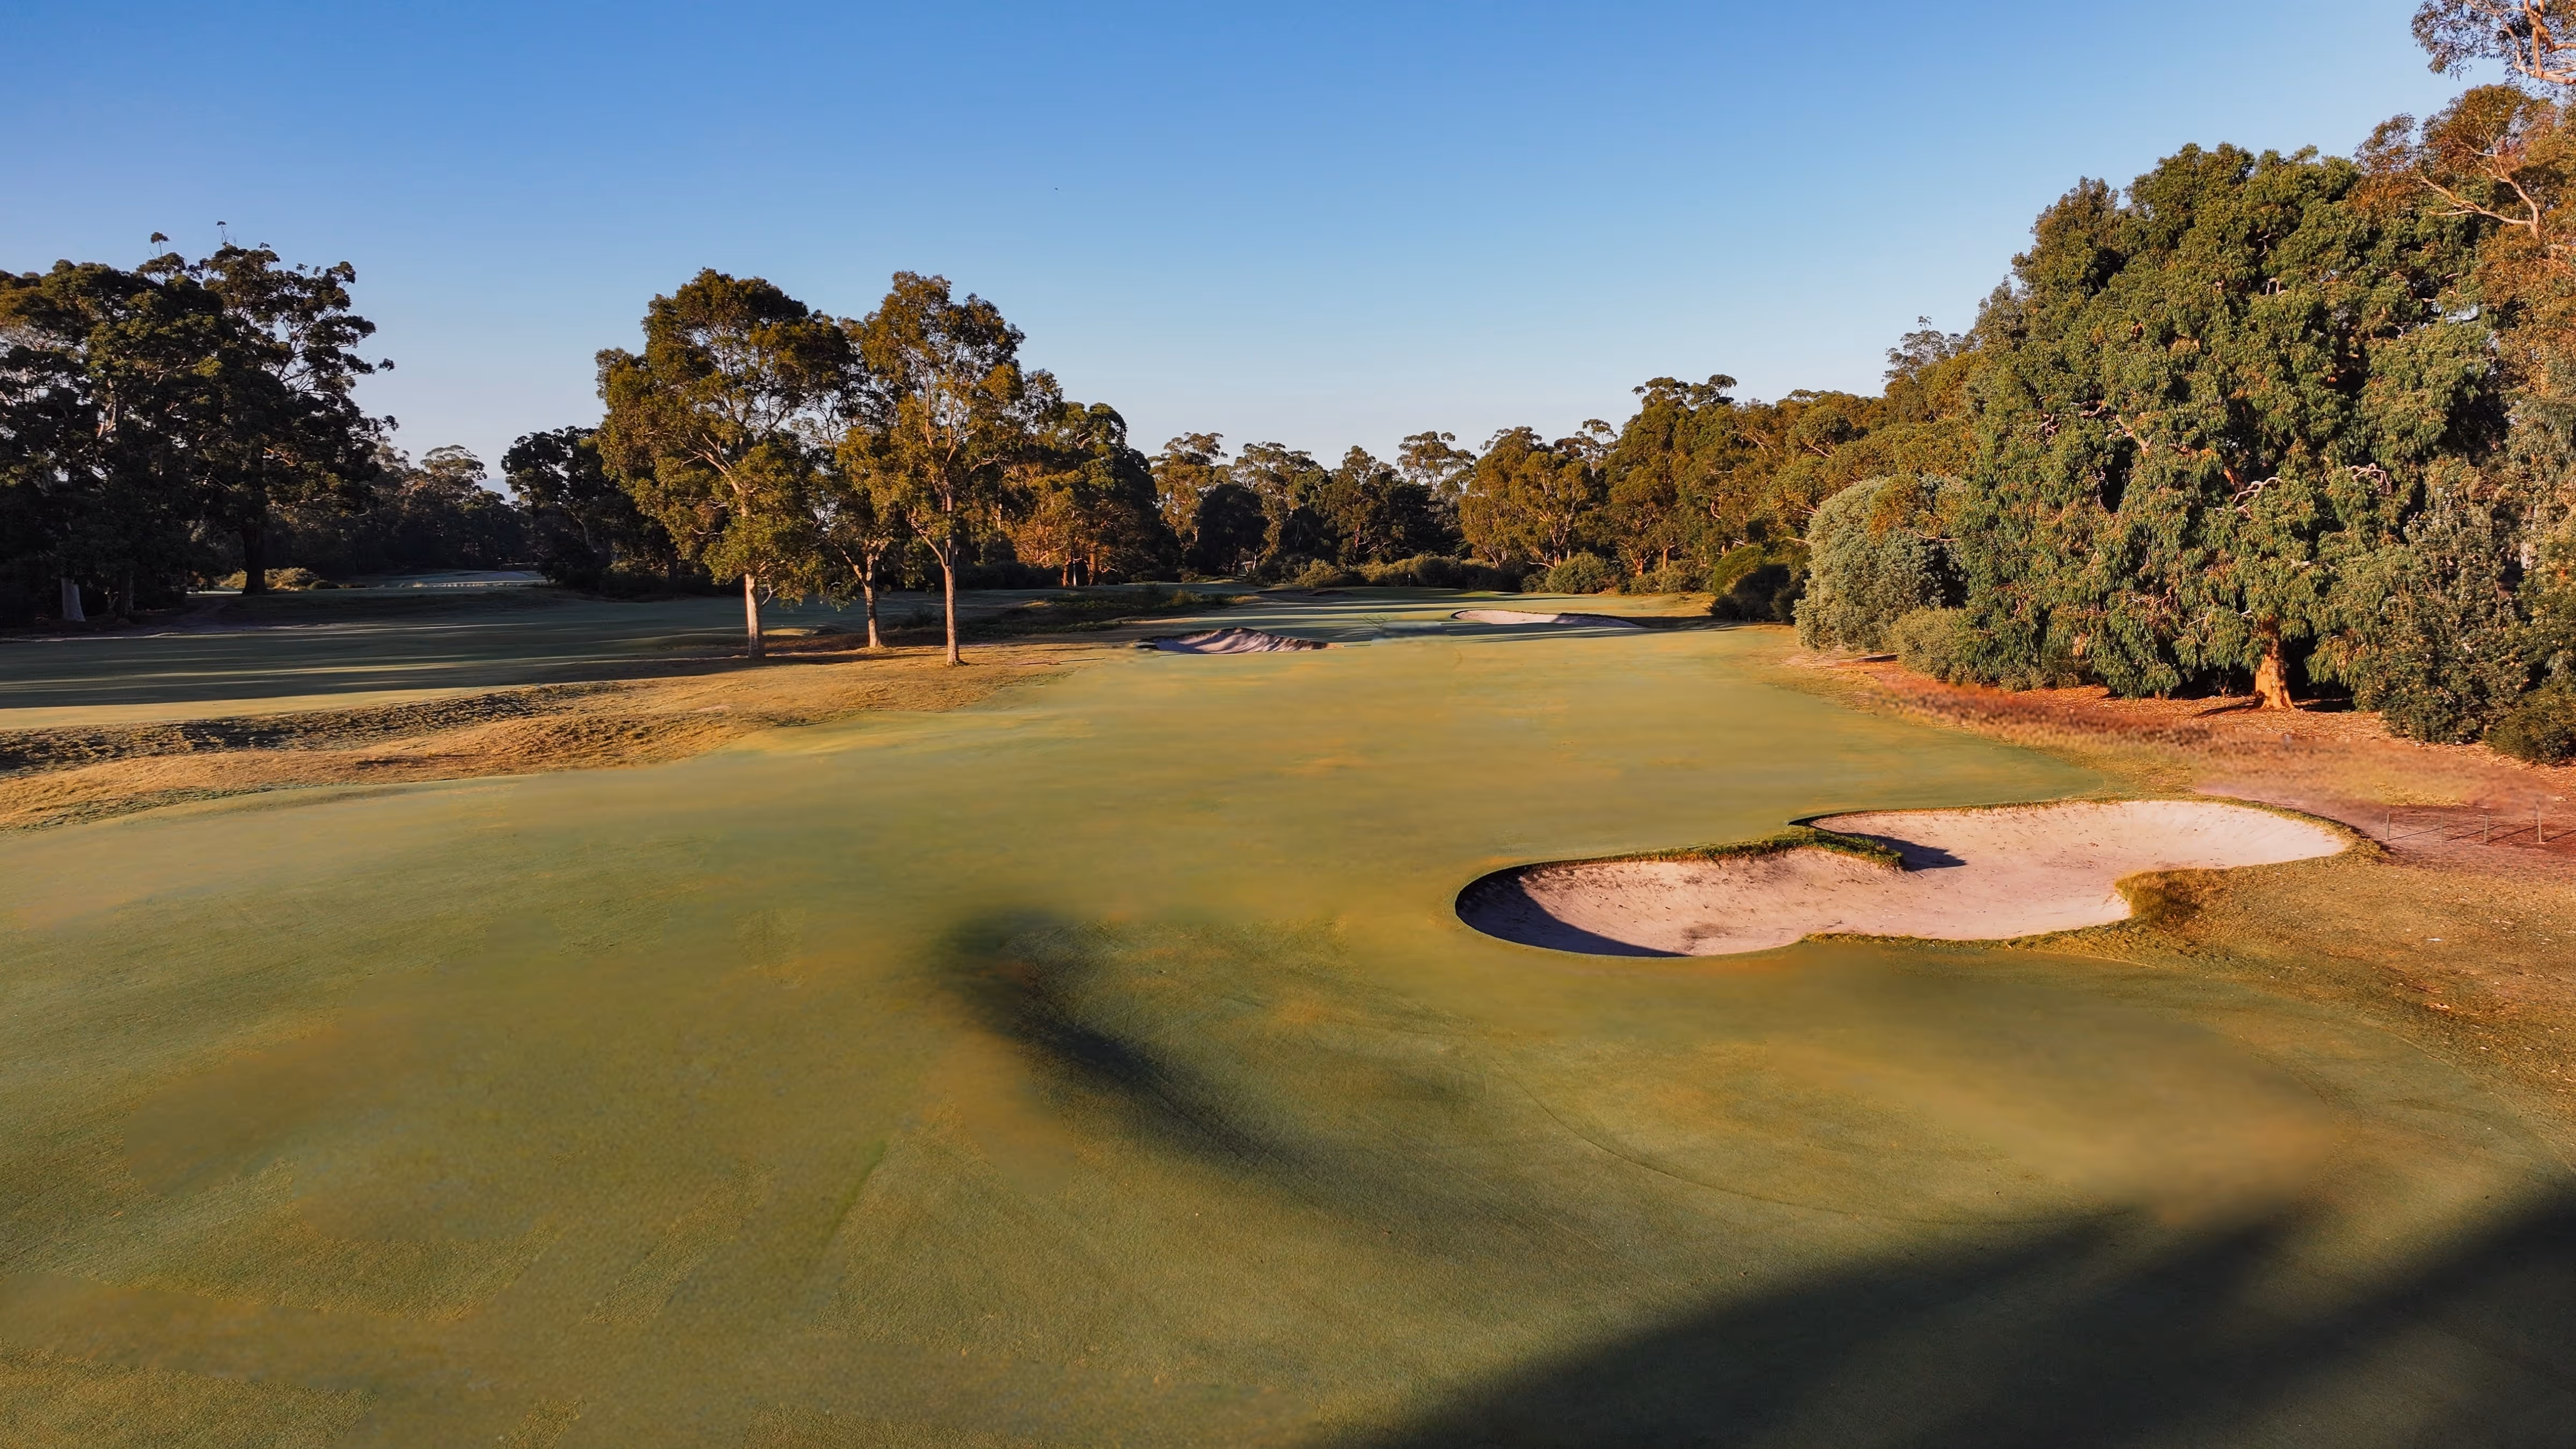
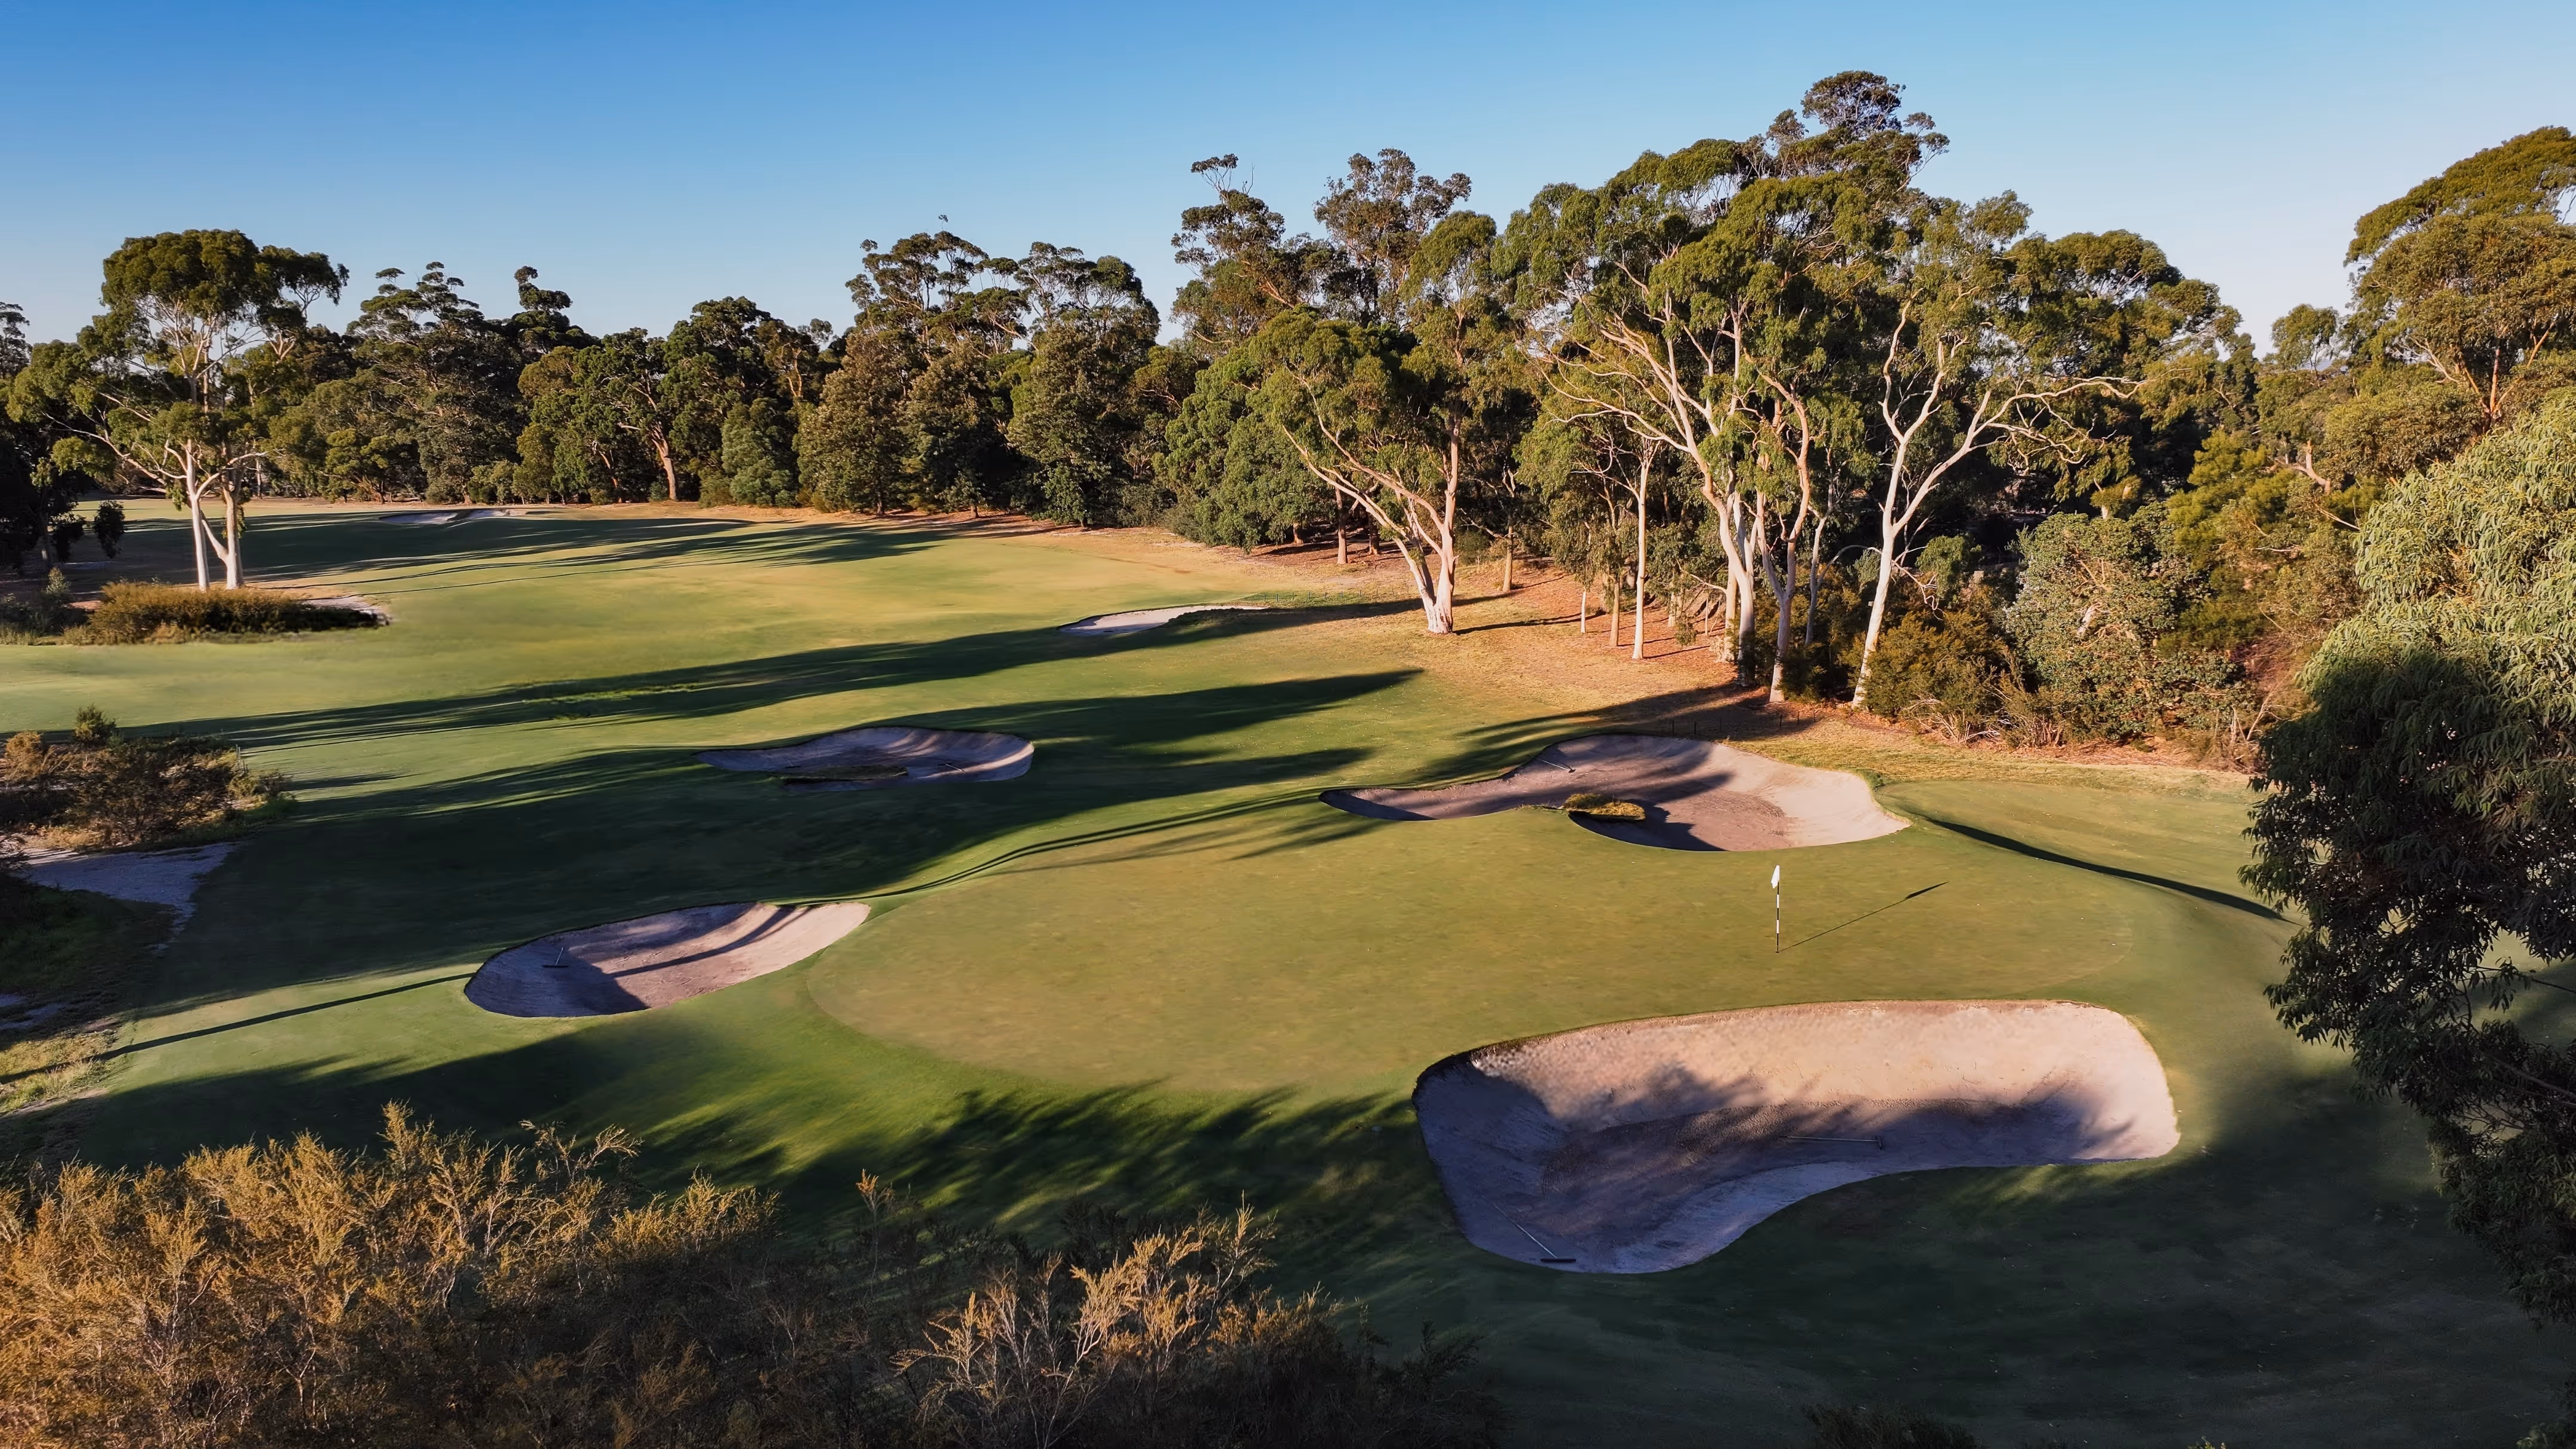
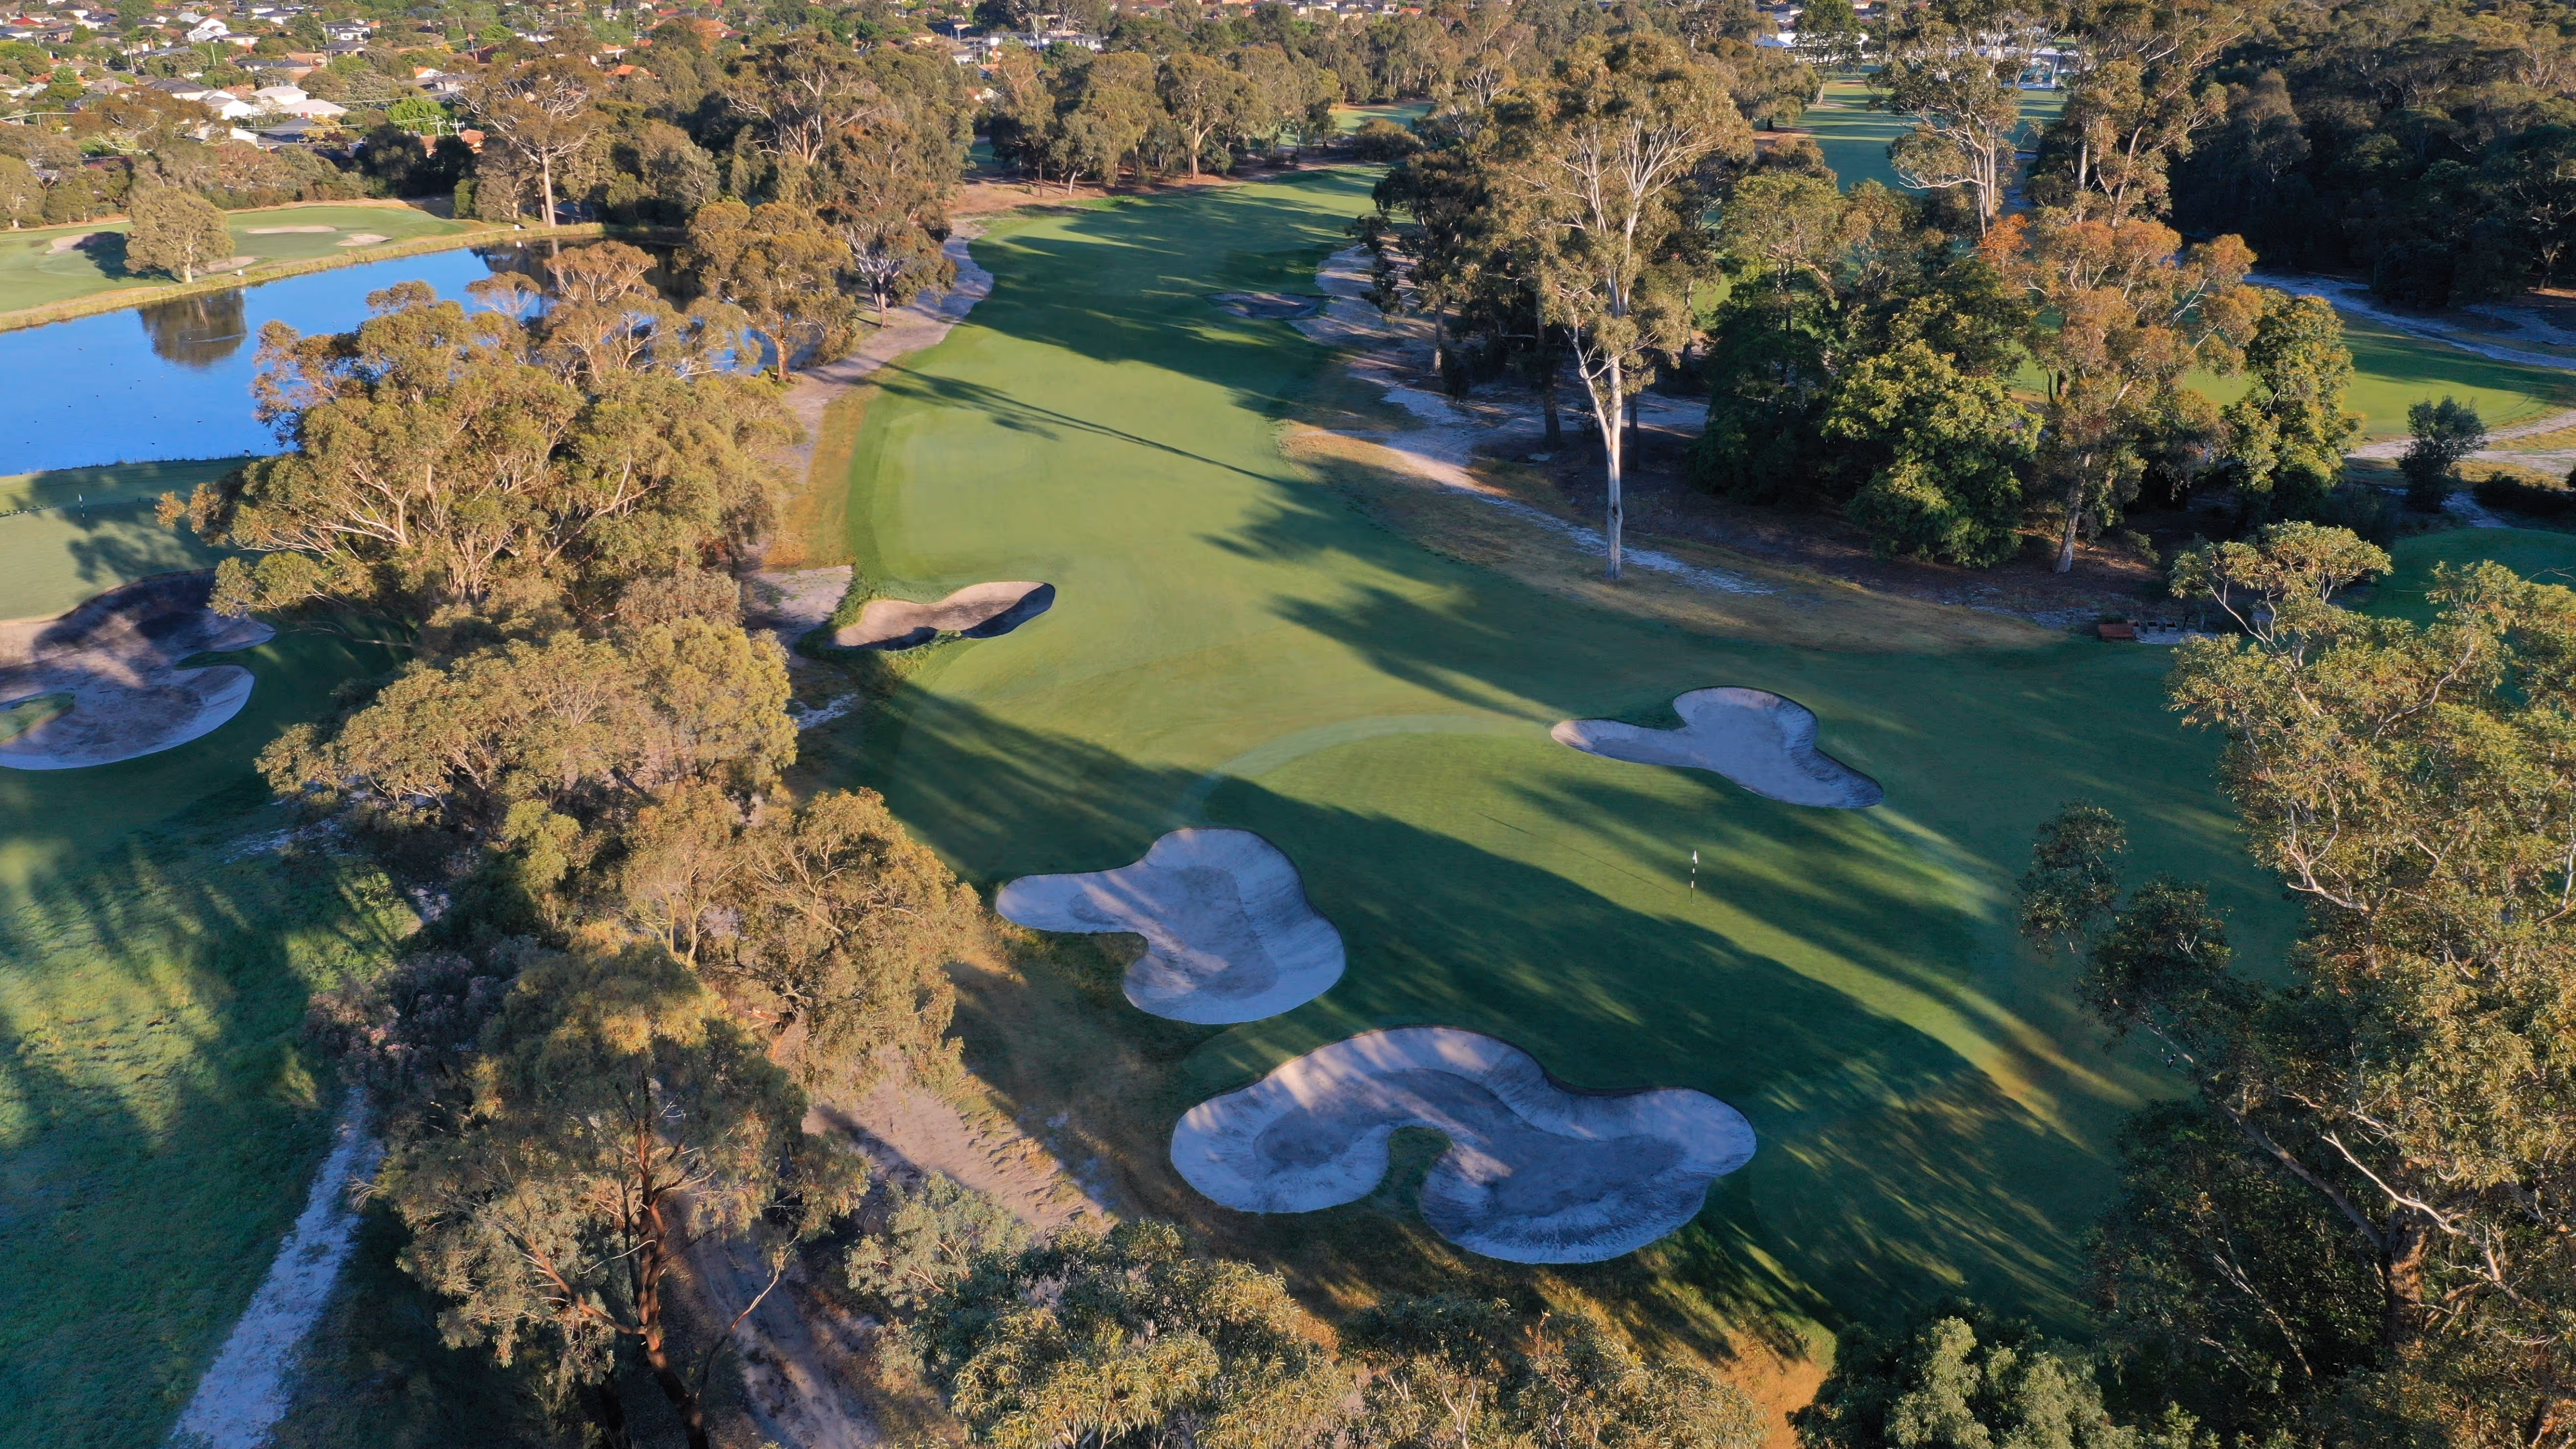
This hole is a medium length par four that turns a little from right to left around two fairway bunkers on the left side of the driving area. A big bunker guards the right of the green and when the flag is tucked close to this bunker a drive to the left edge of the fairway is truly rewarded with a clear line to the flag.
Hole Stats
Championship
430m / Par 4 / 471 yd
Blue
380m / Par 4 / 416 yd
Green
365m / Par 4 / 399 yd
Red
339m / Par 4 / 371 yd

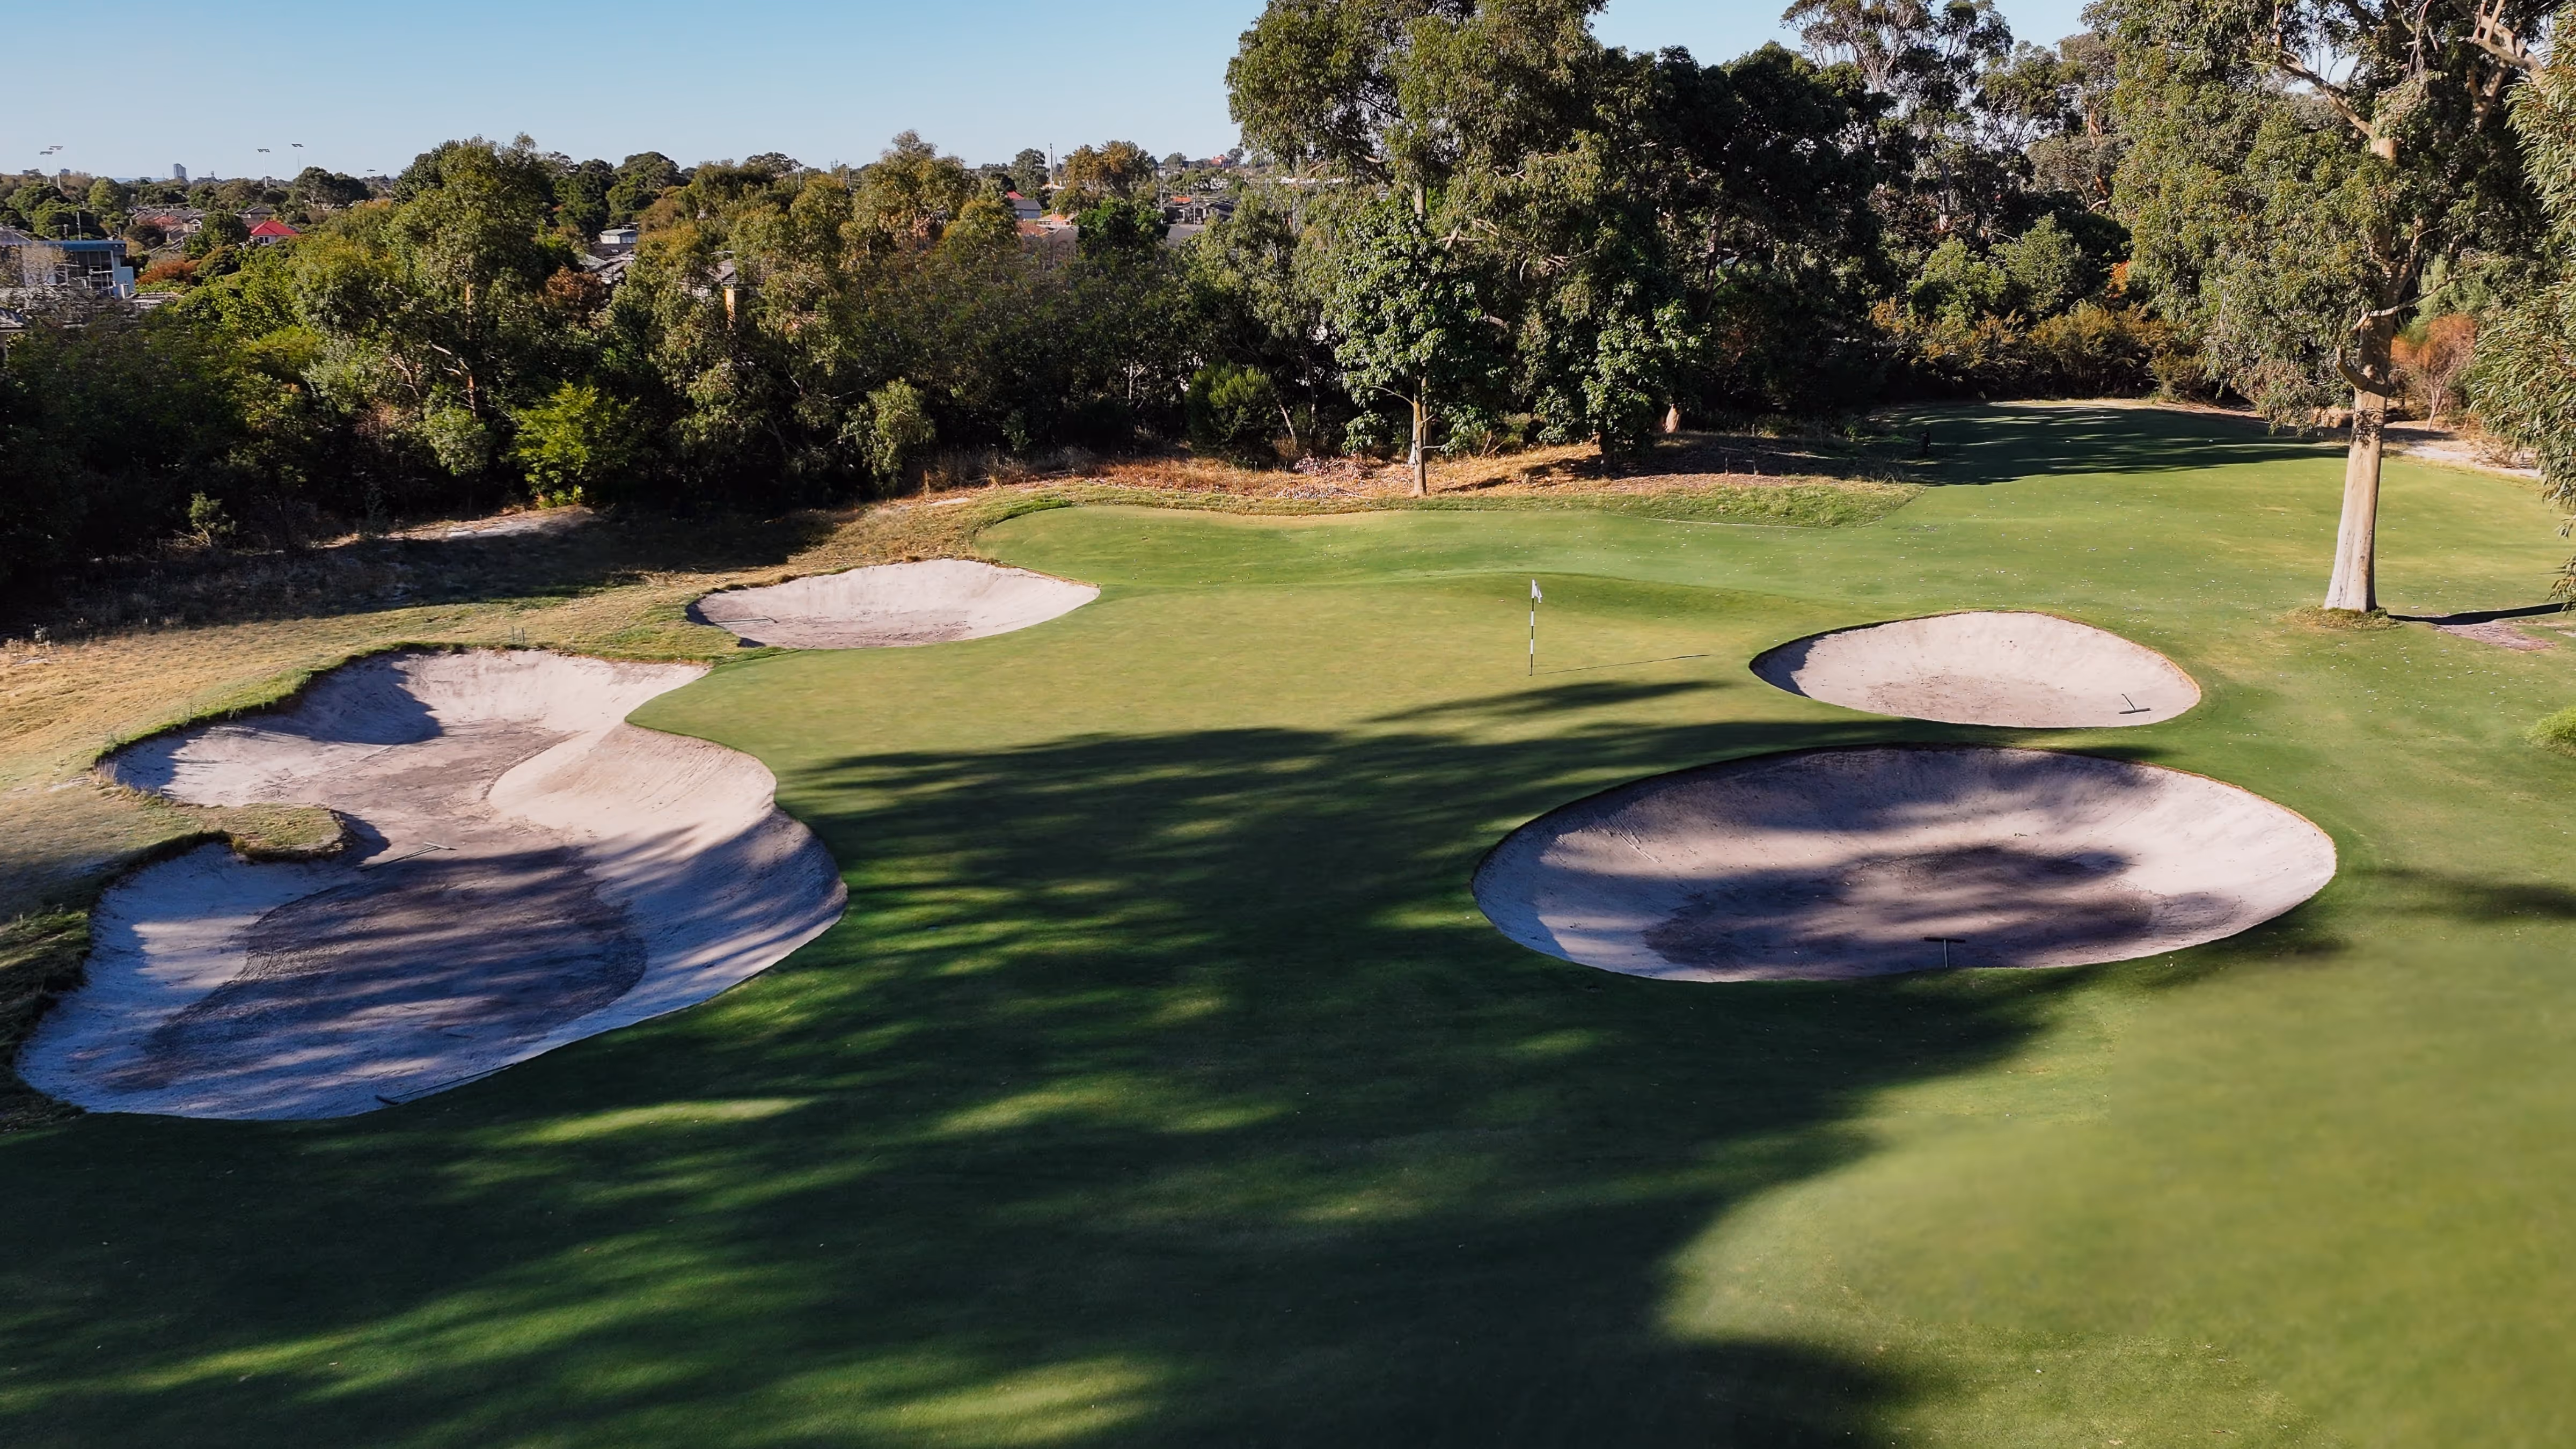
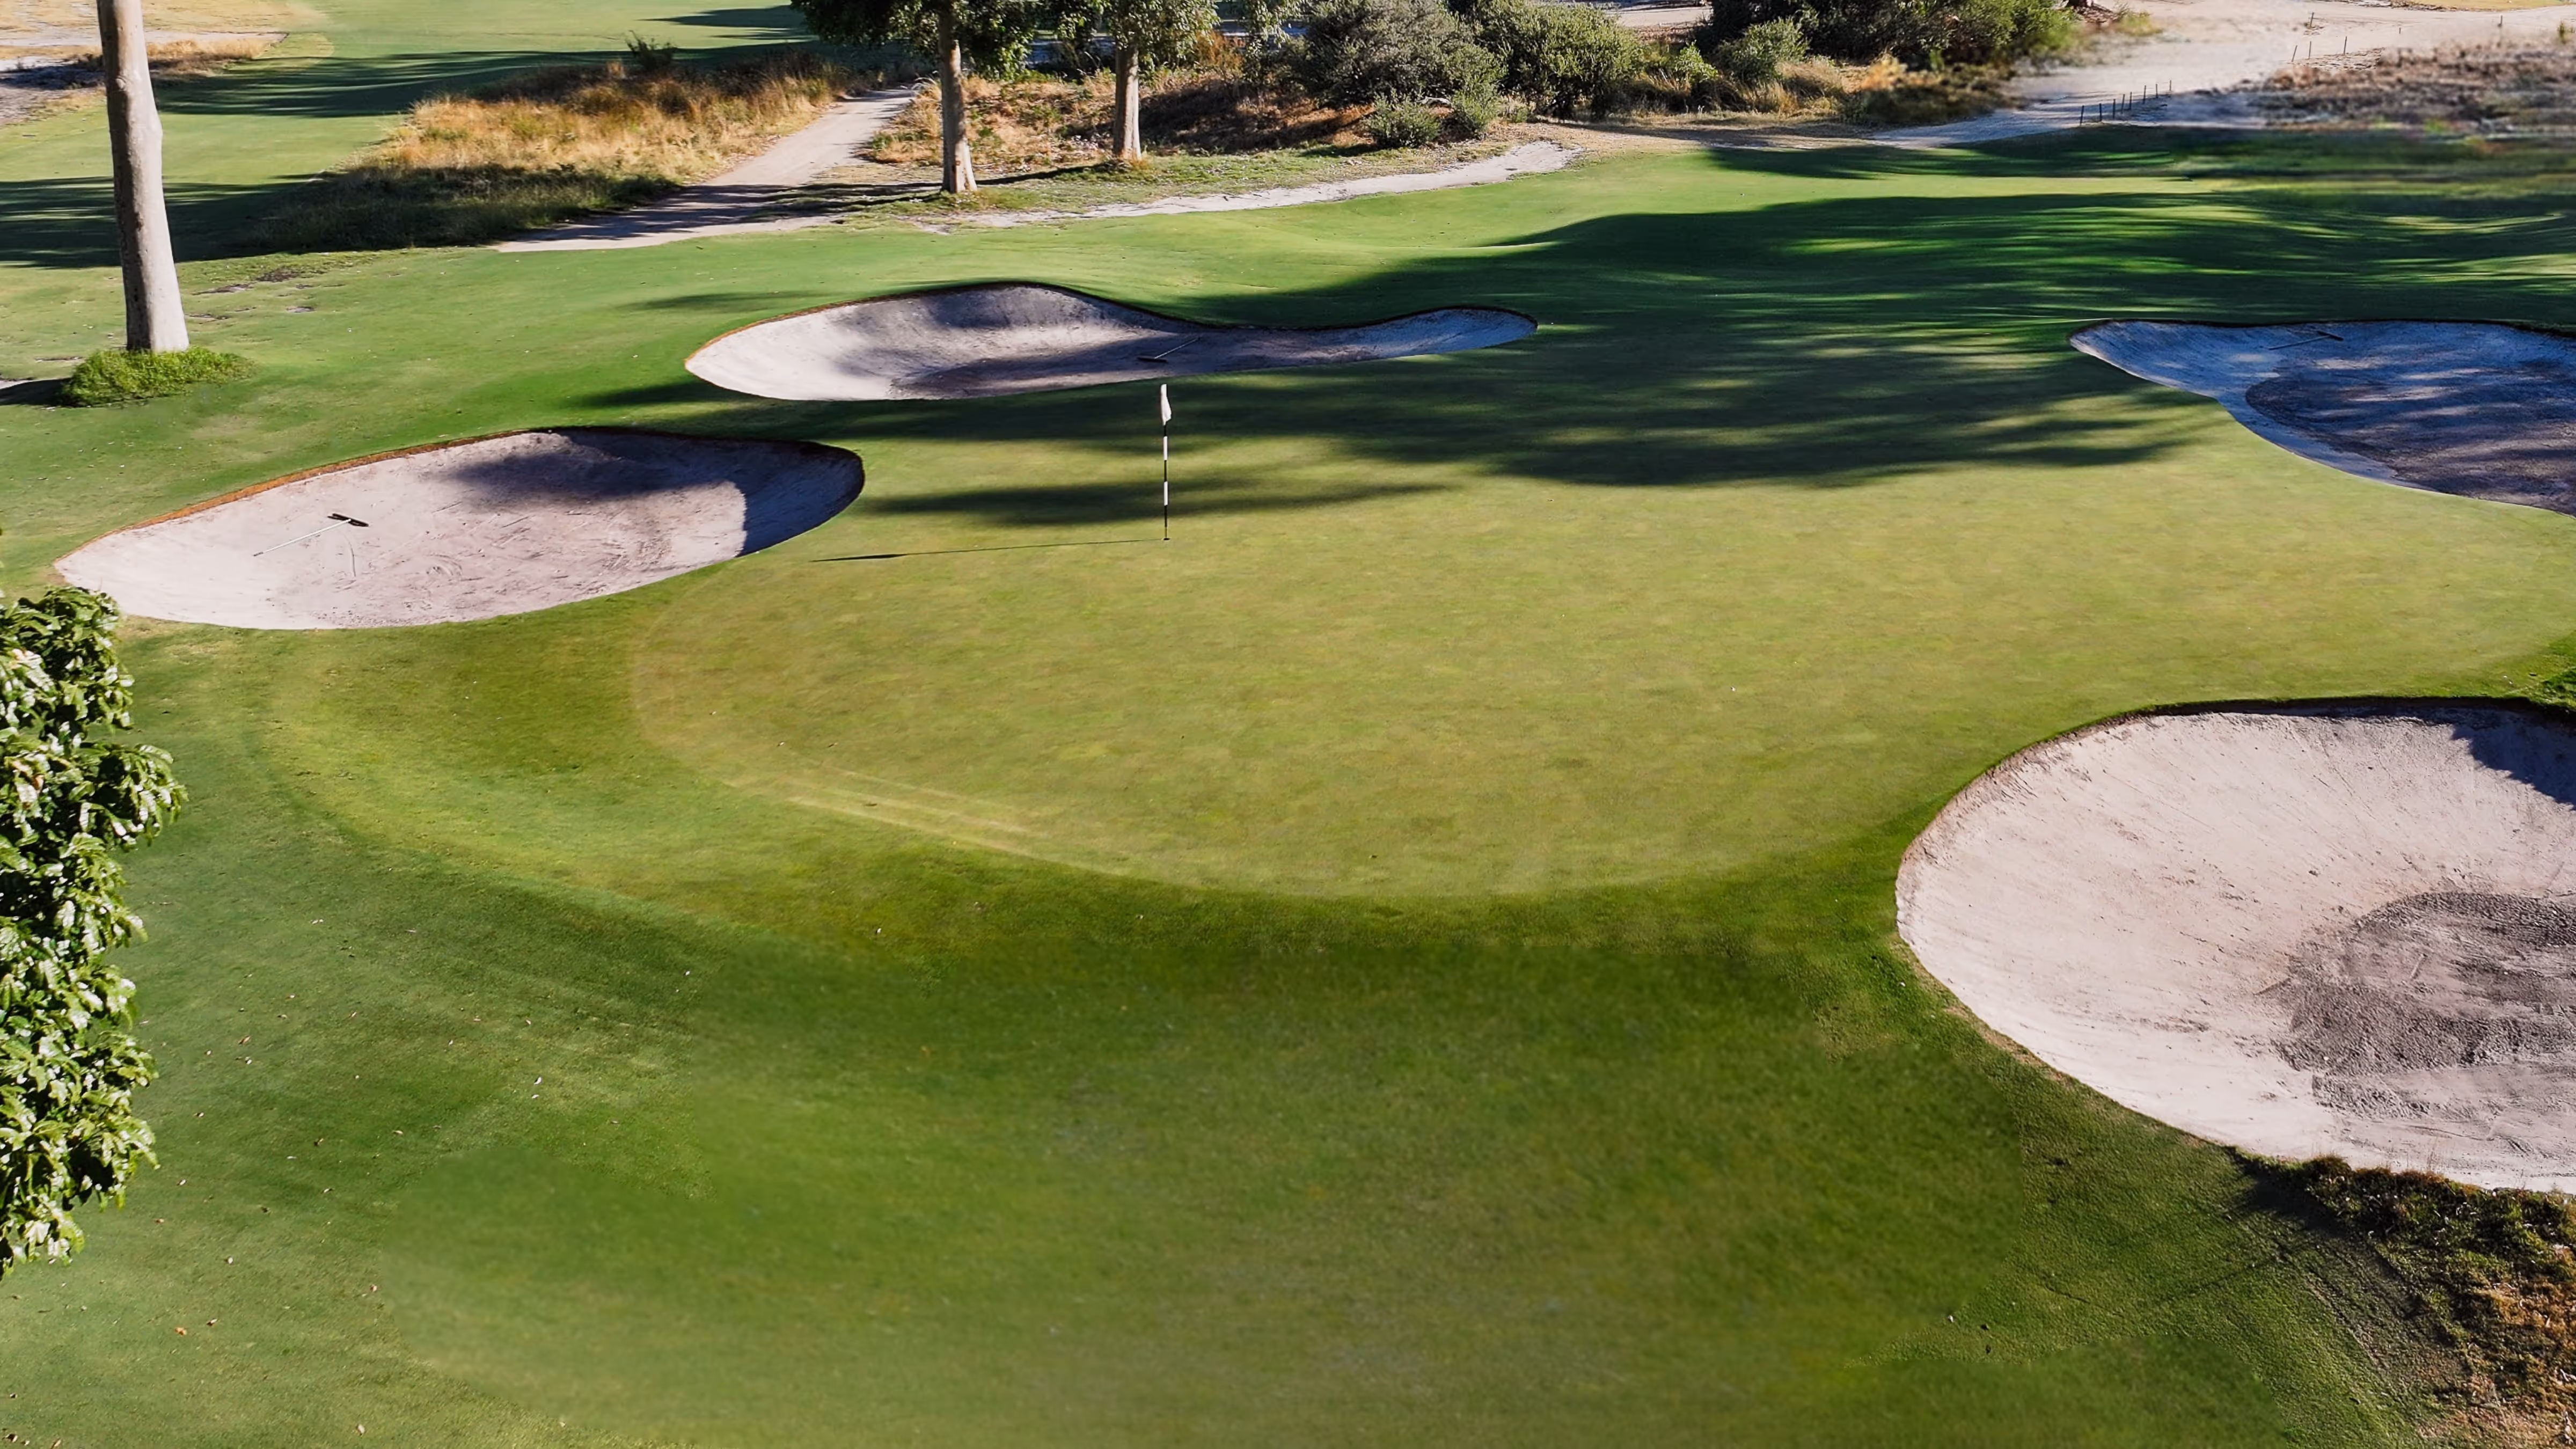
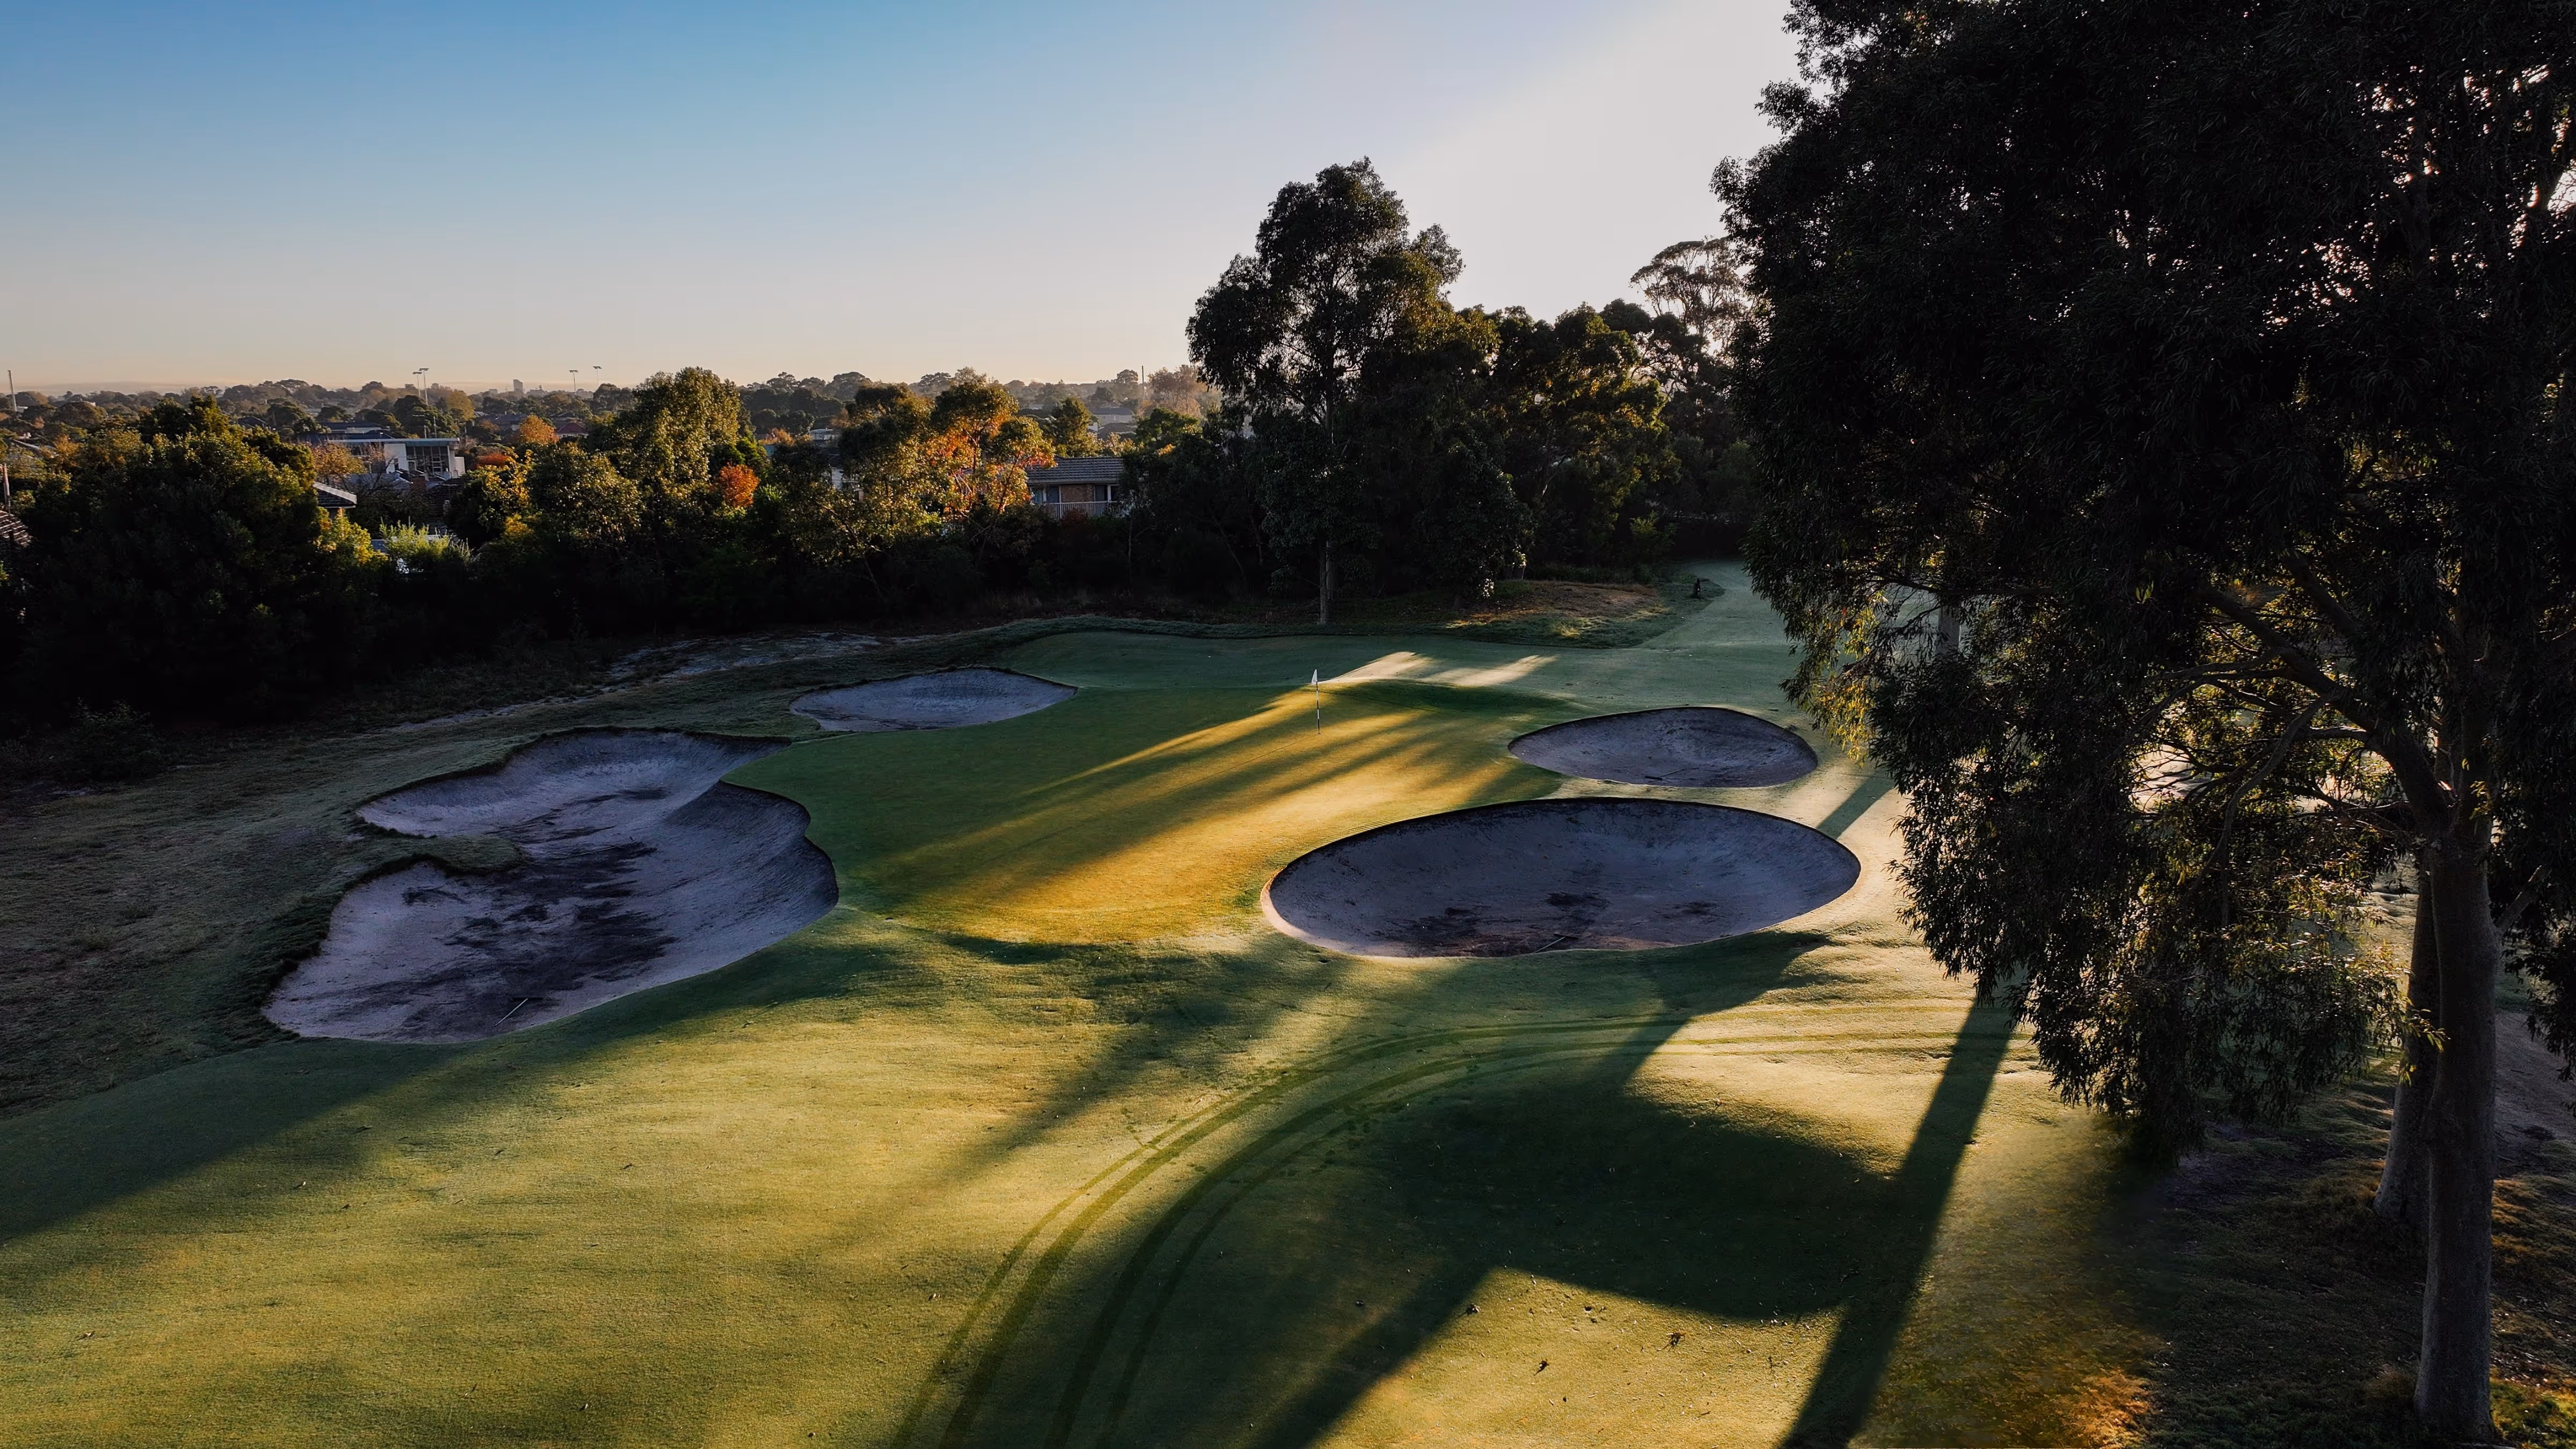
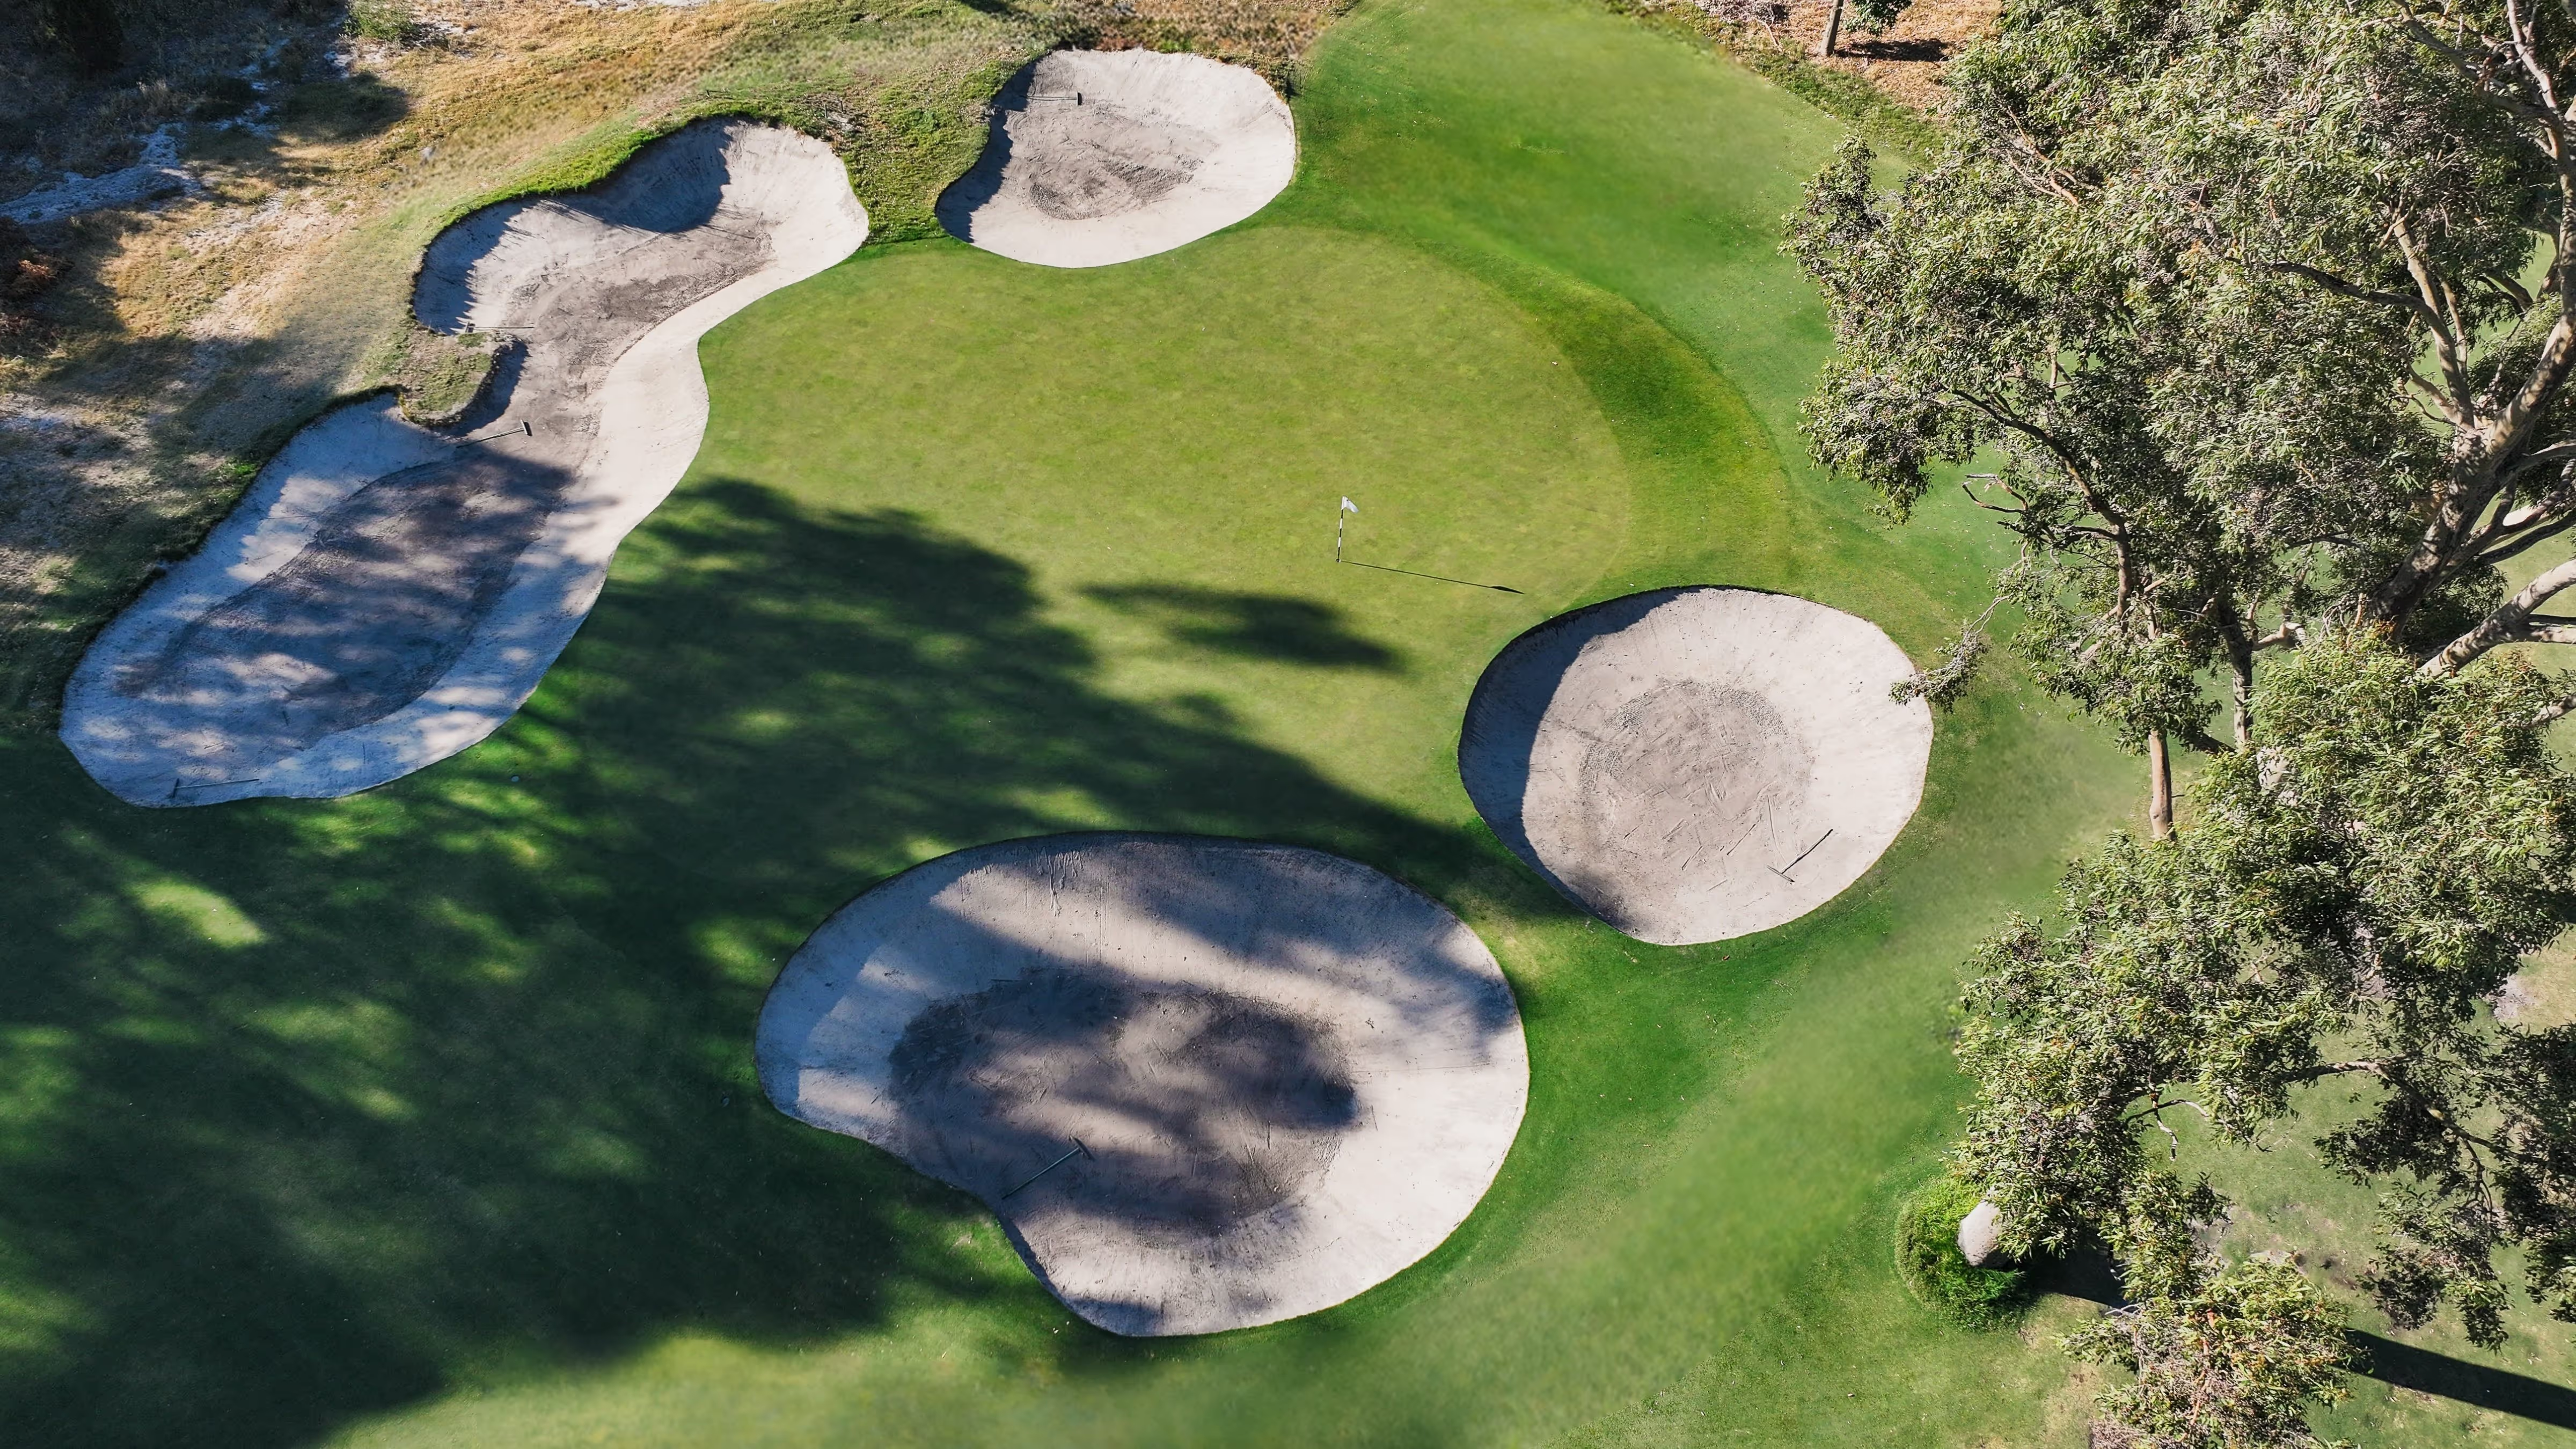
2nd Hole
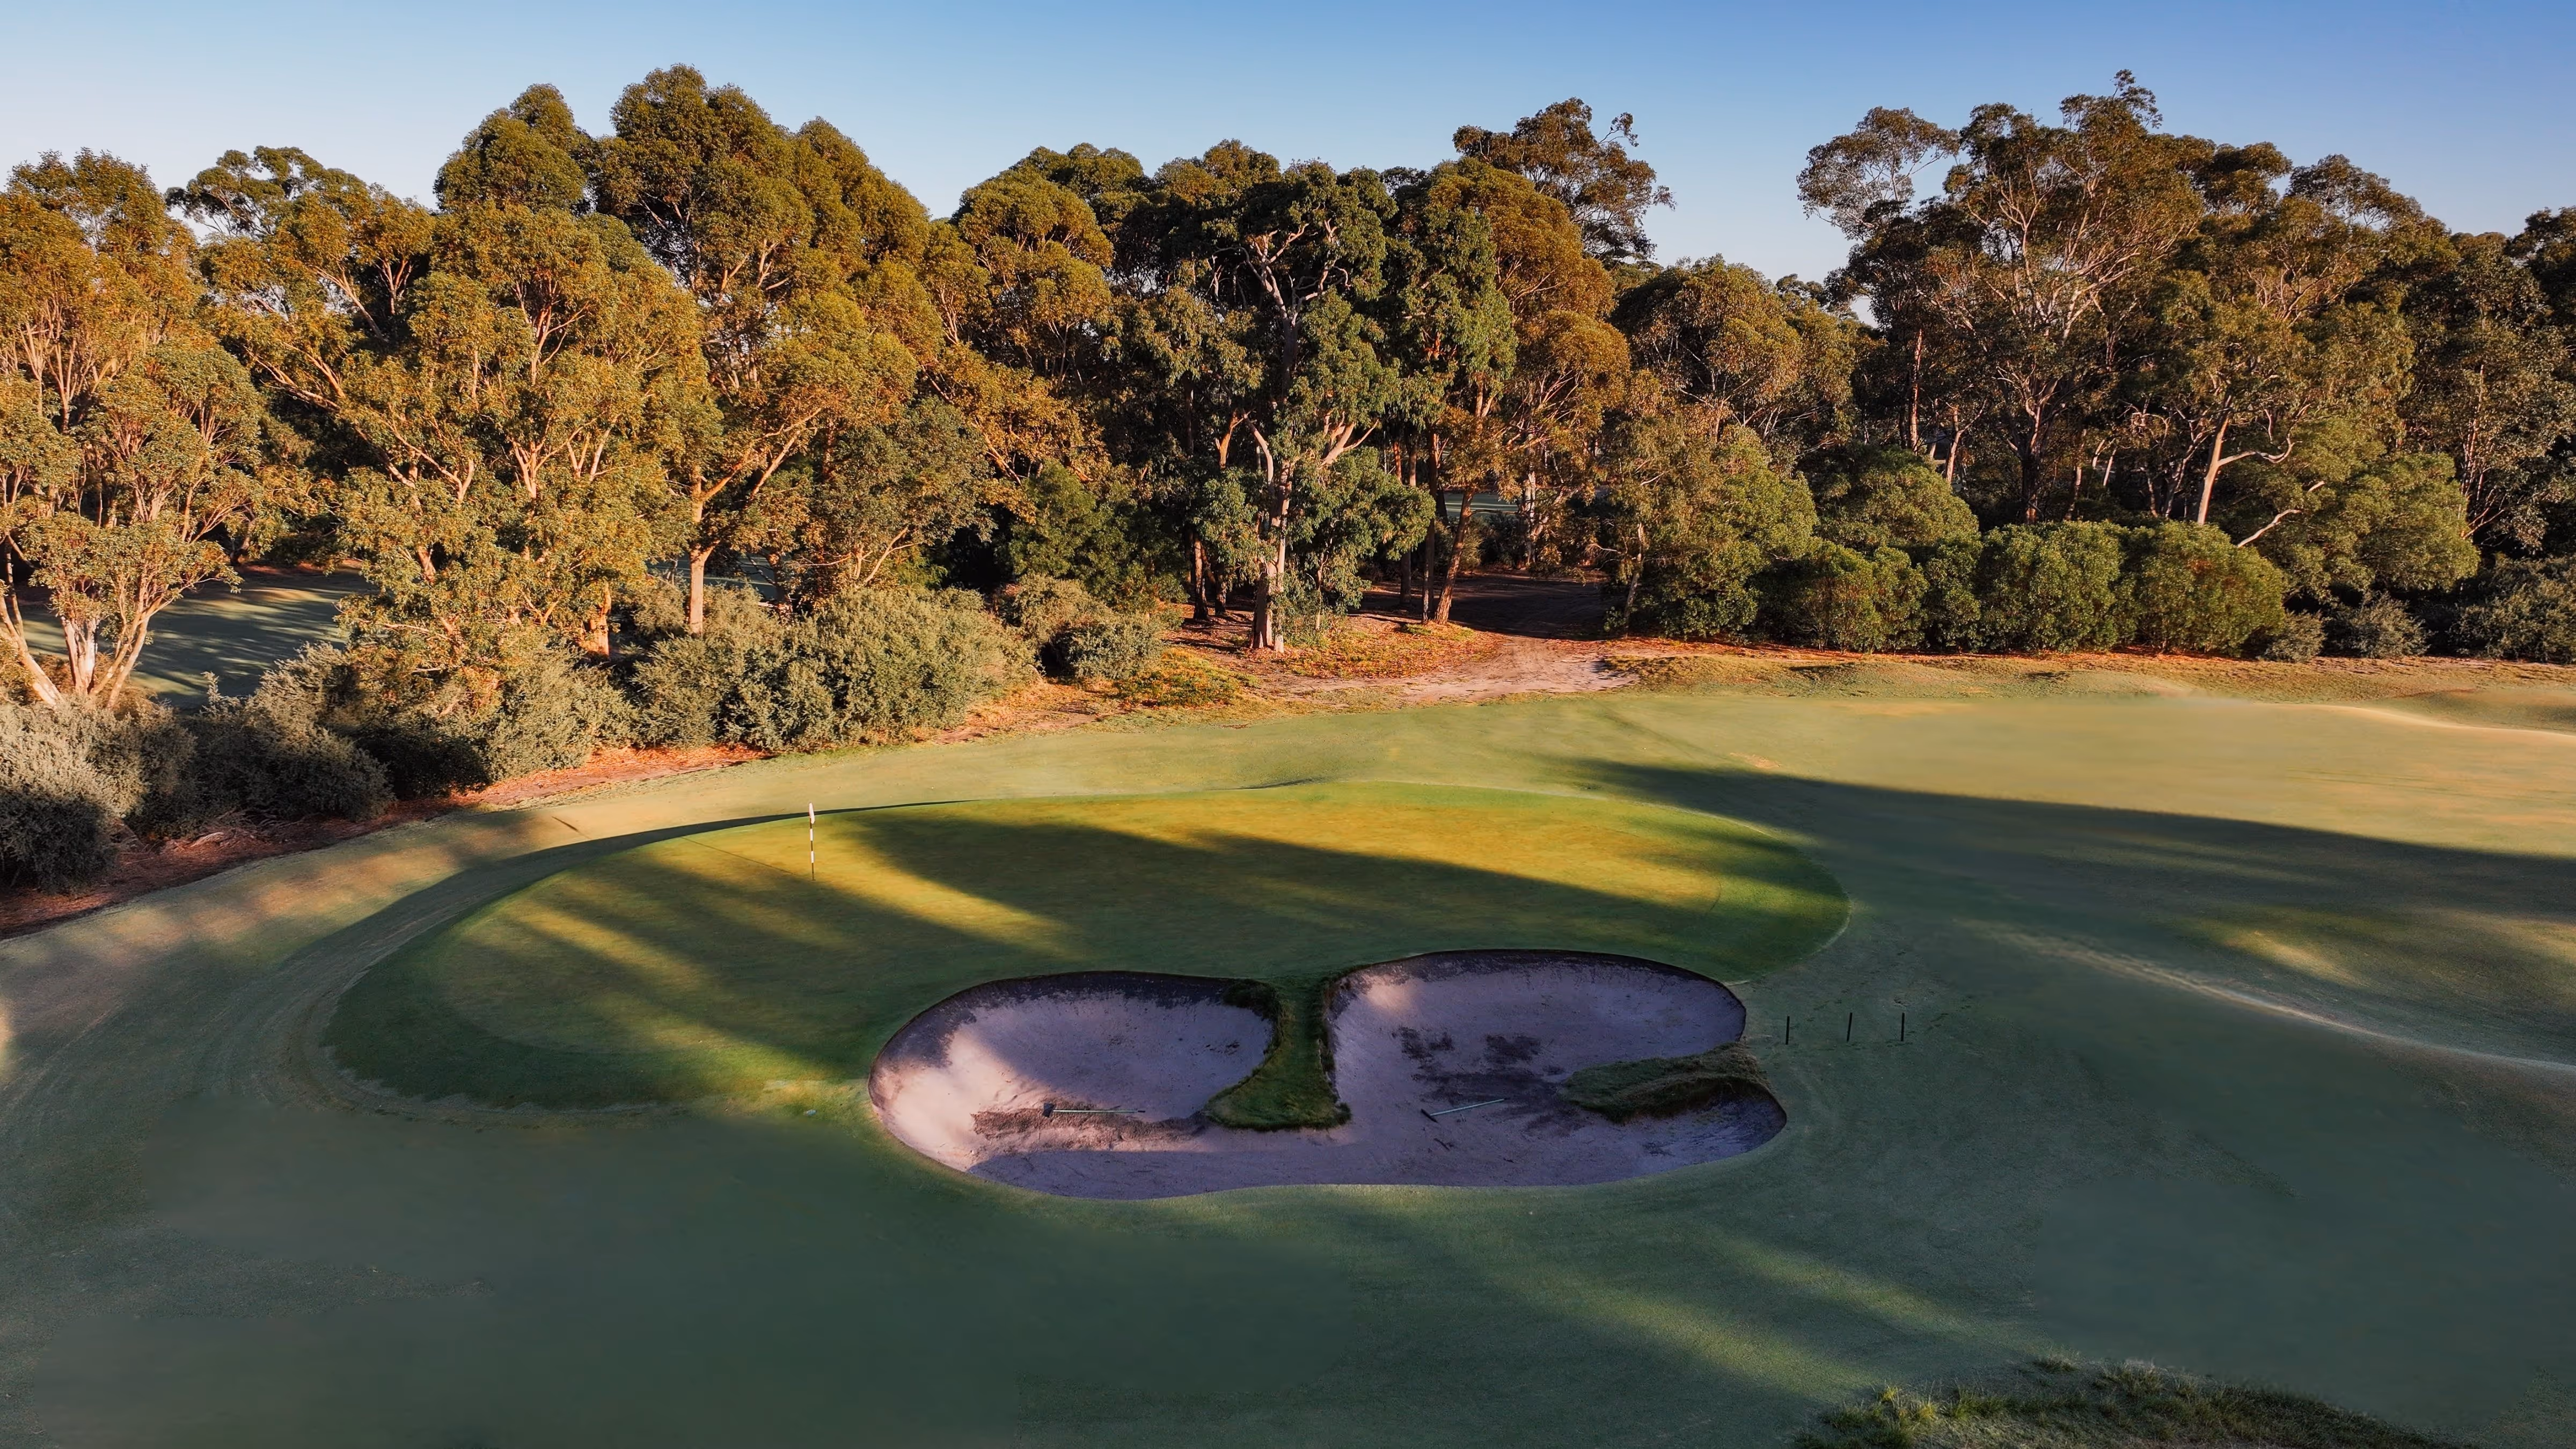
A relatively short par three with a green larger than it might be for a hole of this length, the championship pin placements are protected by the surrounding bunkers and the slopes that run off them into the green. This is a beautiful looking hole but one that shouldn’t provide too many early round problems. Dr Alister MacKenzie, on his visit here in 1926, stated this was one of the best short holes he had seen in Australia.
Hole Stats
Championship
160m / Par 3 / 175 yd
Blue
160m / Par 3 / 175 yd
Green
118m / Par 3 / 129 yd
Red
110m / Par 3 / 120 yd
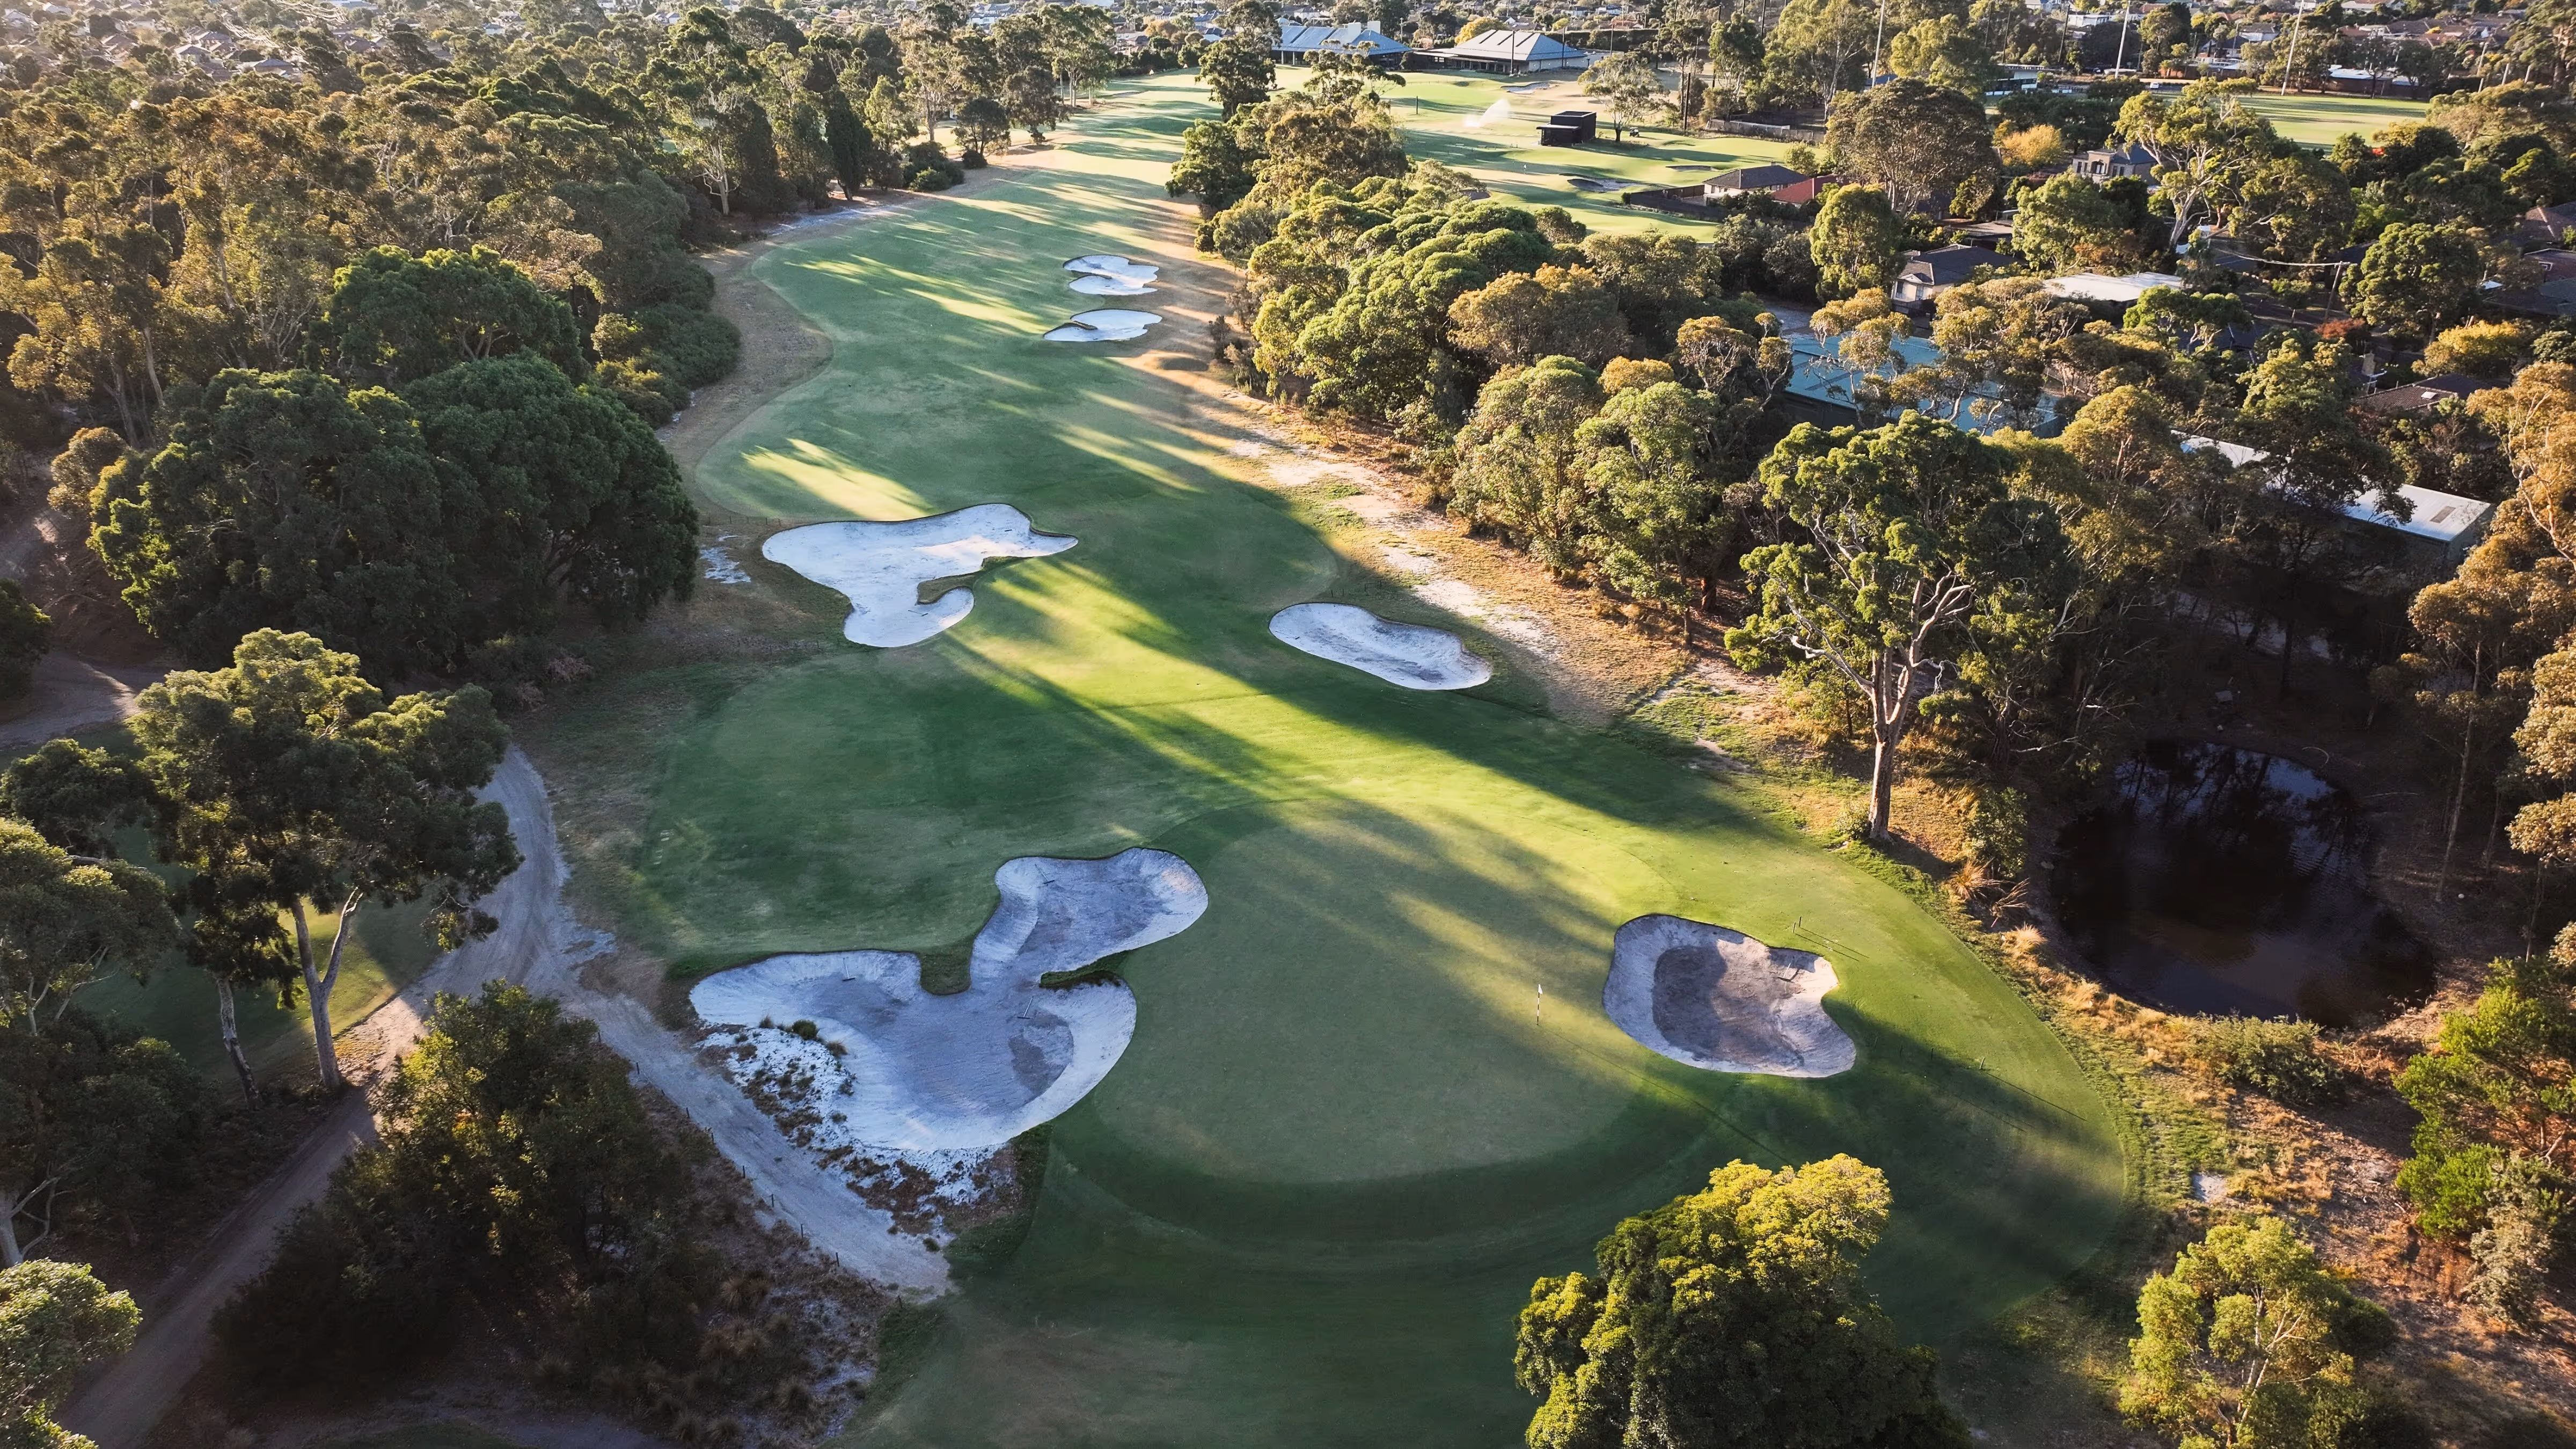
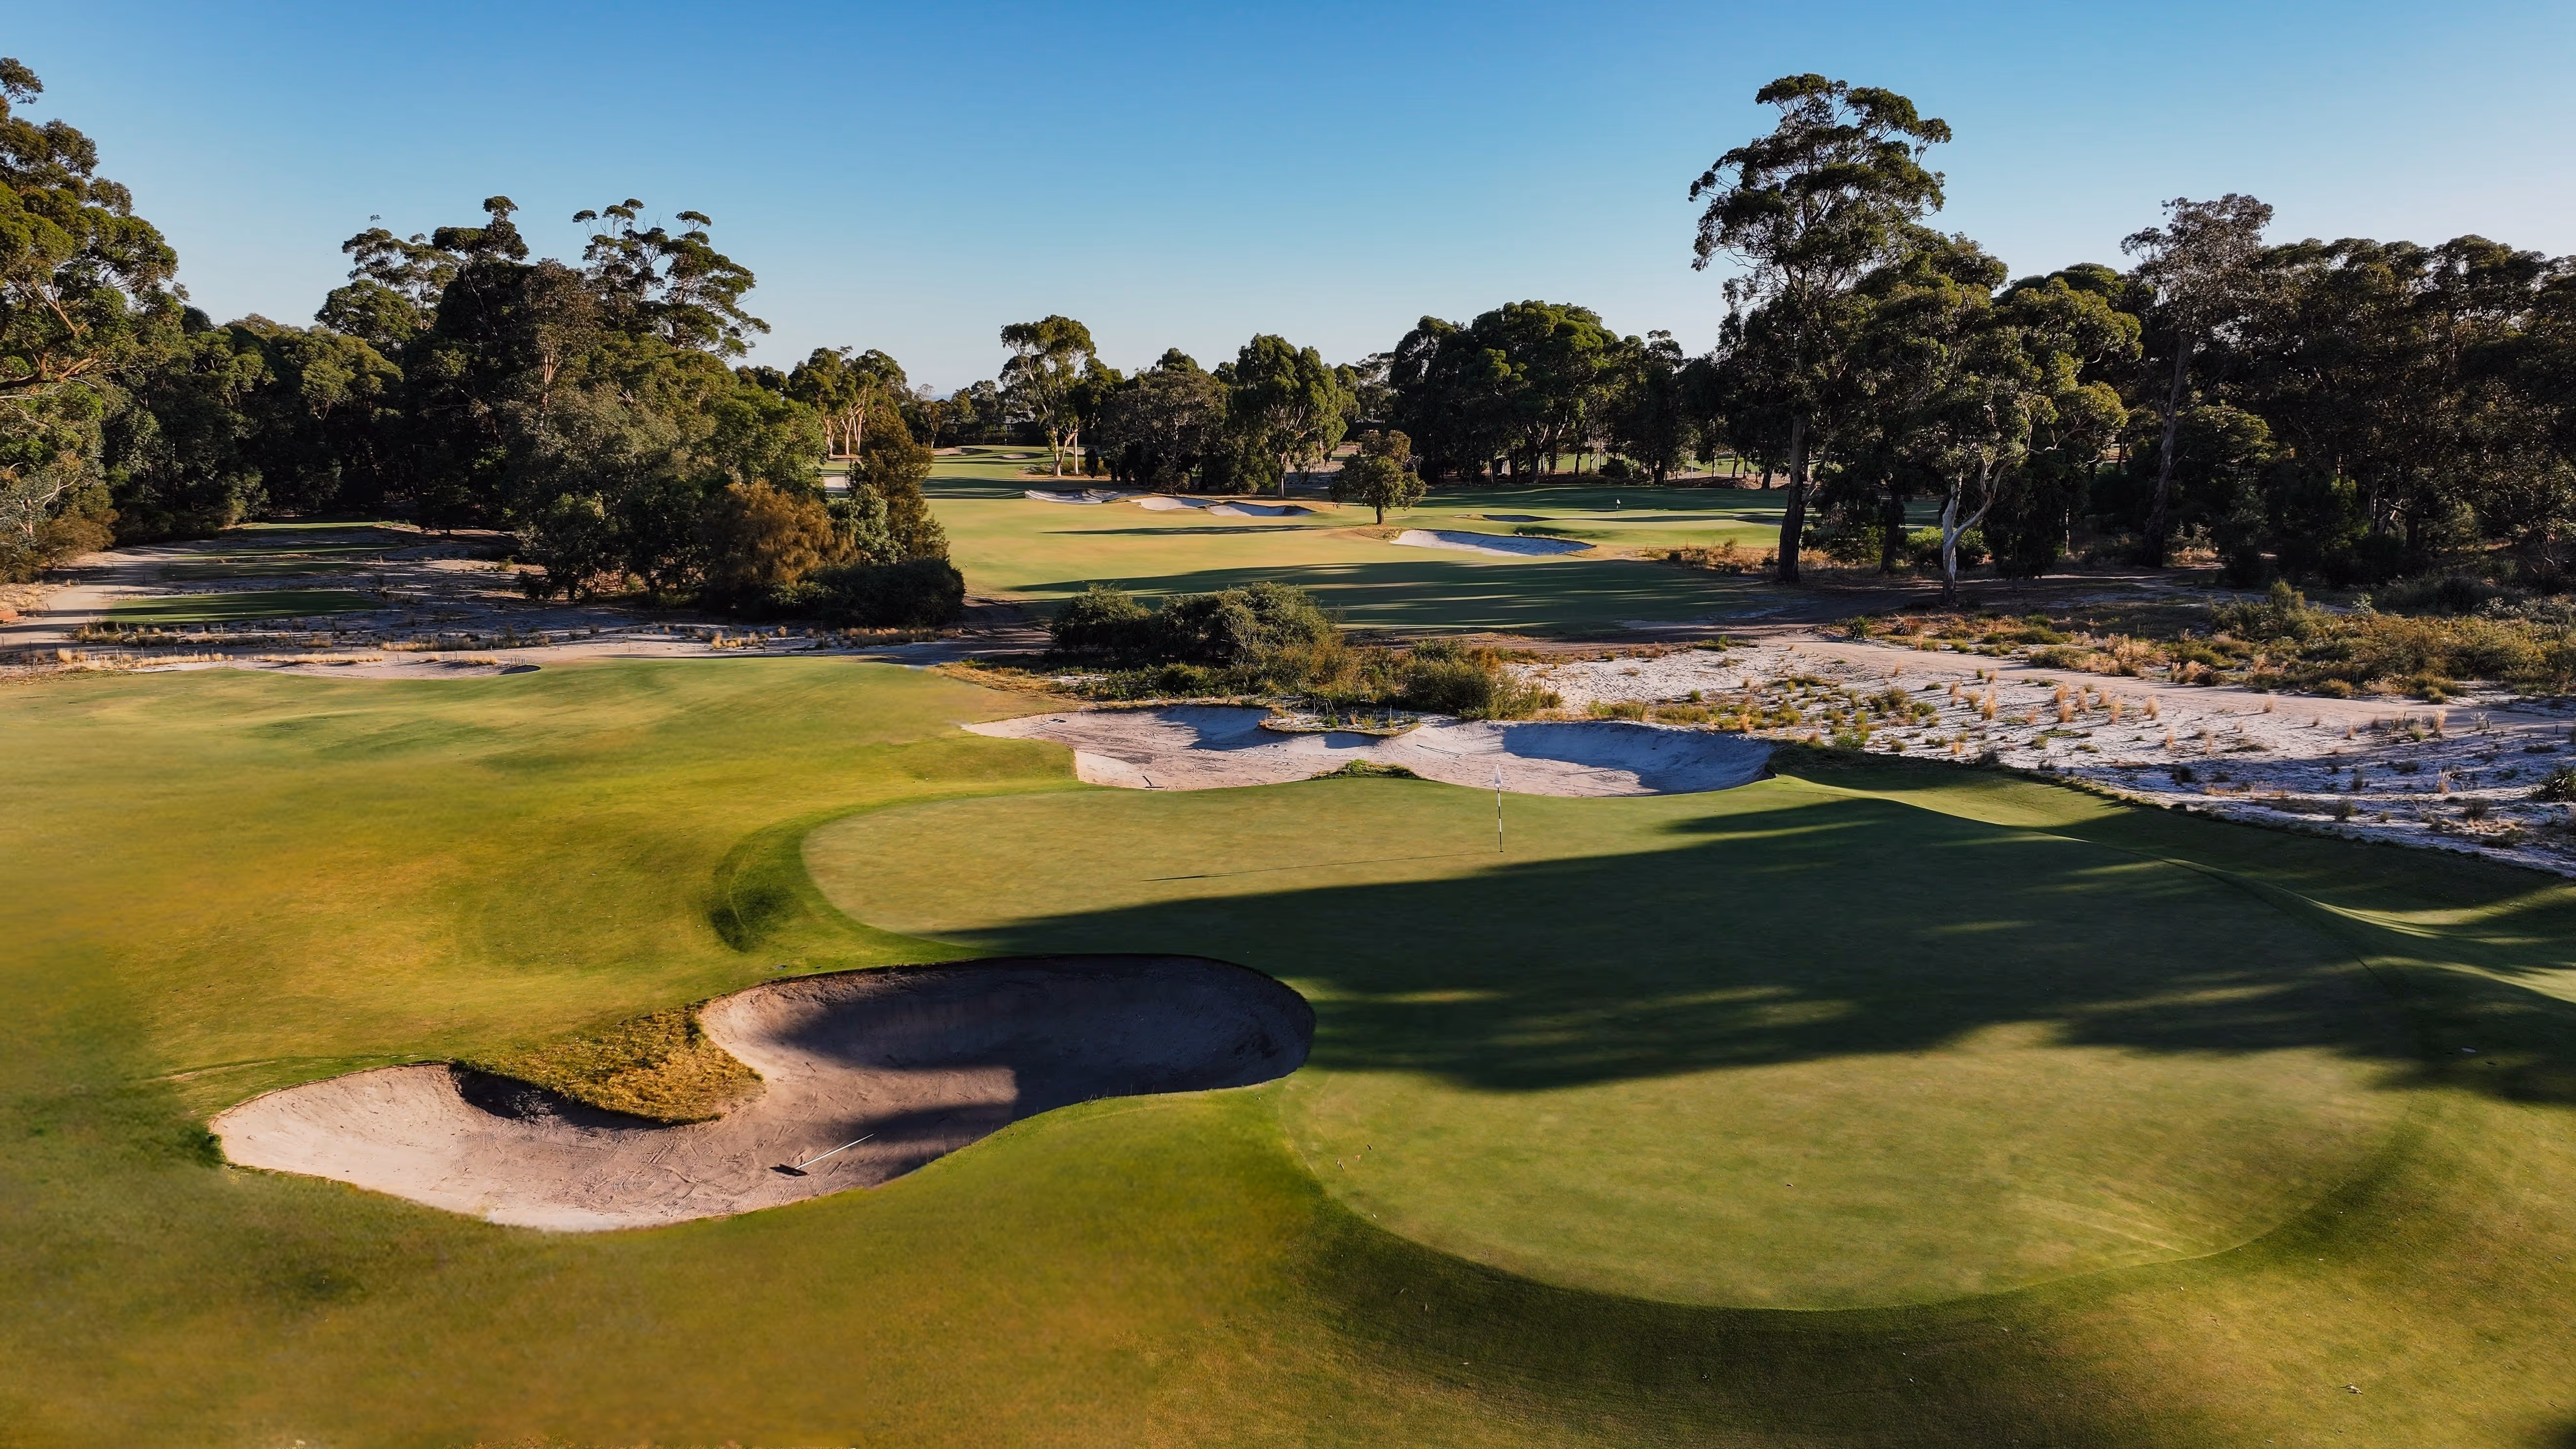
3rd Hole
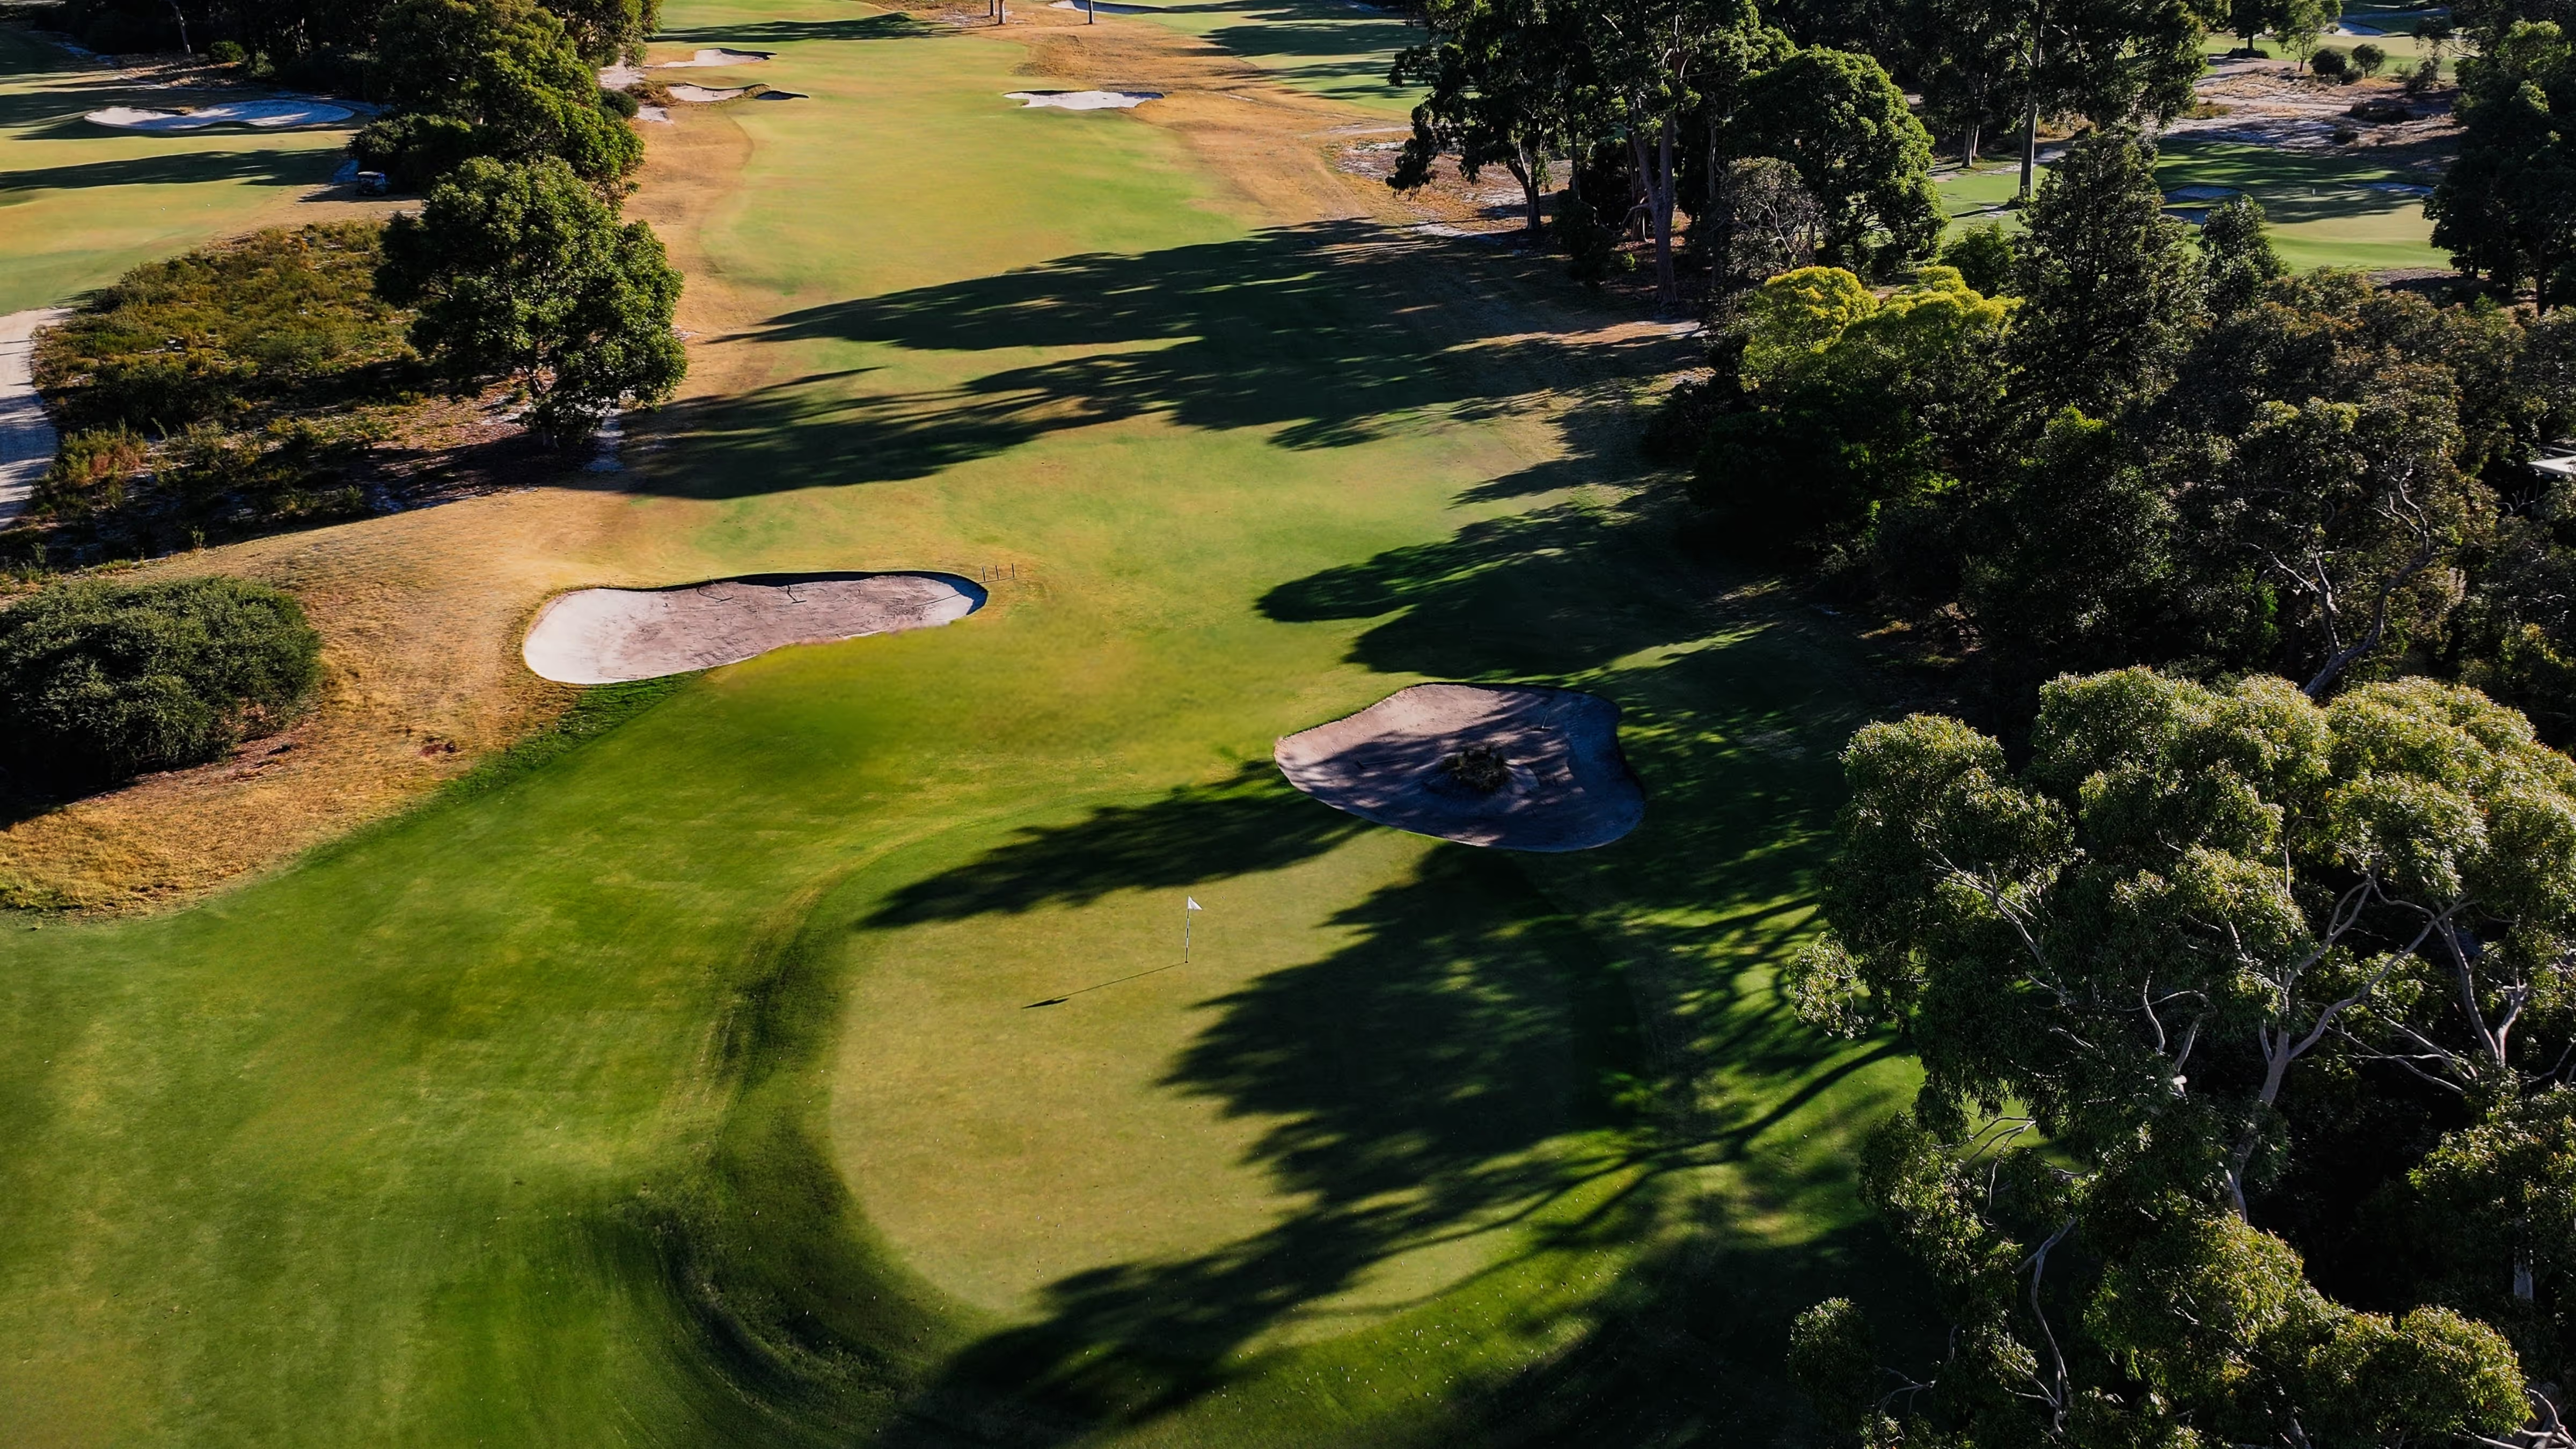
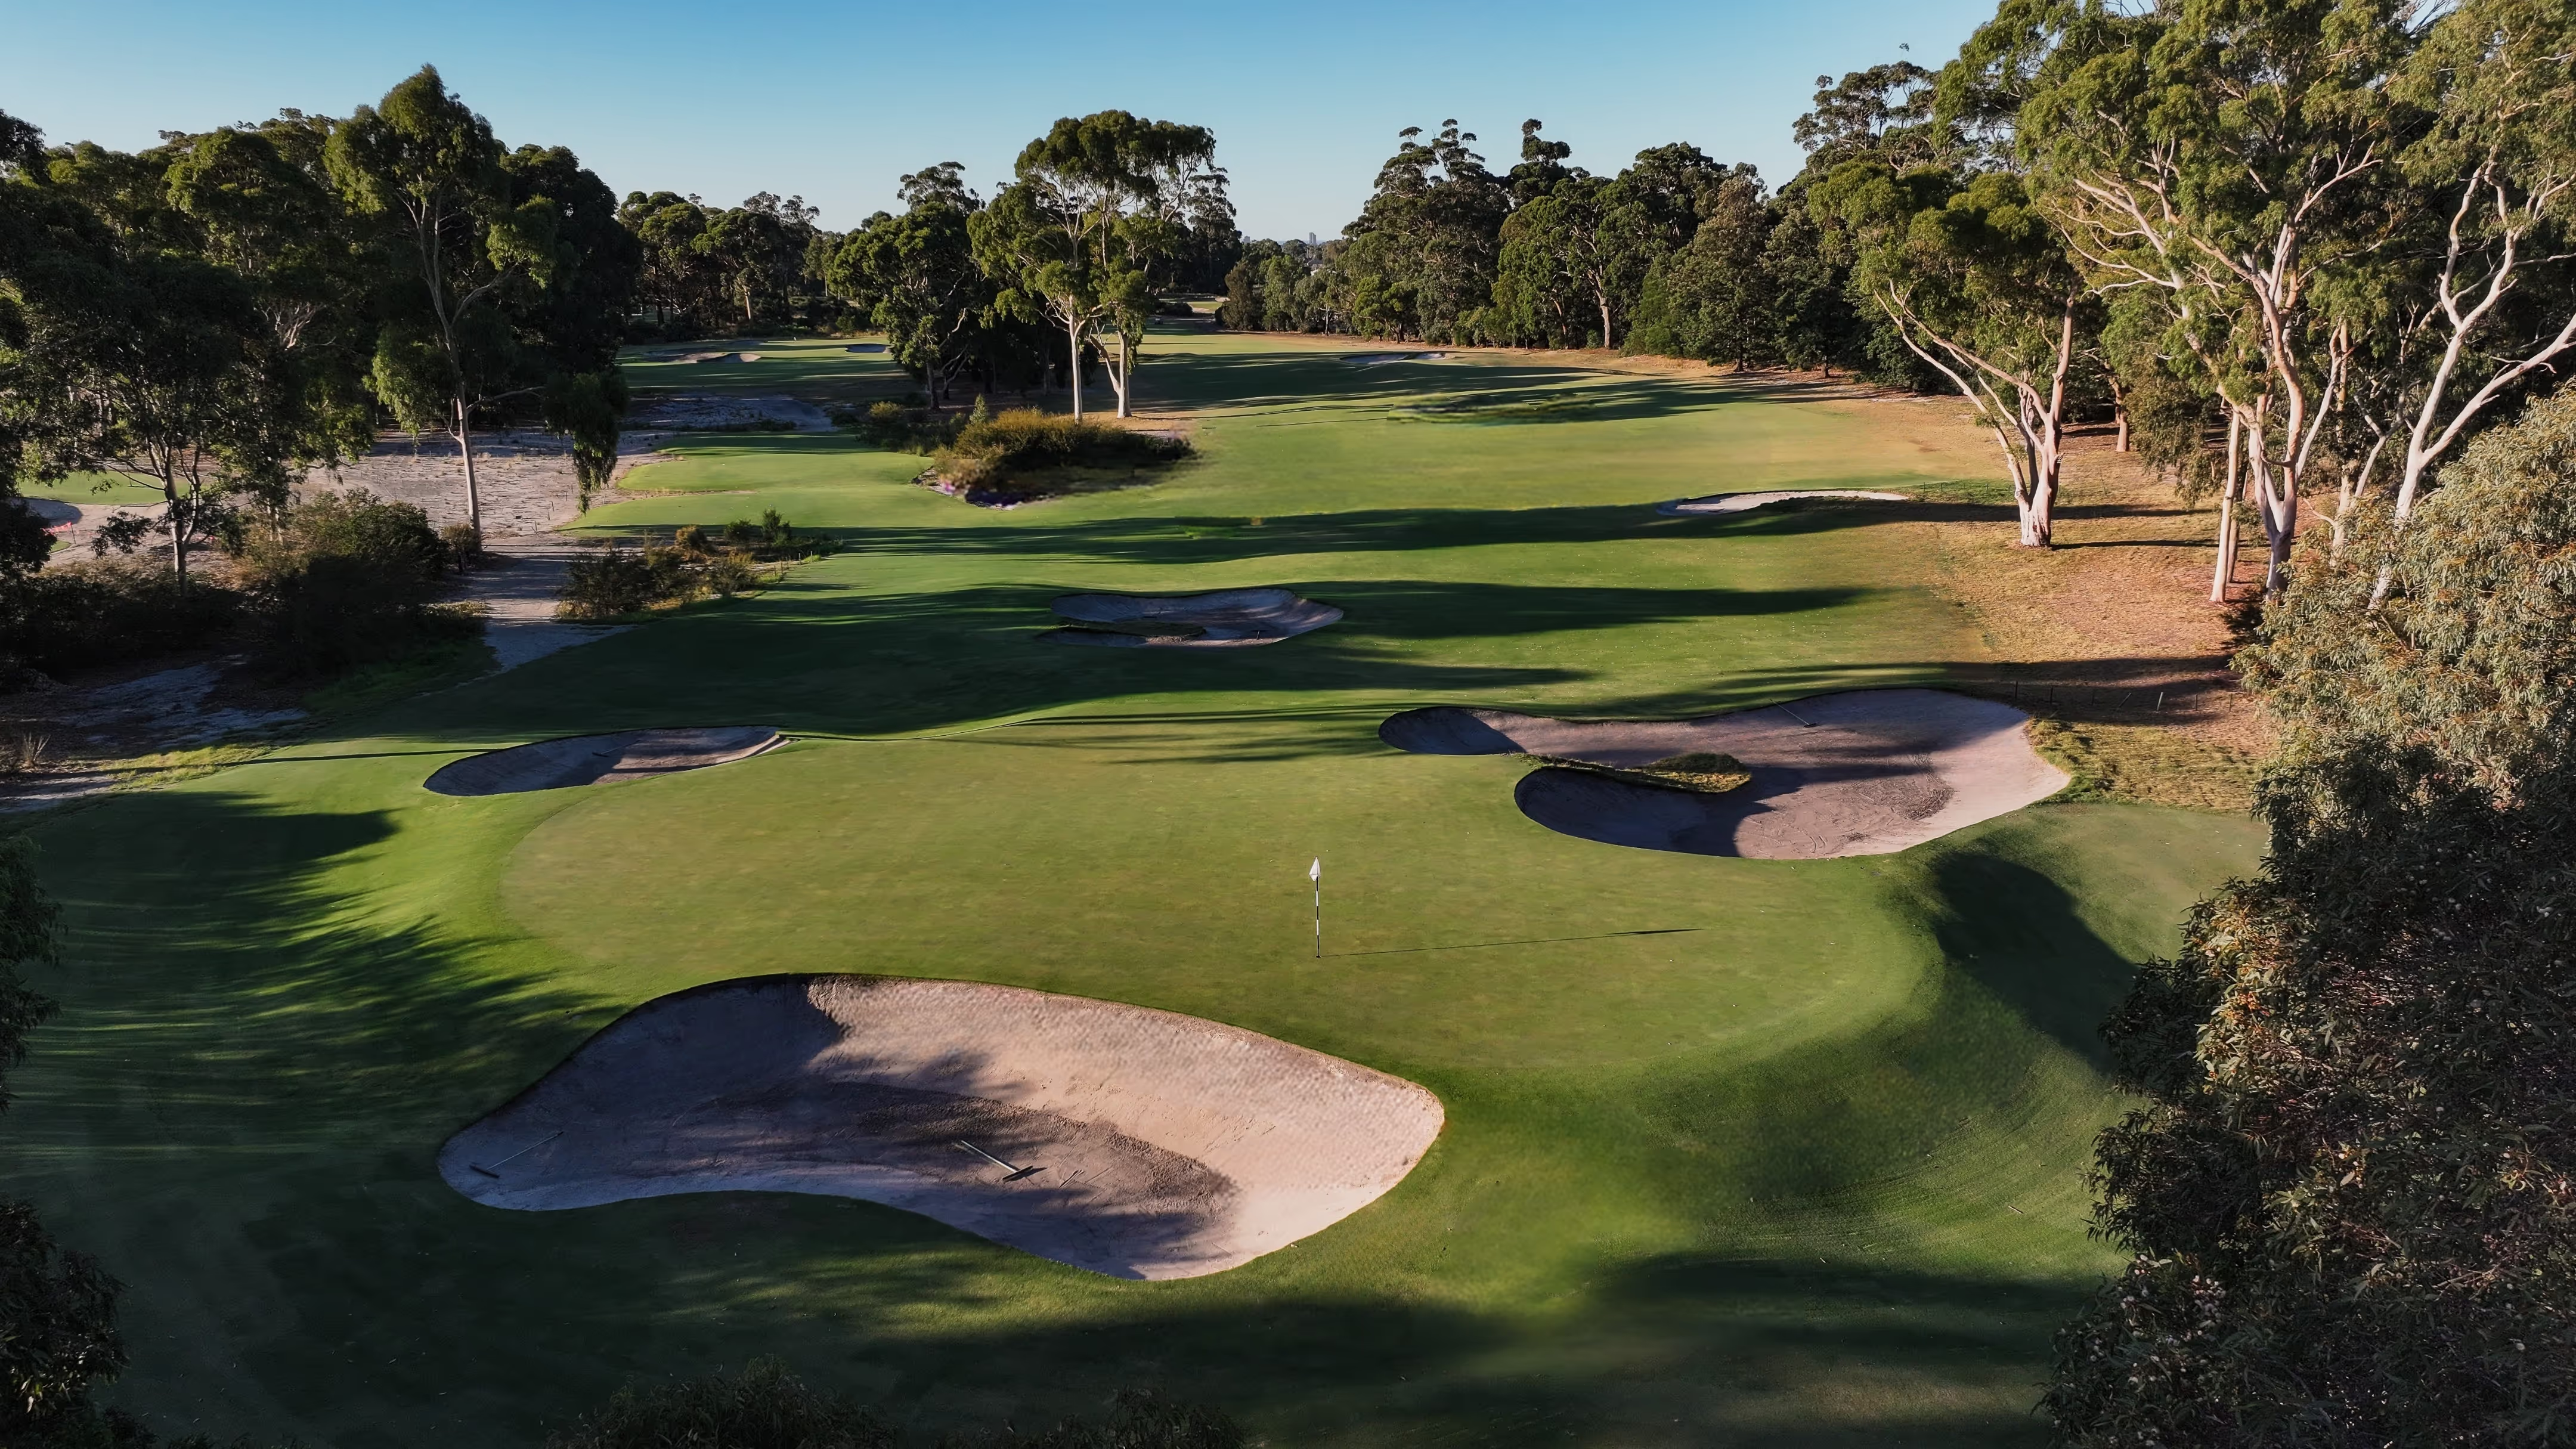
Slightly longer than the 1st hole, this par four suits a draw from the tee except when the flag is tucked in the back left corner of the green. A single greenside bunker protects the left side of the putting surface and to get close an approach from the right half of the fairway is essential. Over the back of this green is a terrible place to miss. Getting up and down from the deep swale isn’t impossible but the chip back requires both great touch and imagination.
Hole Stats
Championship
387m / Par 4 / 423 yd
Blue
378m / Par 4 / 413 yd
Green
321m / Par 4 / 351 yd
Red
321m / Par 4 / 351 yd

.avif)
4th Hole
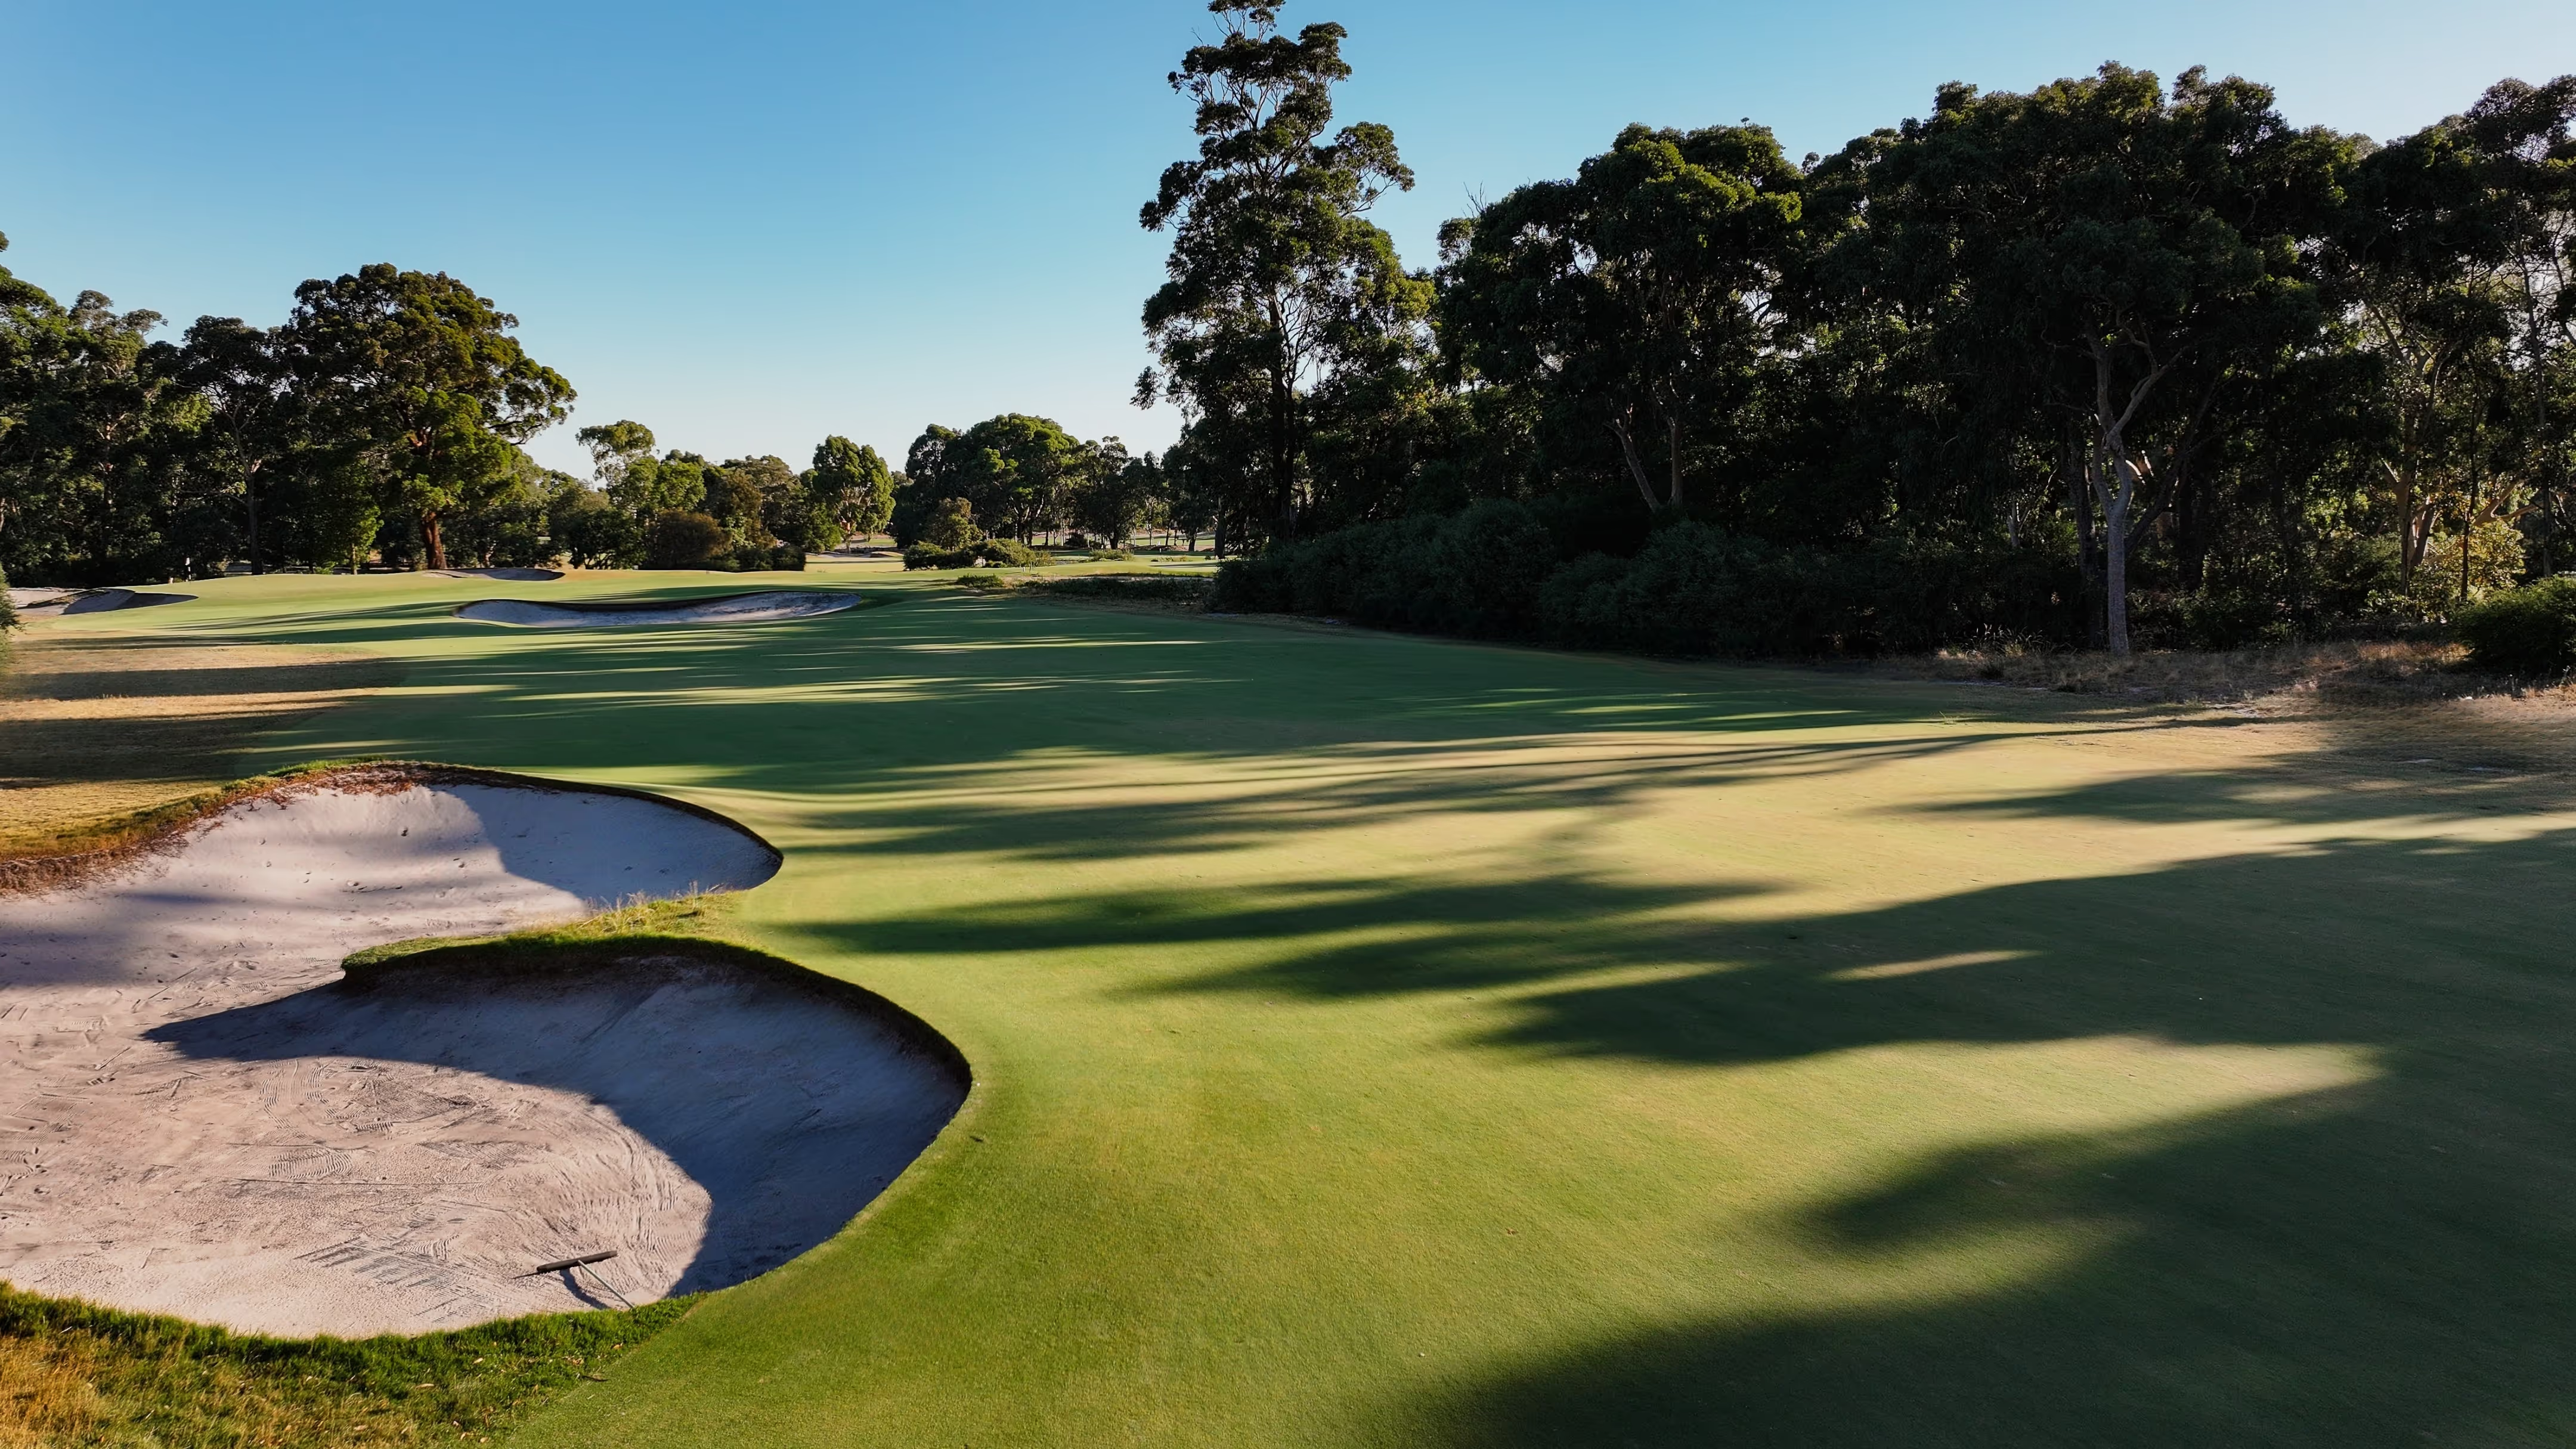
This short par five has been made more difficult by a tightened driving area achieved with the addition of two new fairway bunkers for the 1997 Australian Open. A new back tee, however, adds 30 metres to the hole and whilst probably only a drive and a long iron, the perched up green isn’t to be missed long or right.
Hole Stats
Championship
476m / Par 5 / 520 yd
Blue
476m / Par 5 / 520 yd
Green
389m / Par 5 / 425 yd
Red
389m / Par 5 / 425 yd
.avif)
.avif)
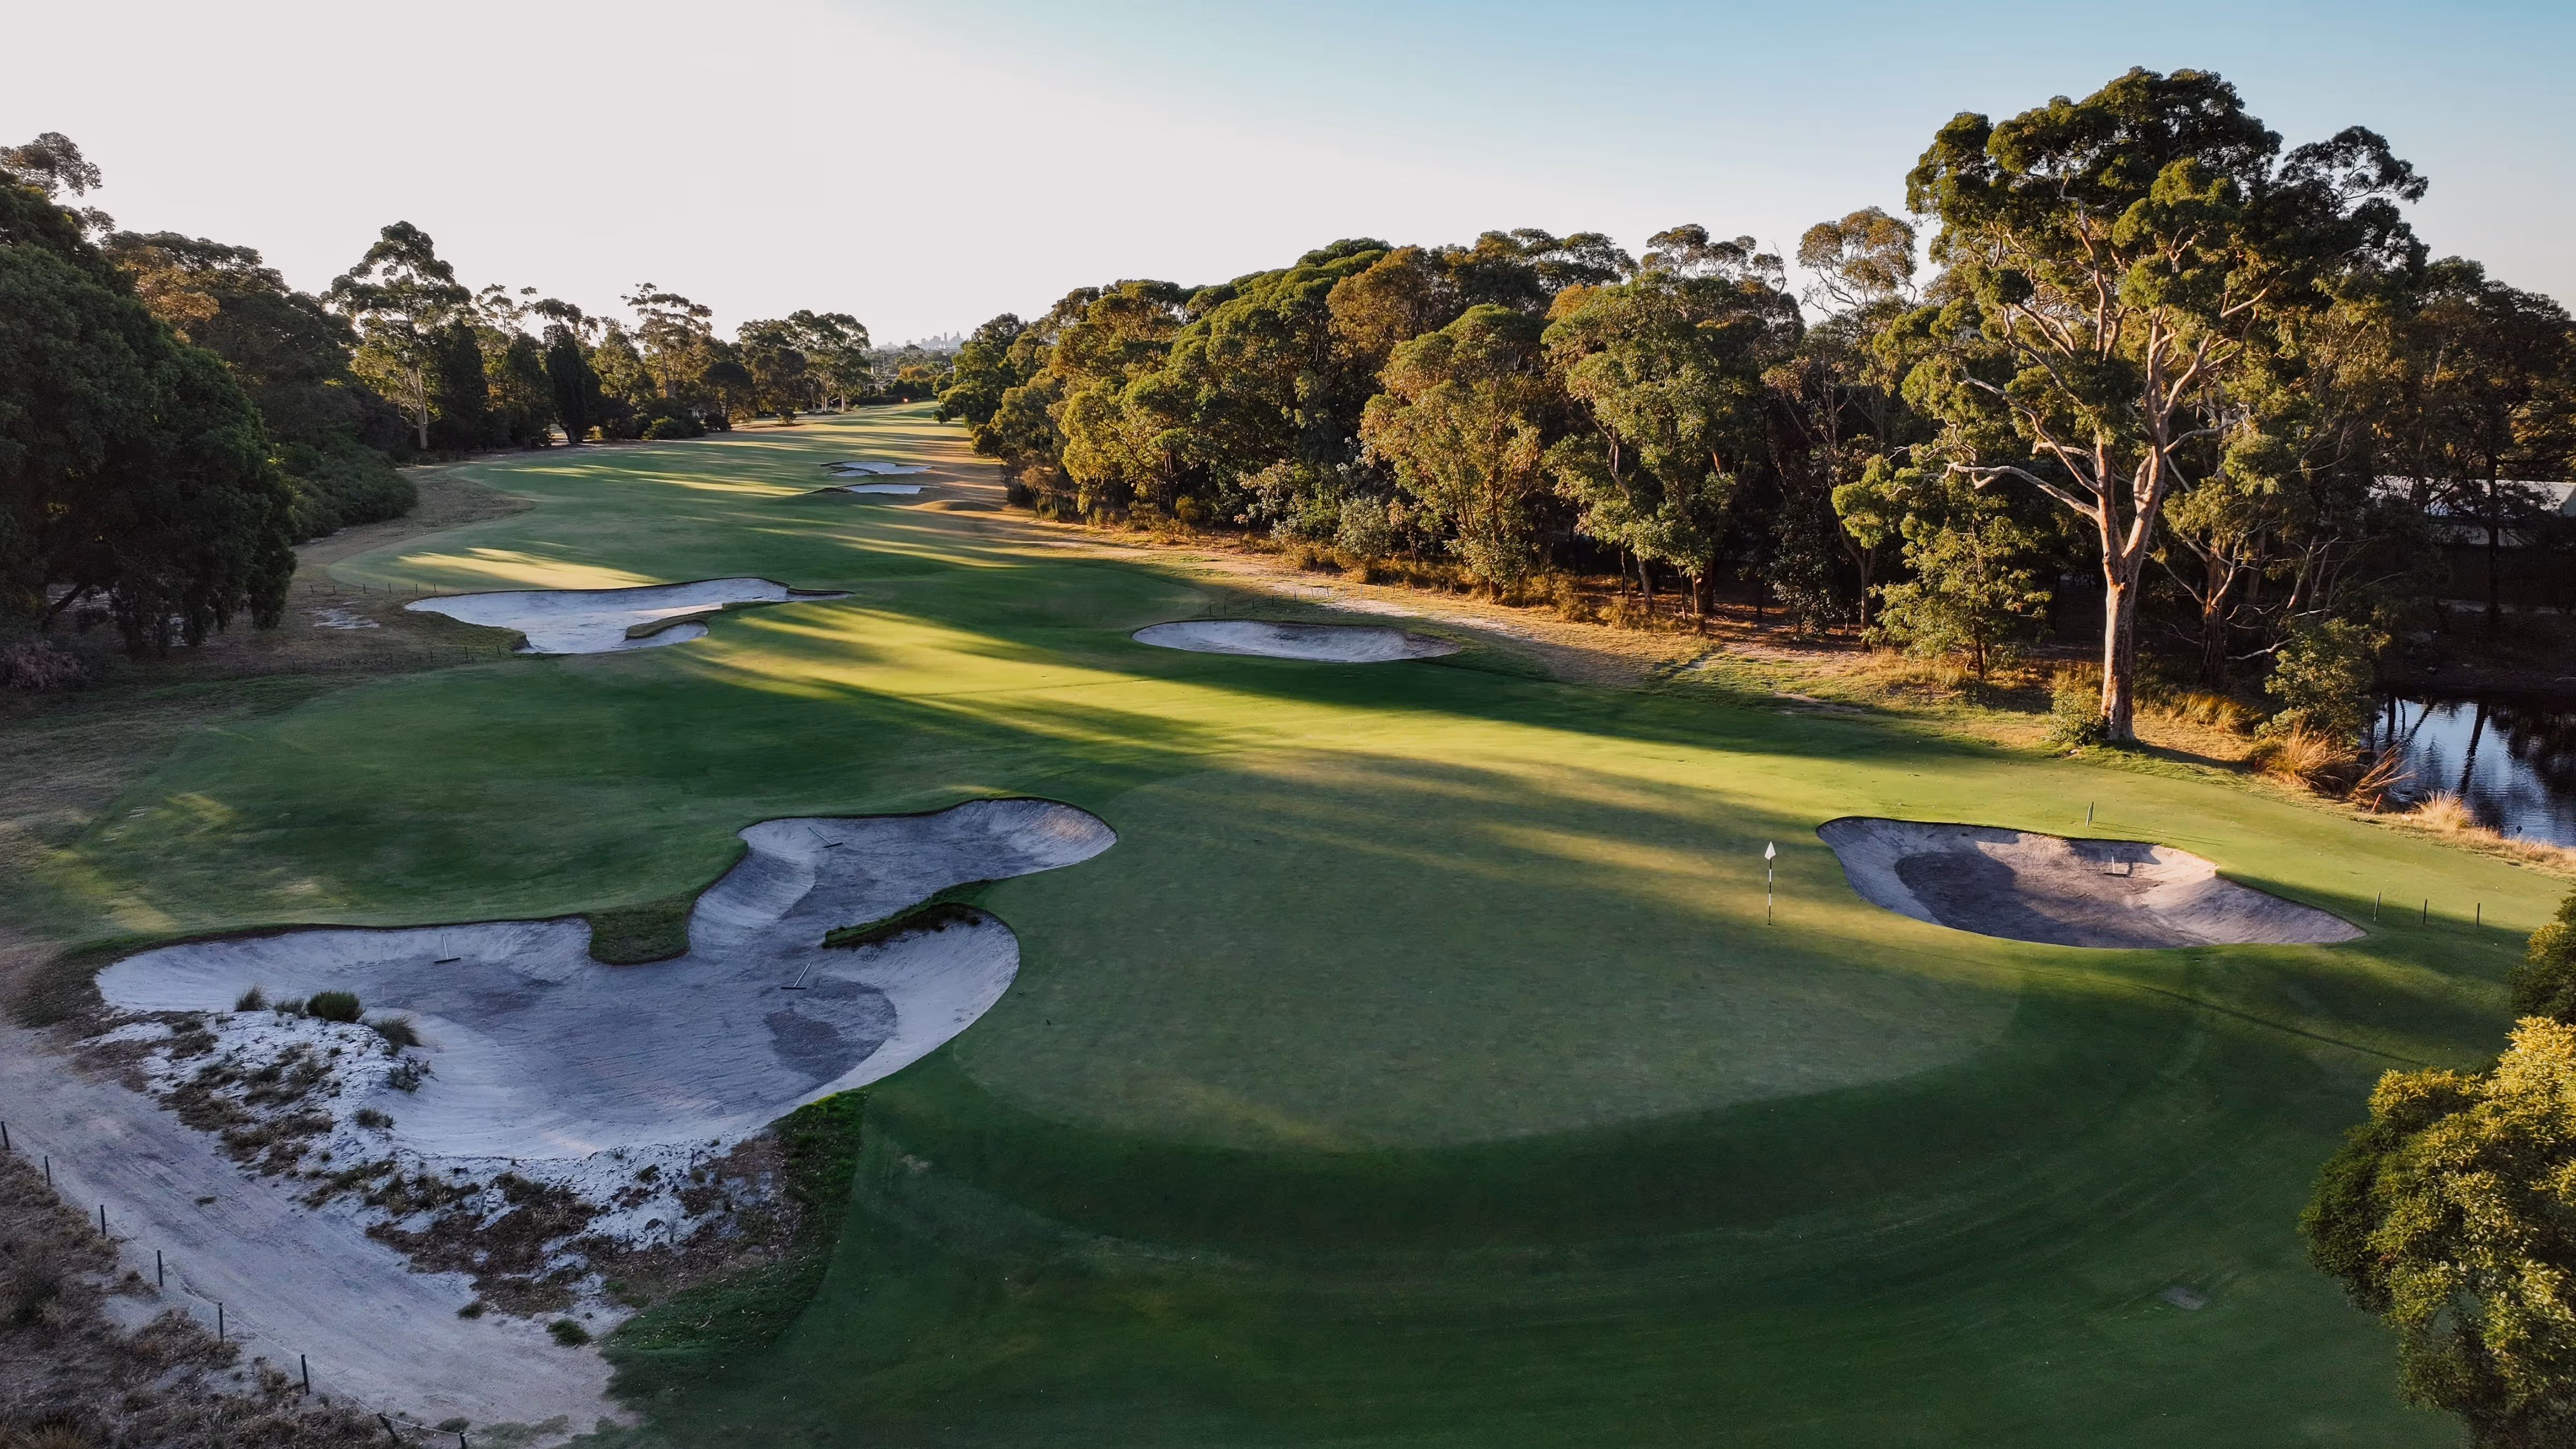
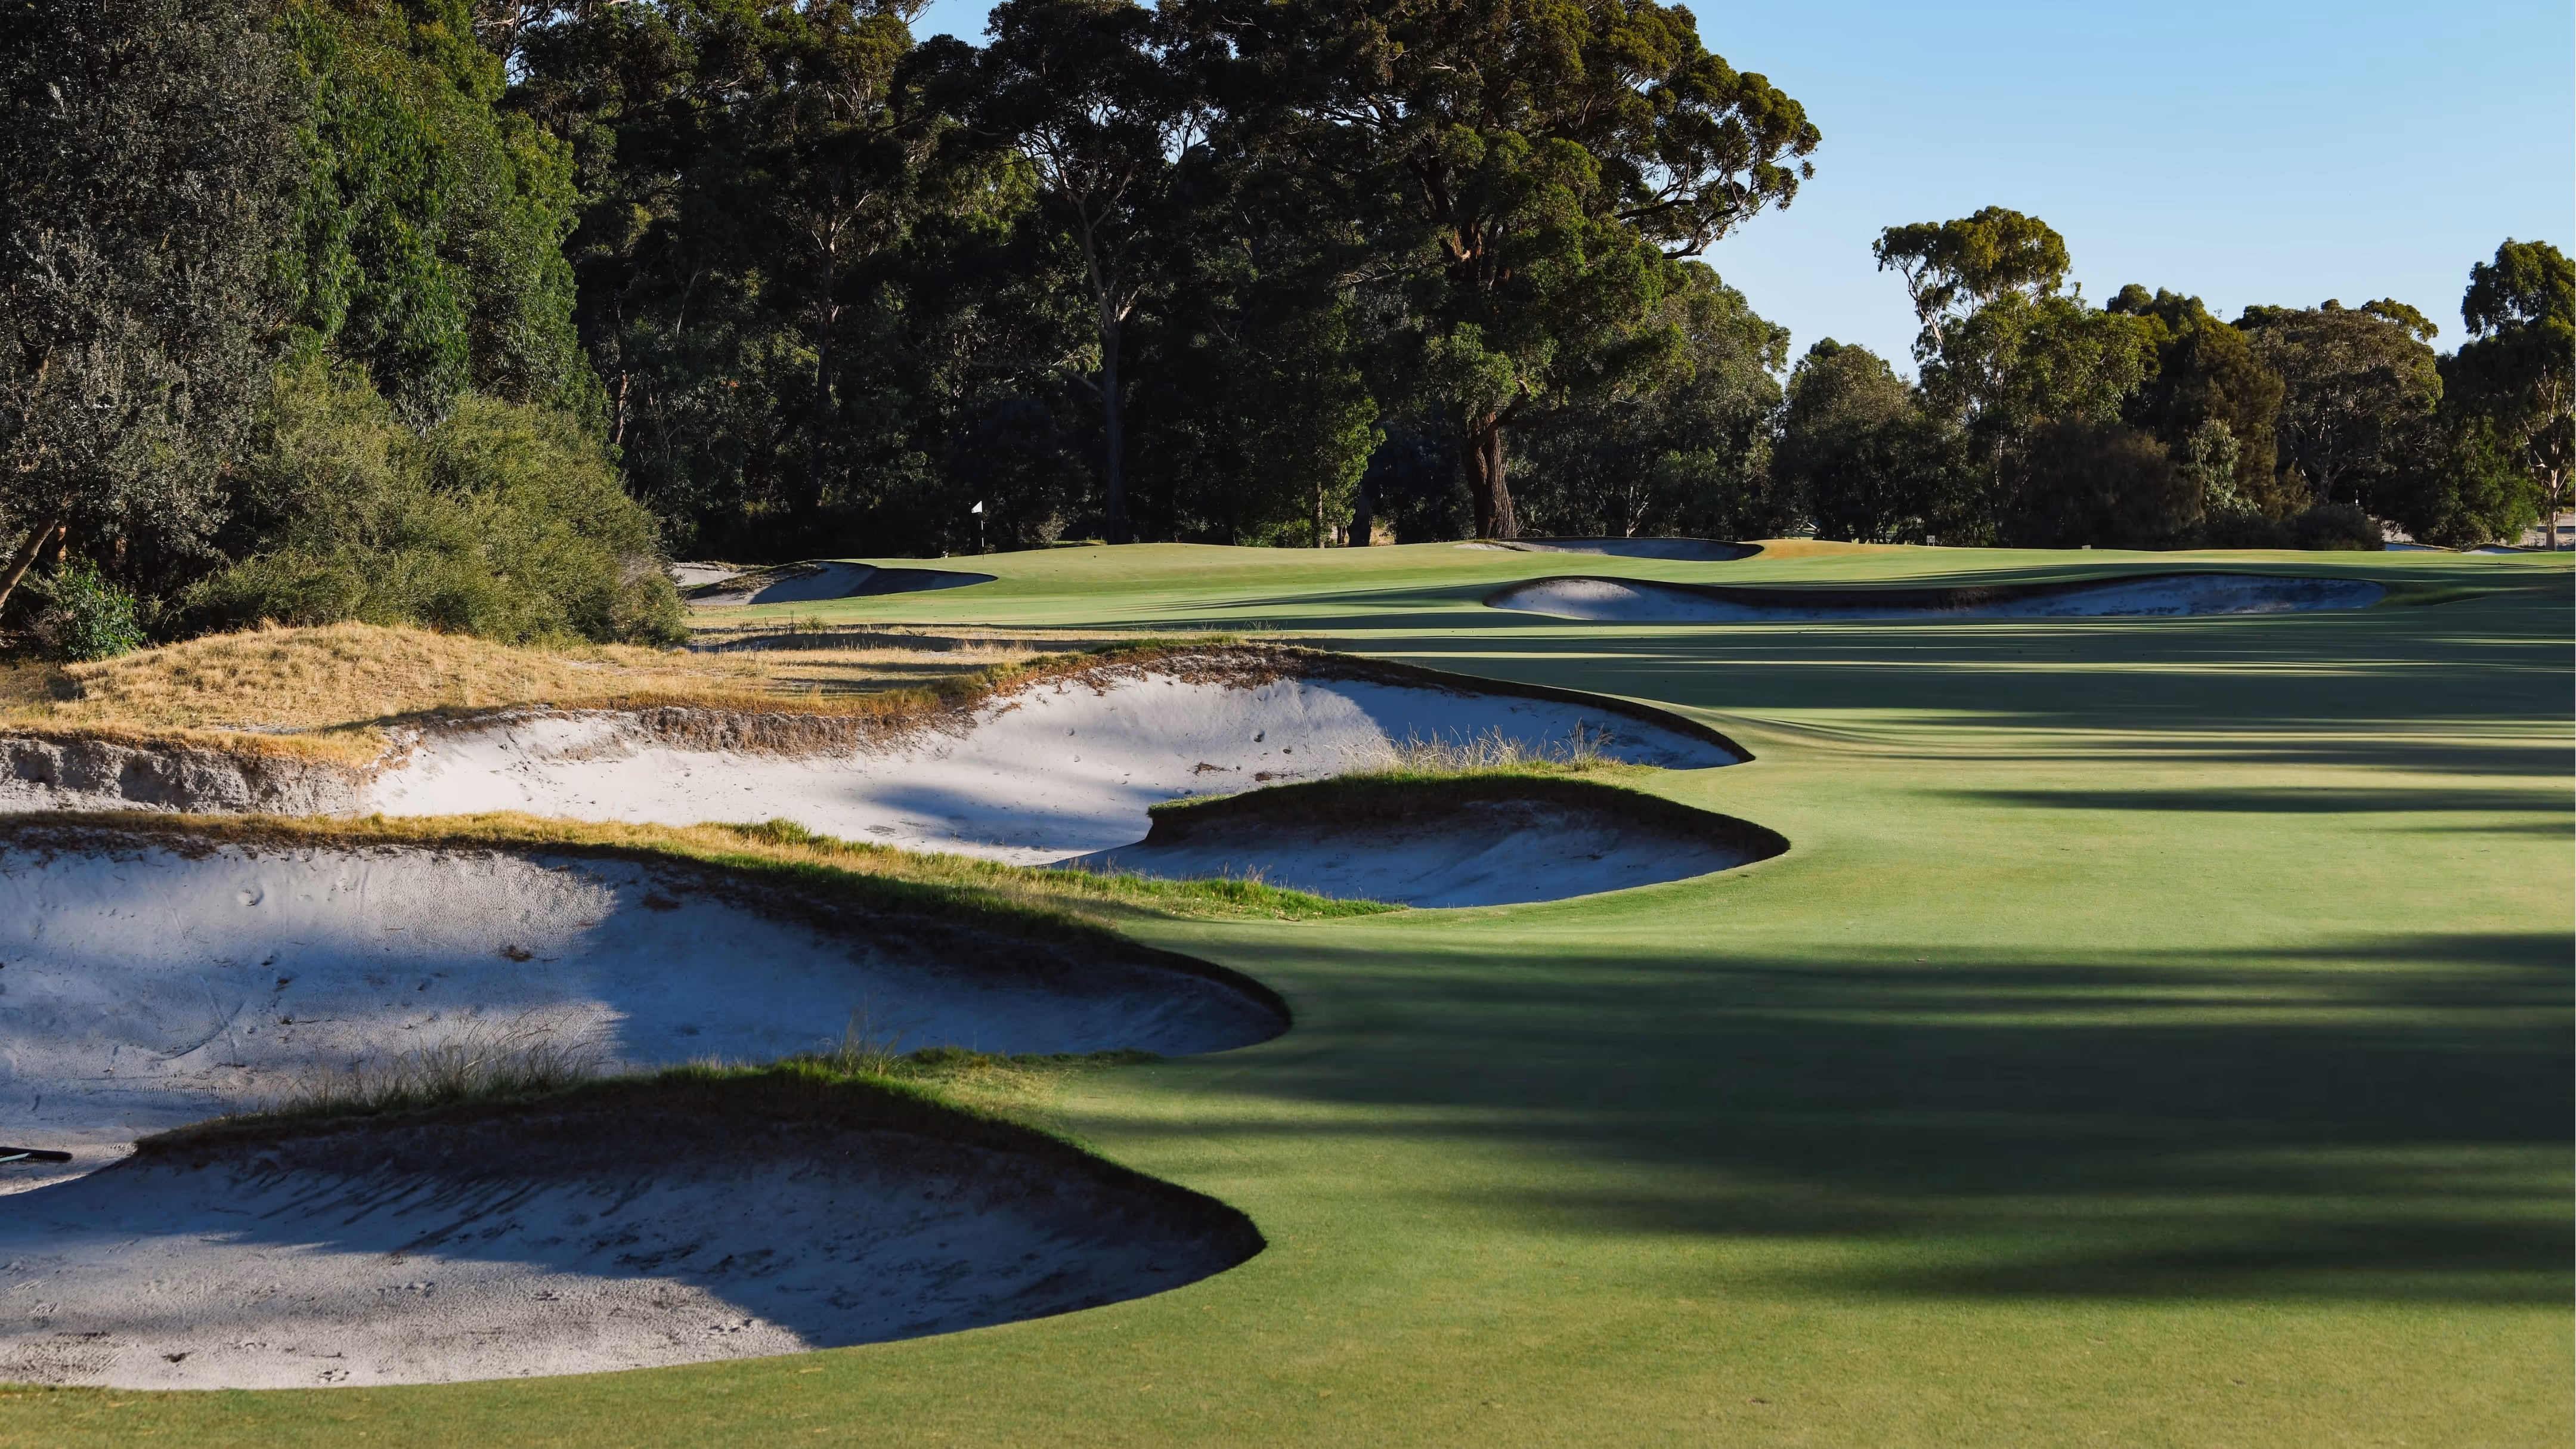
5th Hole
Another hole made more difficult by the addition of a new championship tee. Two deep fairway bunkers are right in play down the left side of the driving area, the right hand fairway bunker is of little concern. The green features a huge slope off the shoulder of the right hand greenside bunker and if the flag is in the right half of the green an approach from the left half of the fairway – usually with a short or mid iron – is ideal. Widely regarded as one of the classic holes on the course.
Hole Stats
Championship
388m / Par 4 / 424 yd
Blue
388m / Par 4 / 424 yd
Green
334m / Par 4 / 365 yd
Red
313m / Par 4 / 342 yd
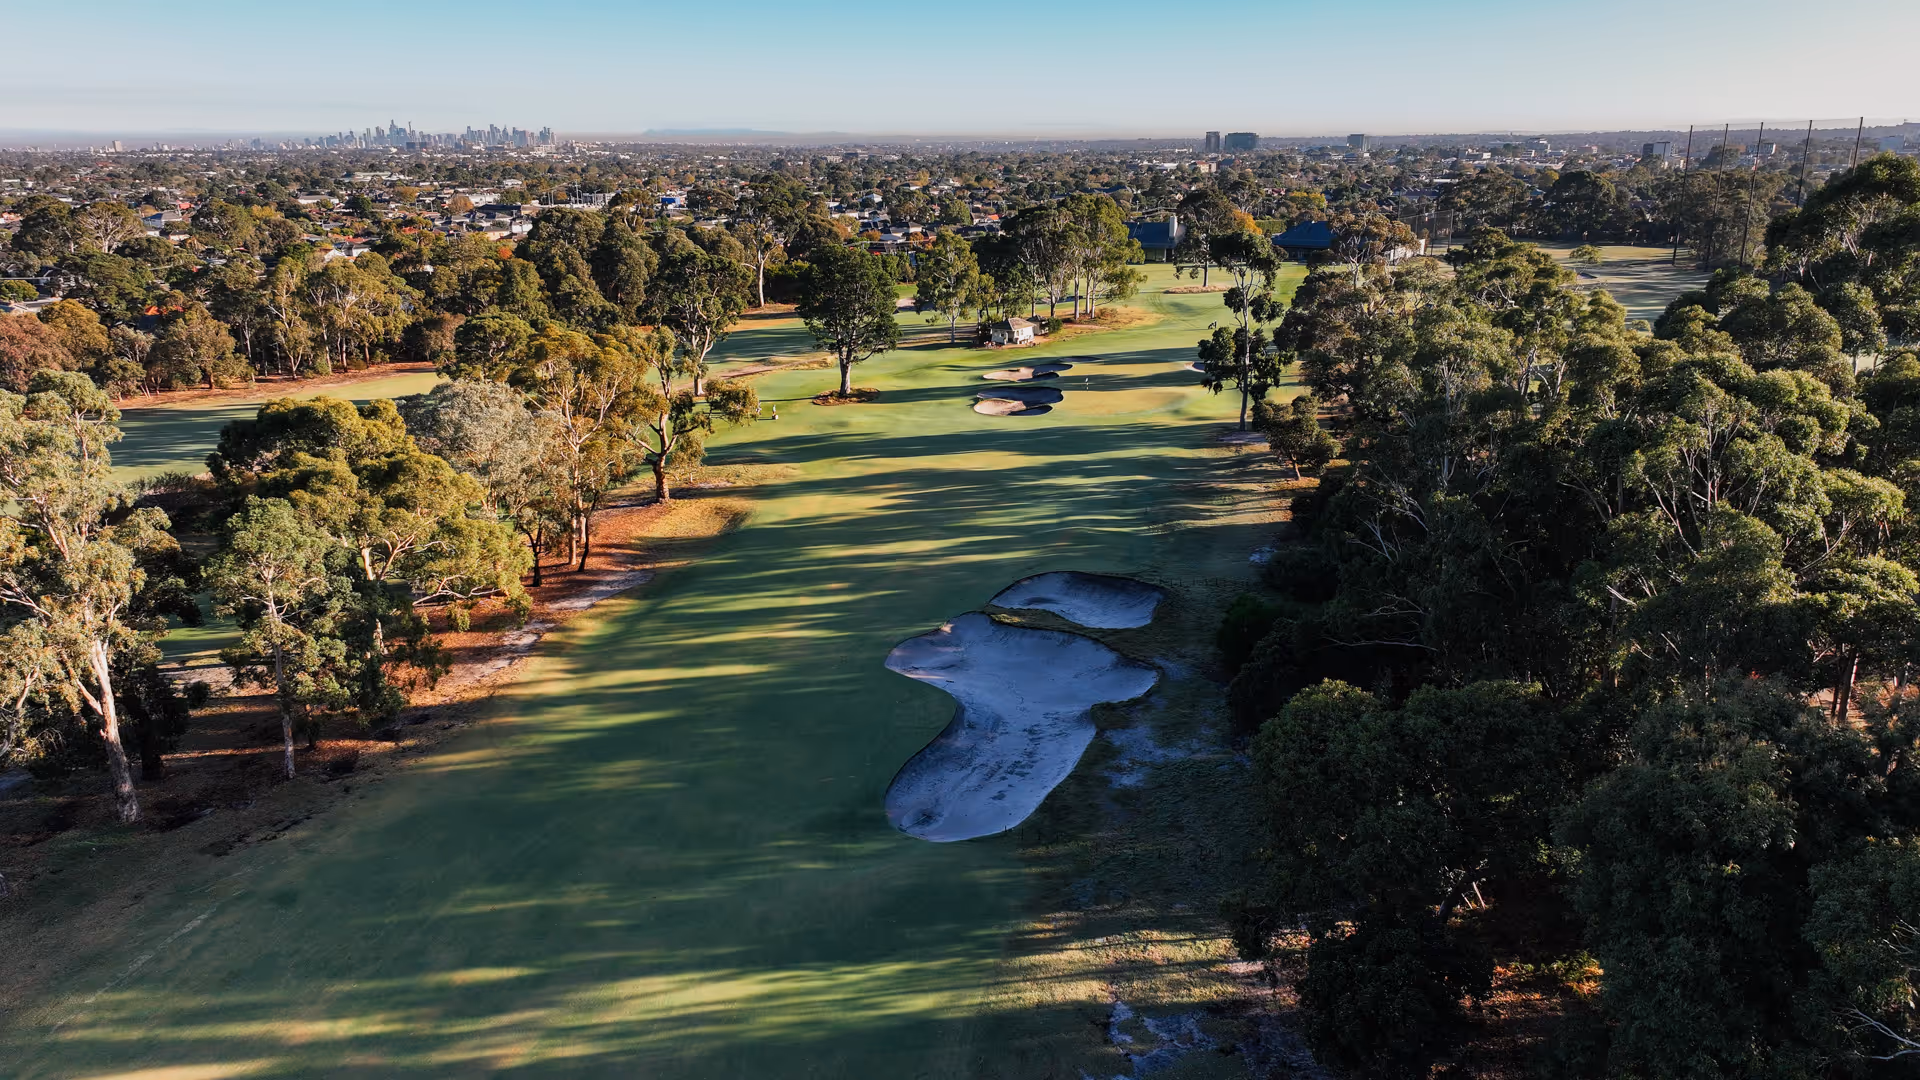
6th Hole
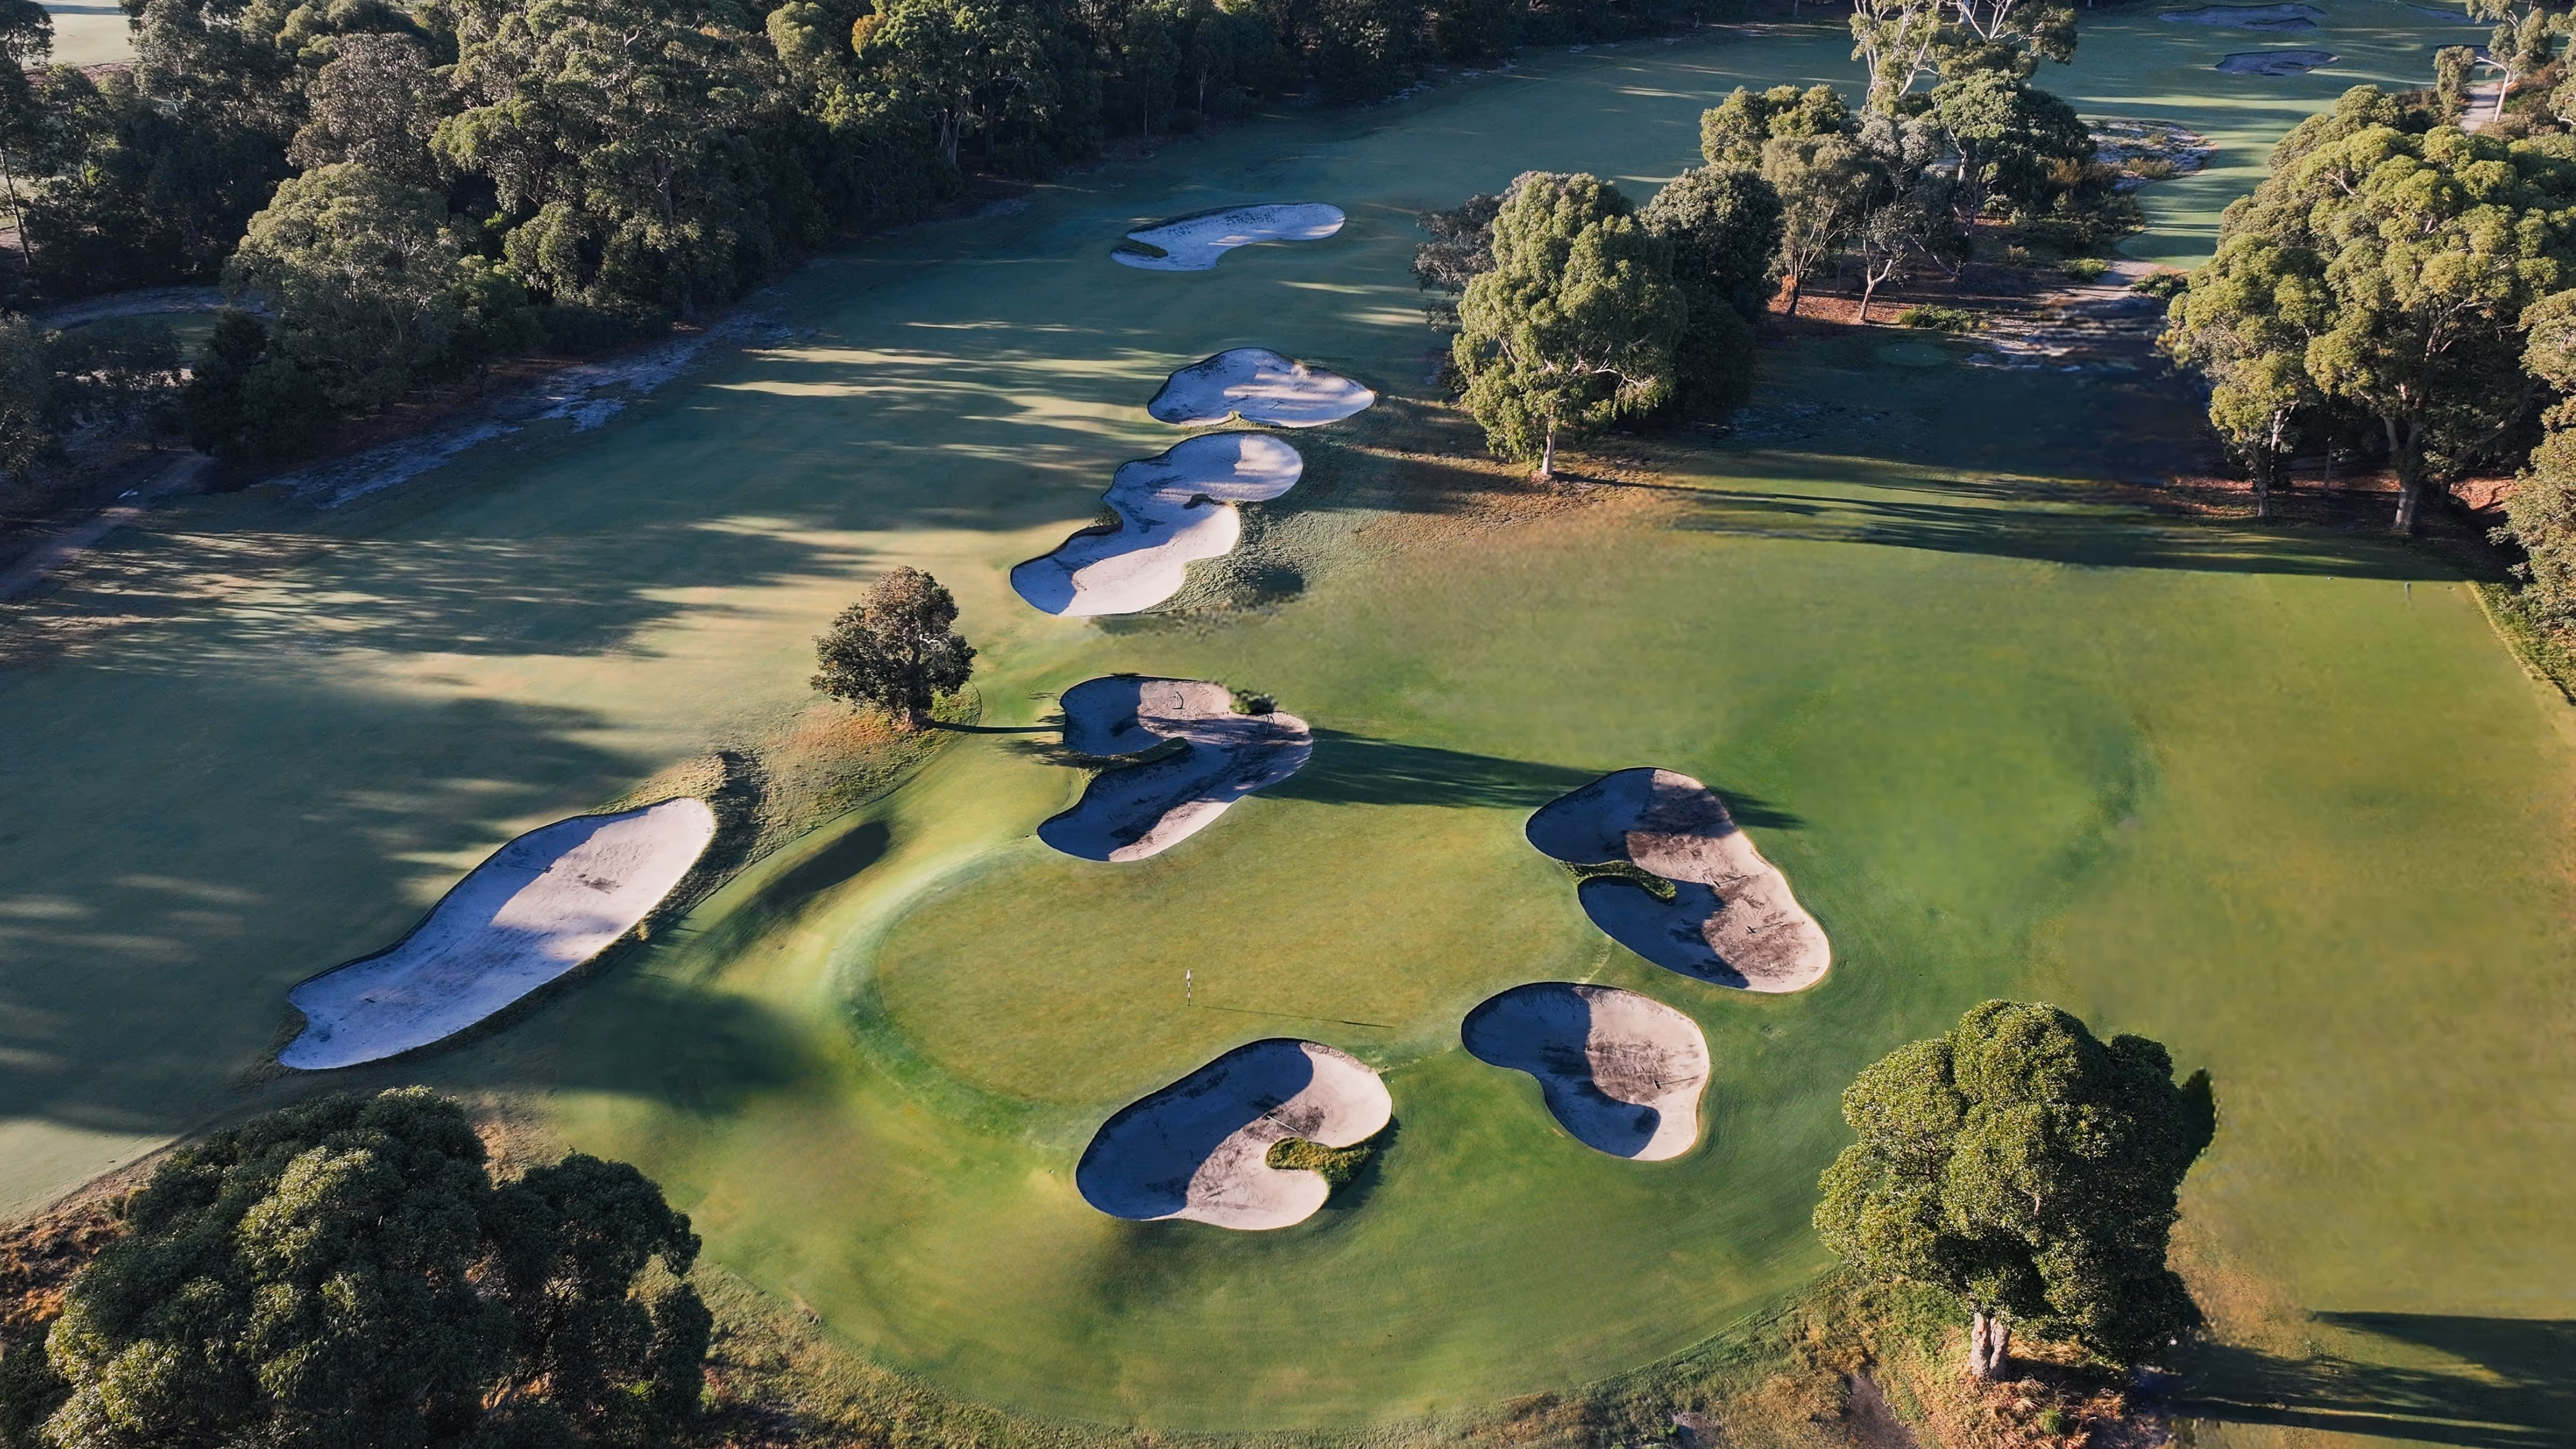
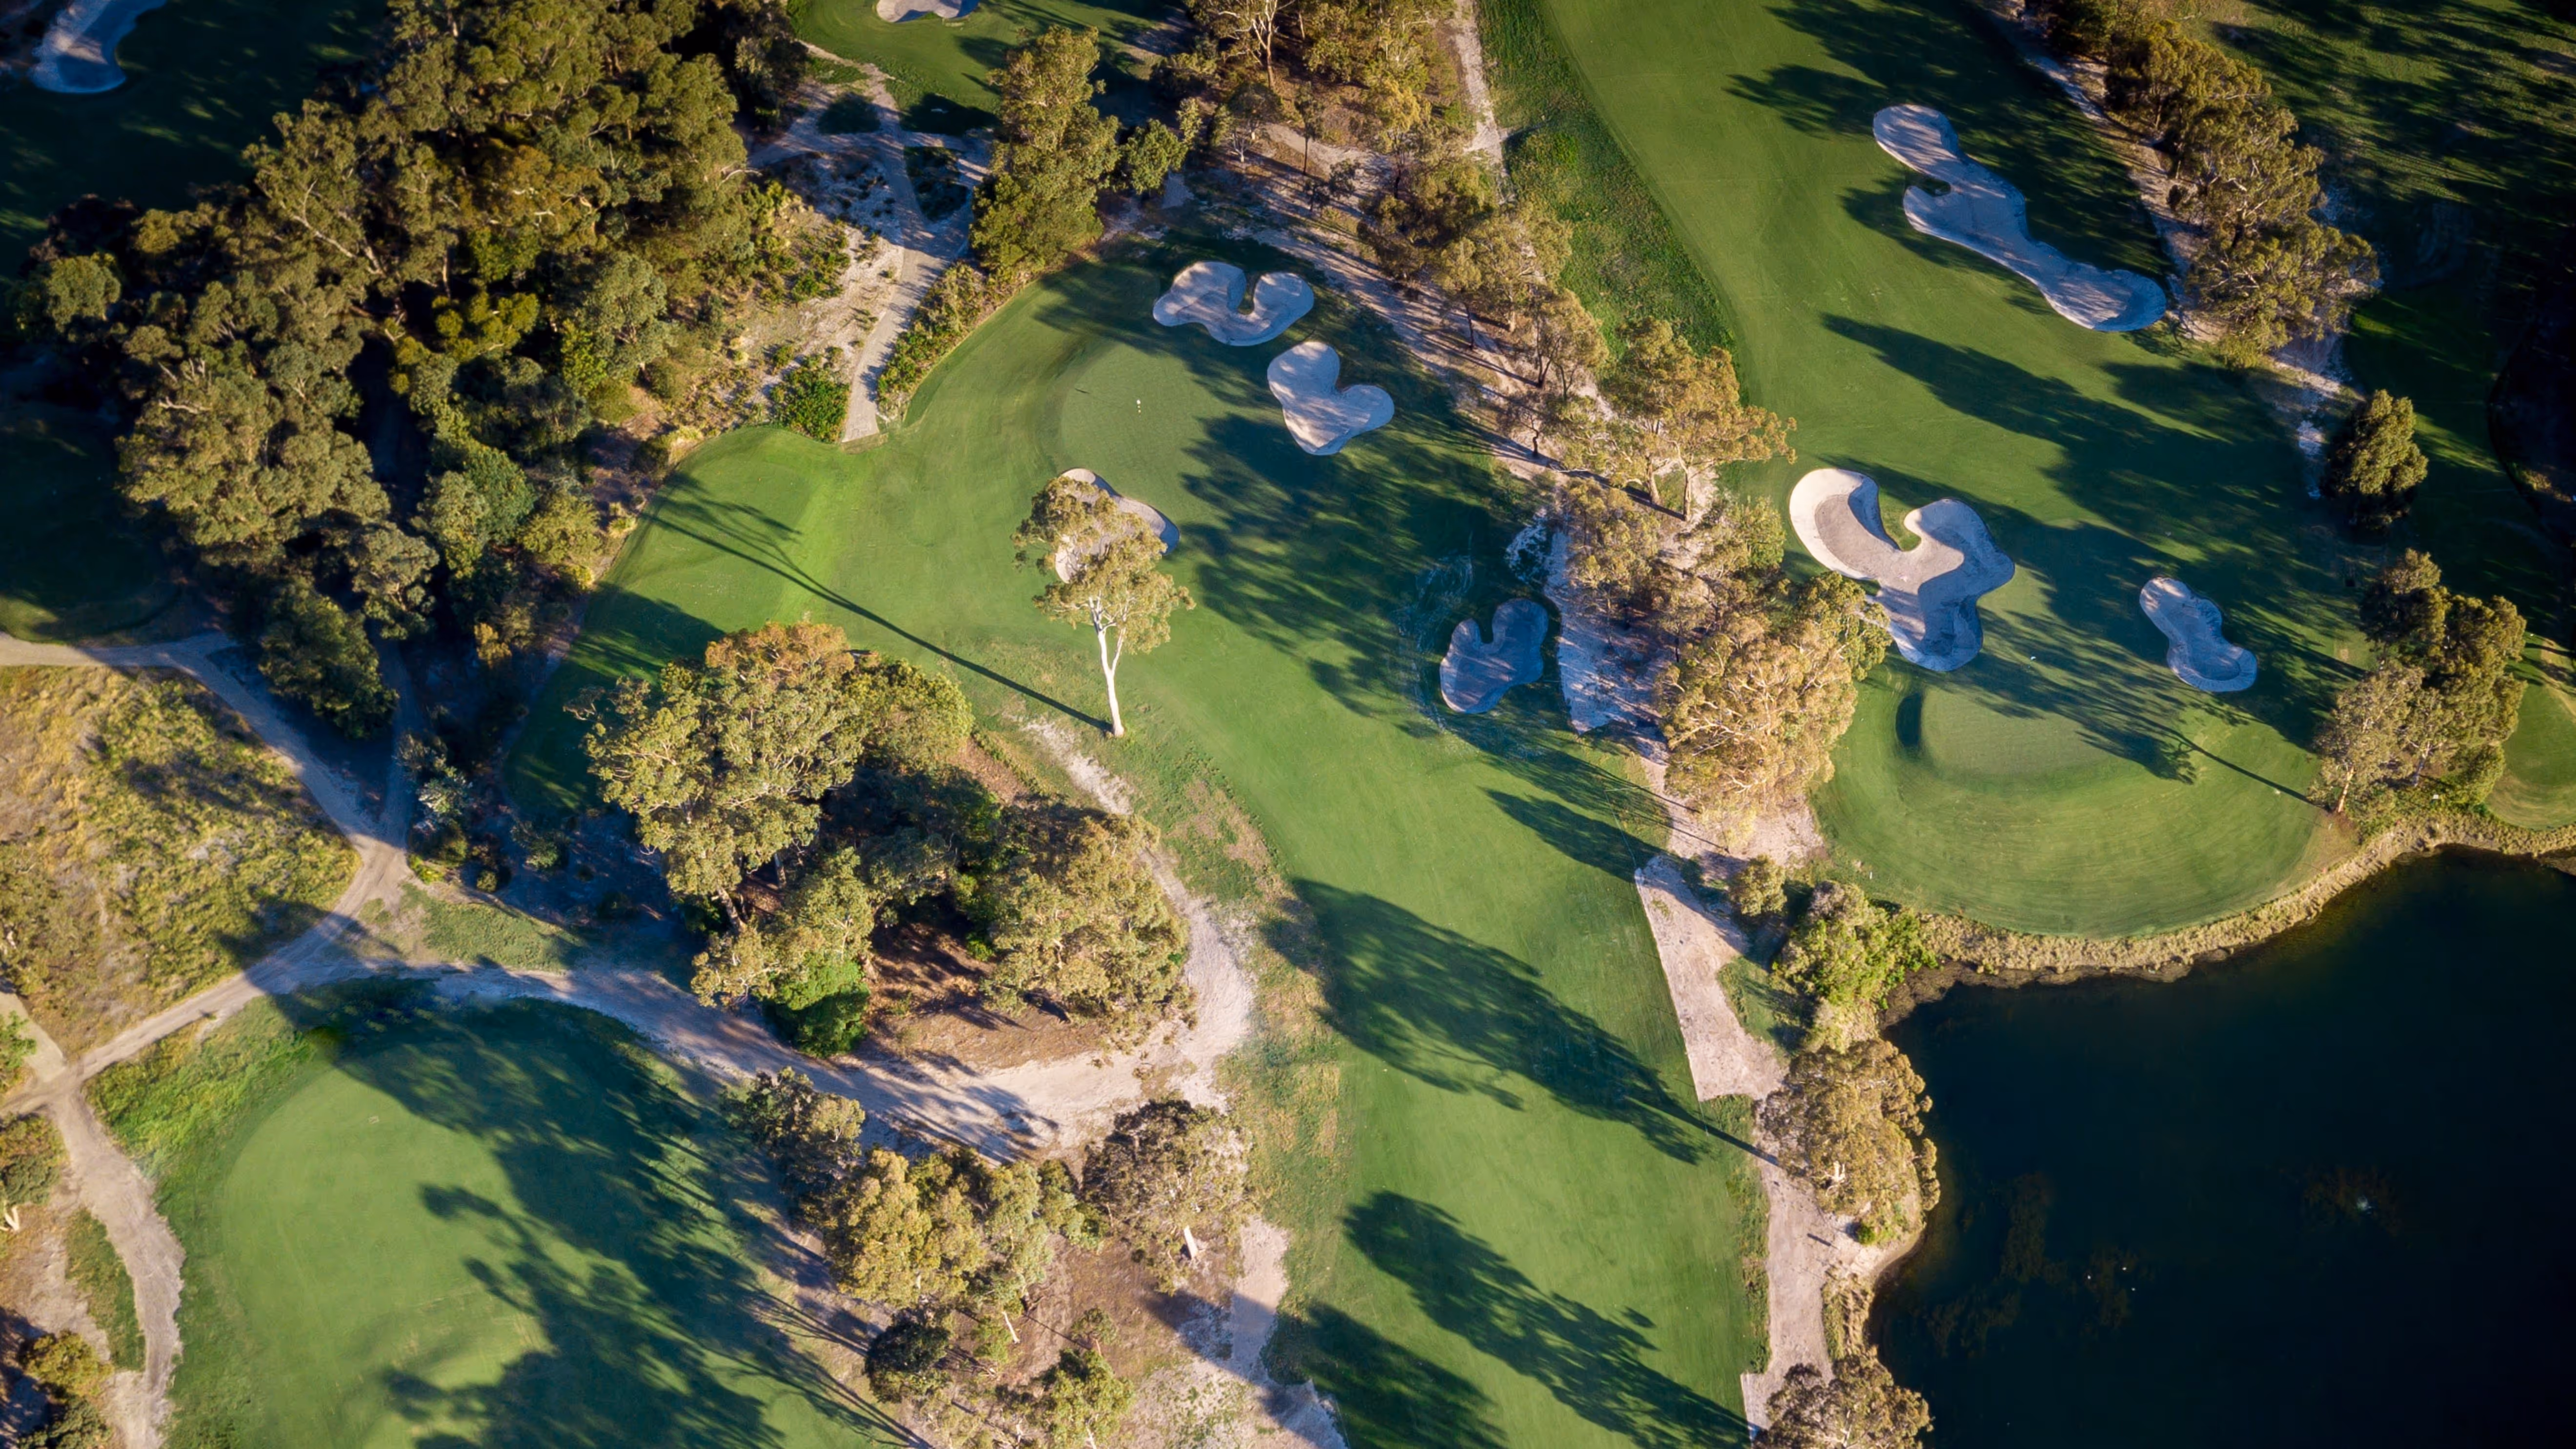
The 6th is the second of three front nine par fives and the player must drive to the far left side of the dogleg to gain the best possible angle to approach the green. Jack Nicklaus, famously, carried the fairway bunker that stretches across the left half of the fairway (270 metres) with a driver and a small ball in the 1967 Australian P.G.A Championship. The green and surrounds feature cavernous bunkers and a heavily contoured green. Precise shot making is required, whether it be from a long second or short third shot.
Hole Stats
Championship
470m / Par 5 / 514 yd
Blue
470m / Par 5 / 514 yd
Green
454m / Par 5 / 497 yd
Red
444m / Par 5 / 486 yd
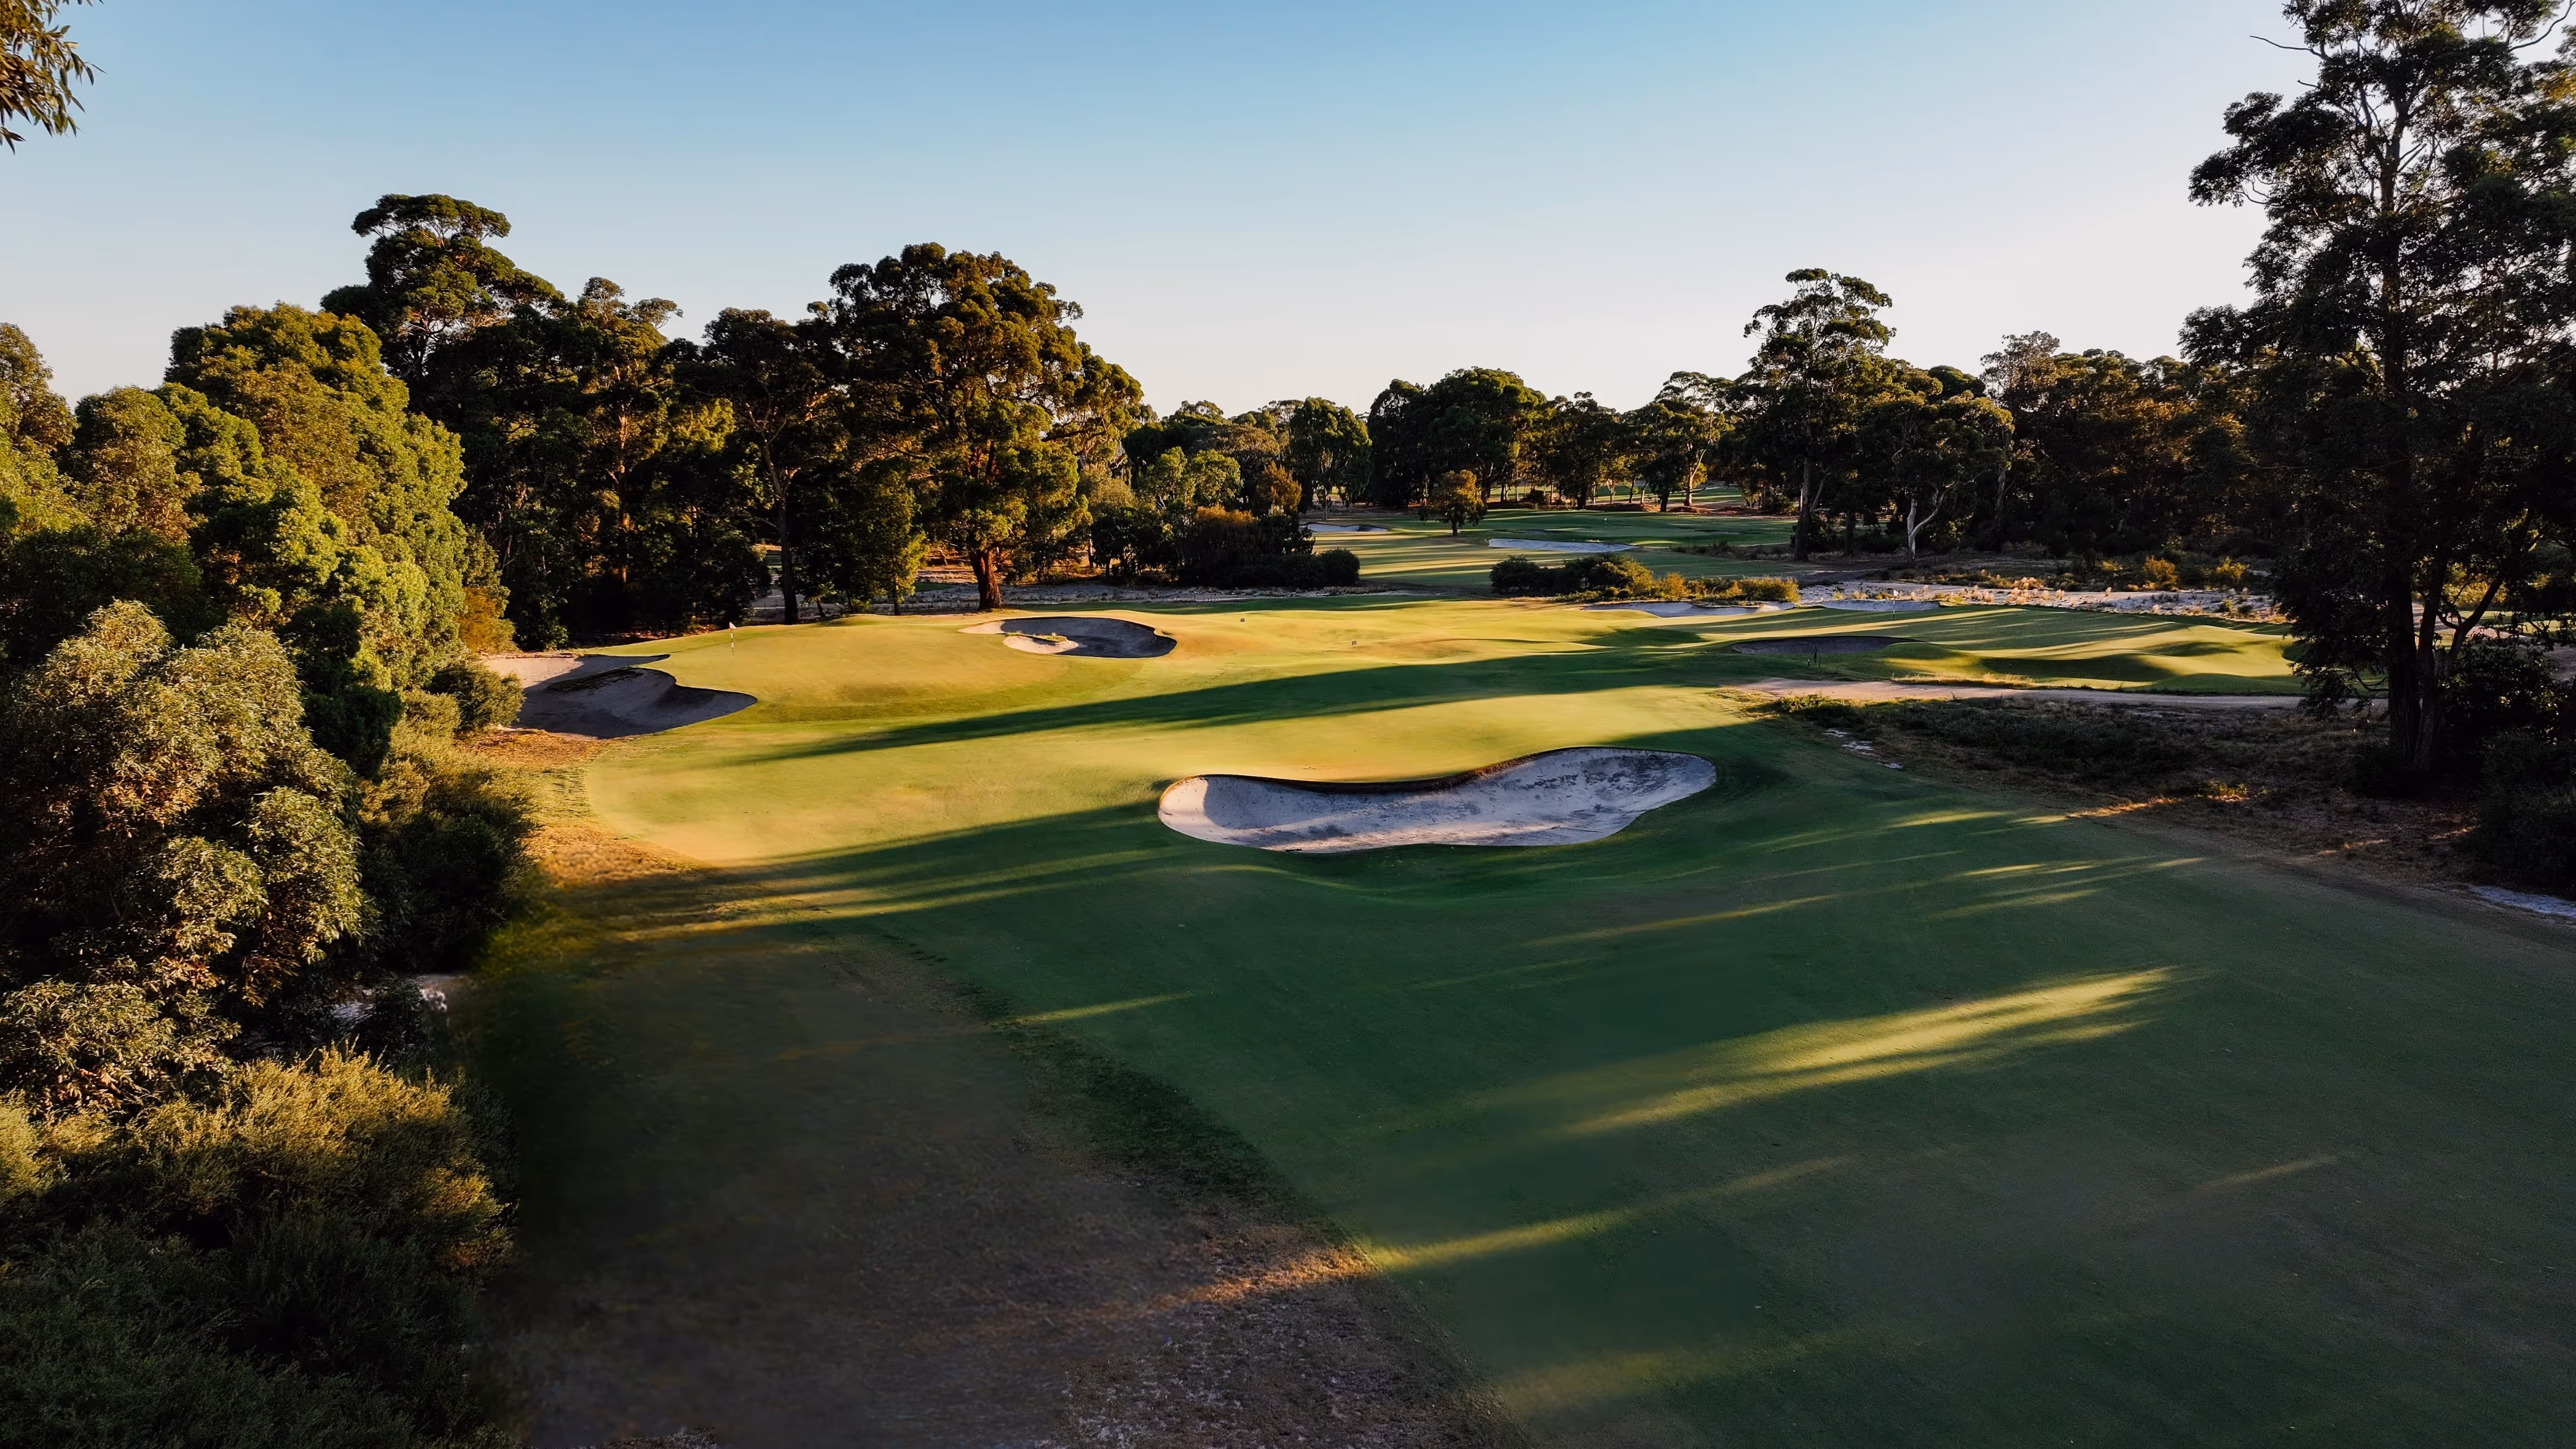
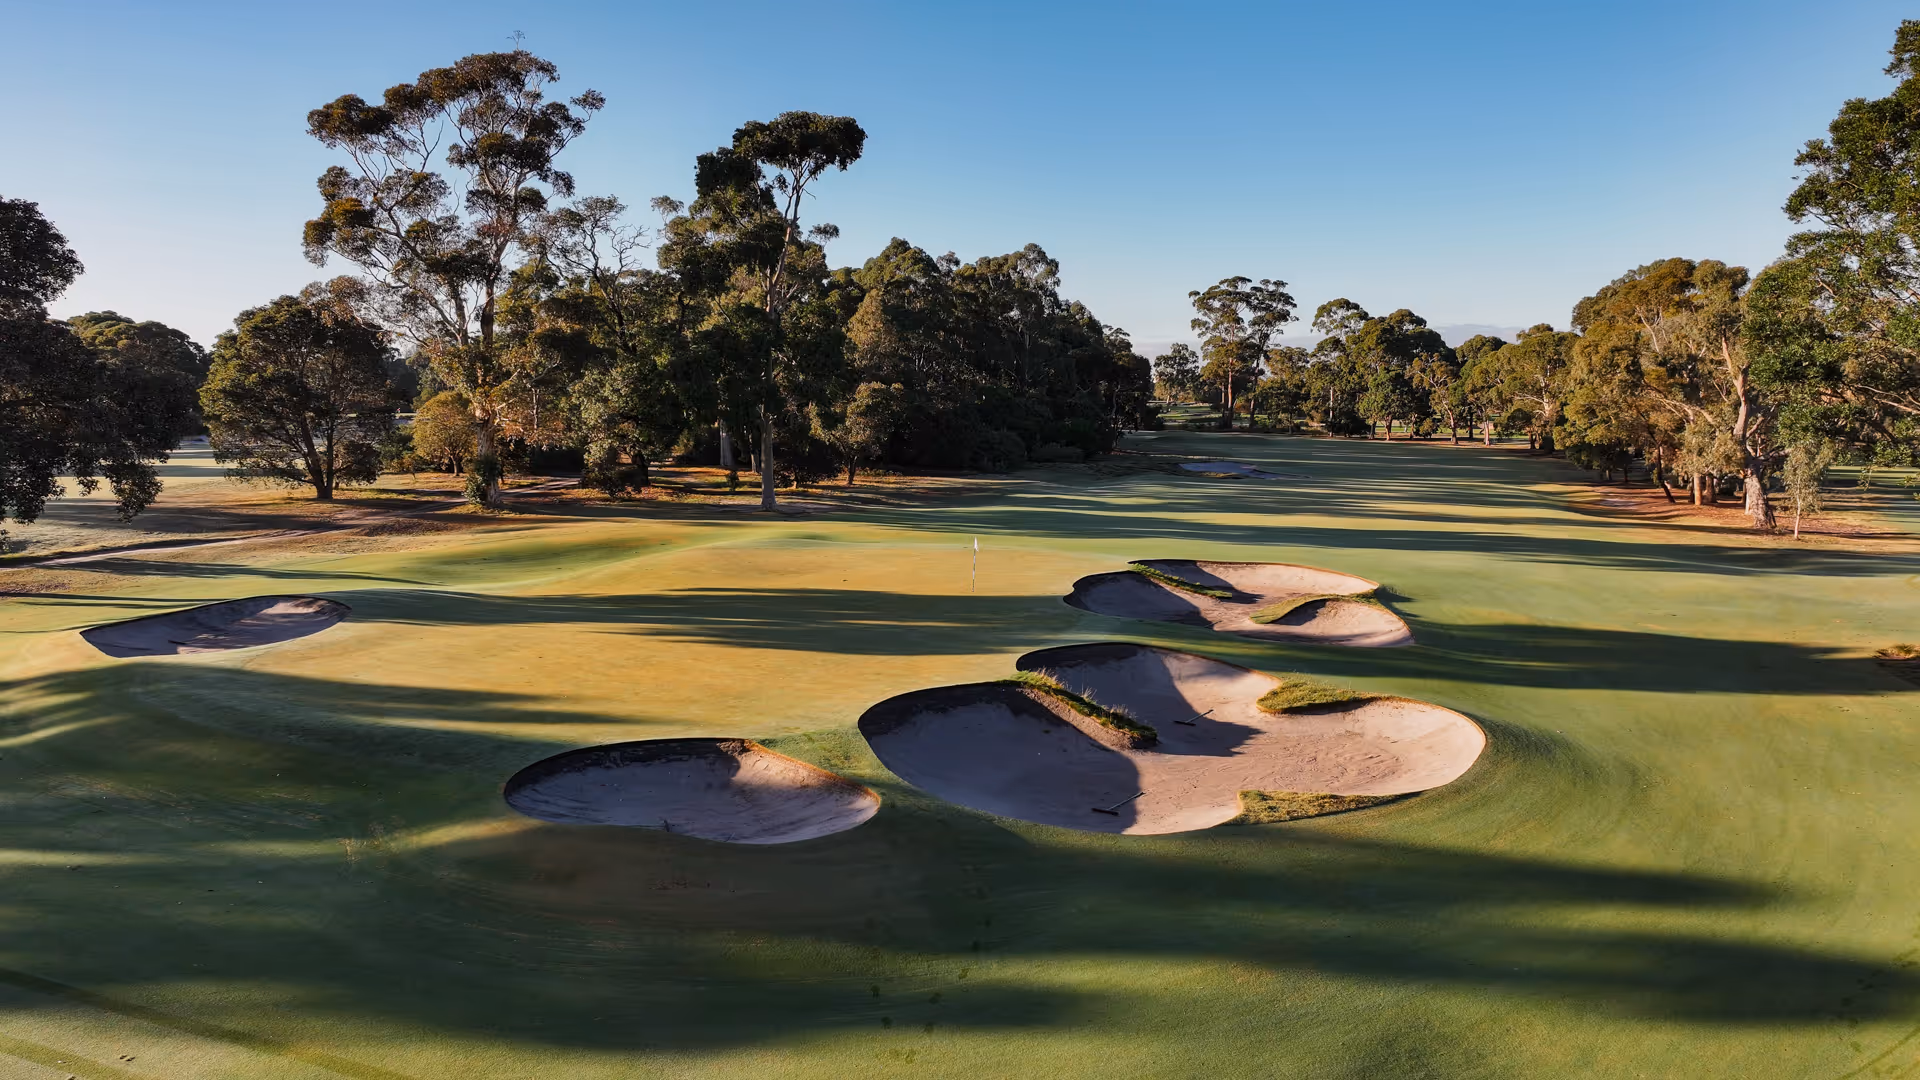
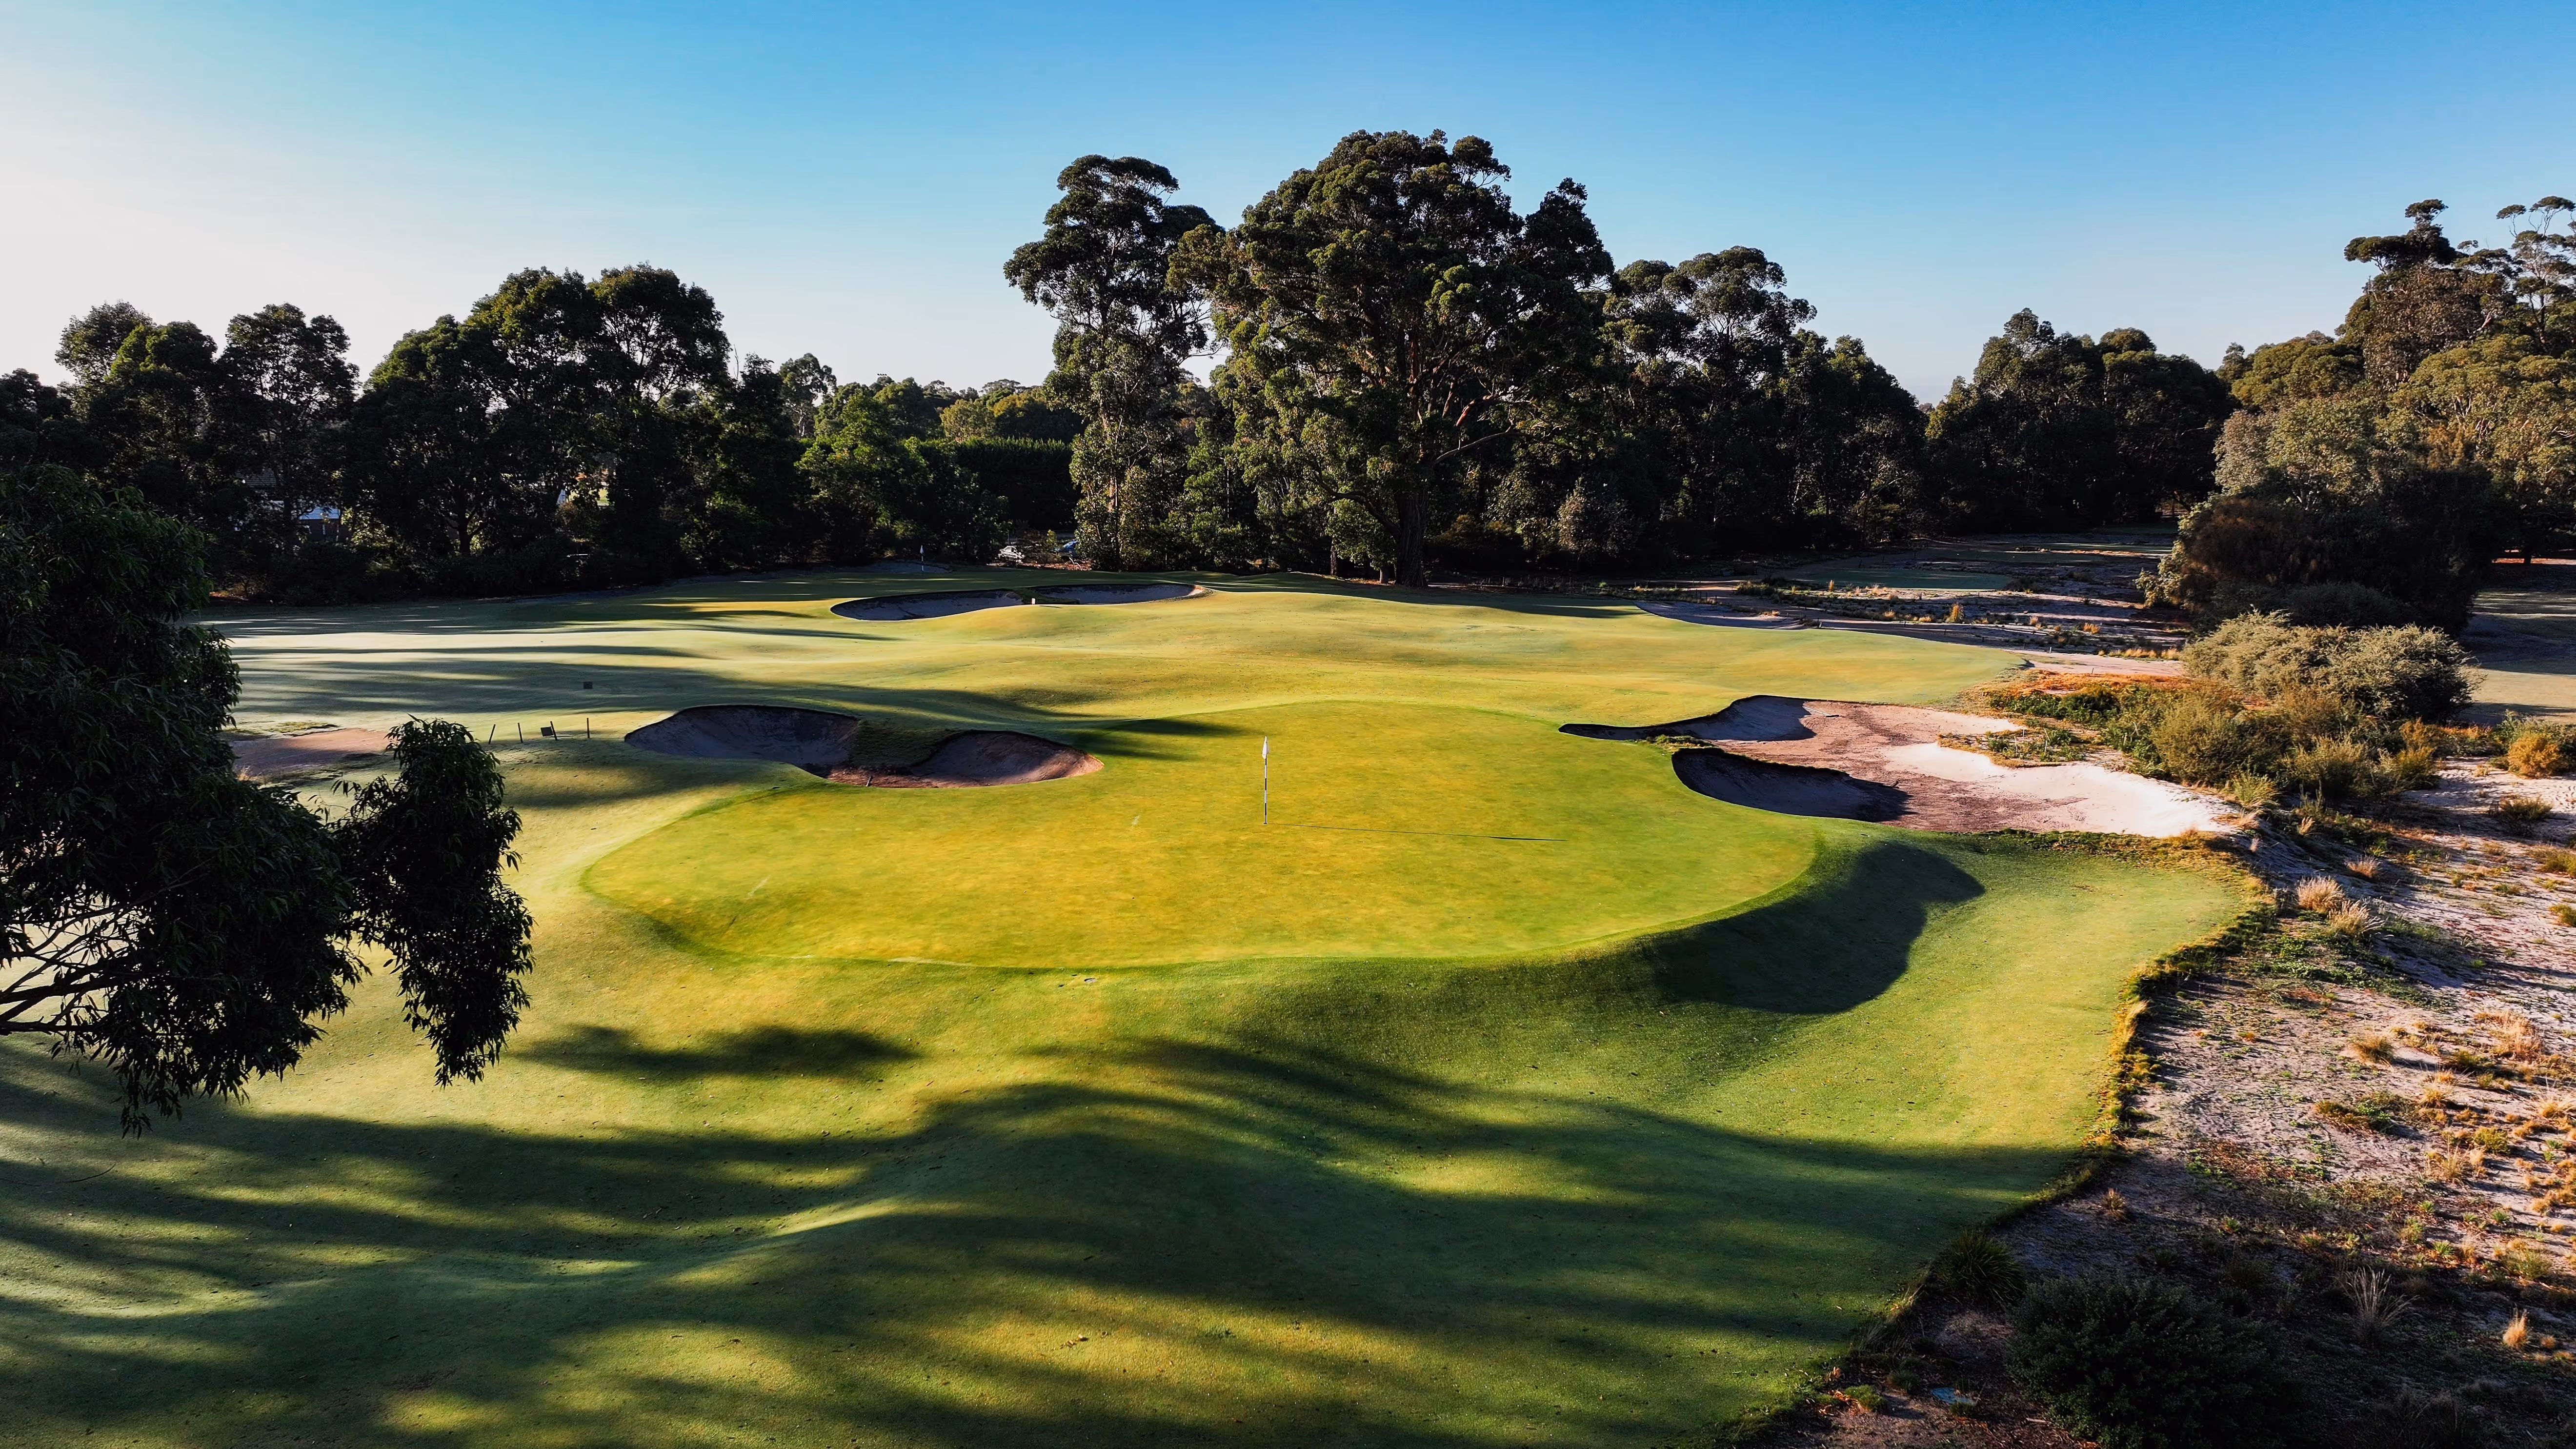
7th Hole
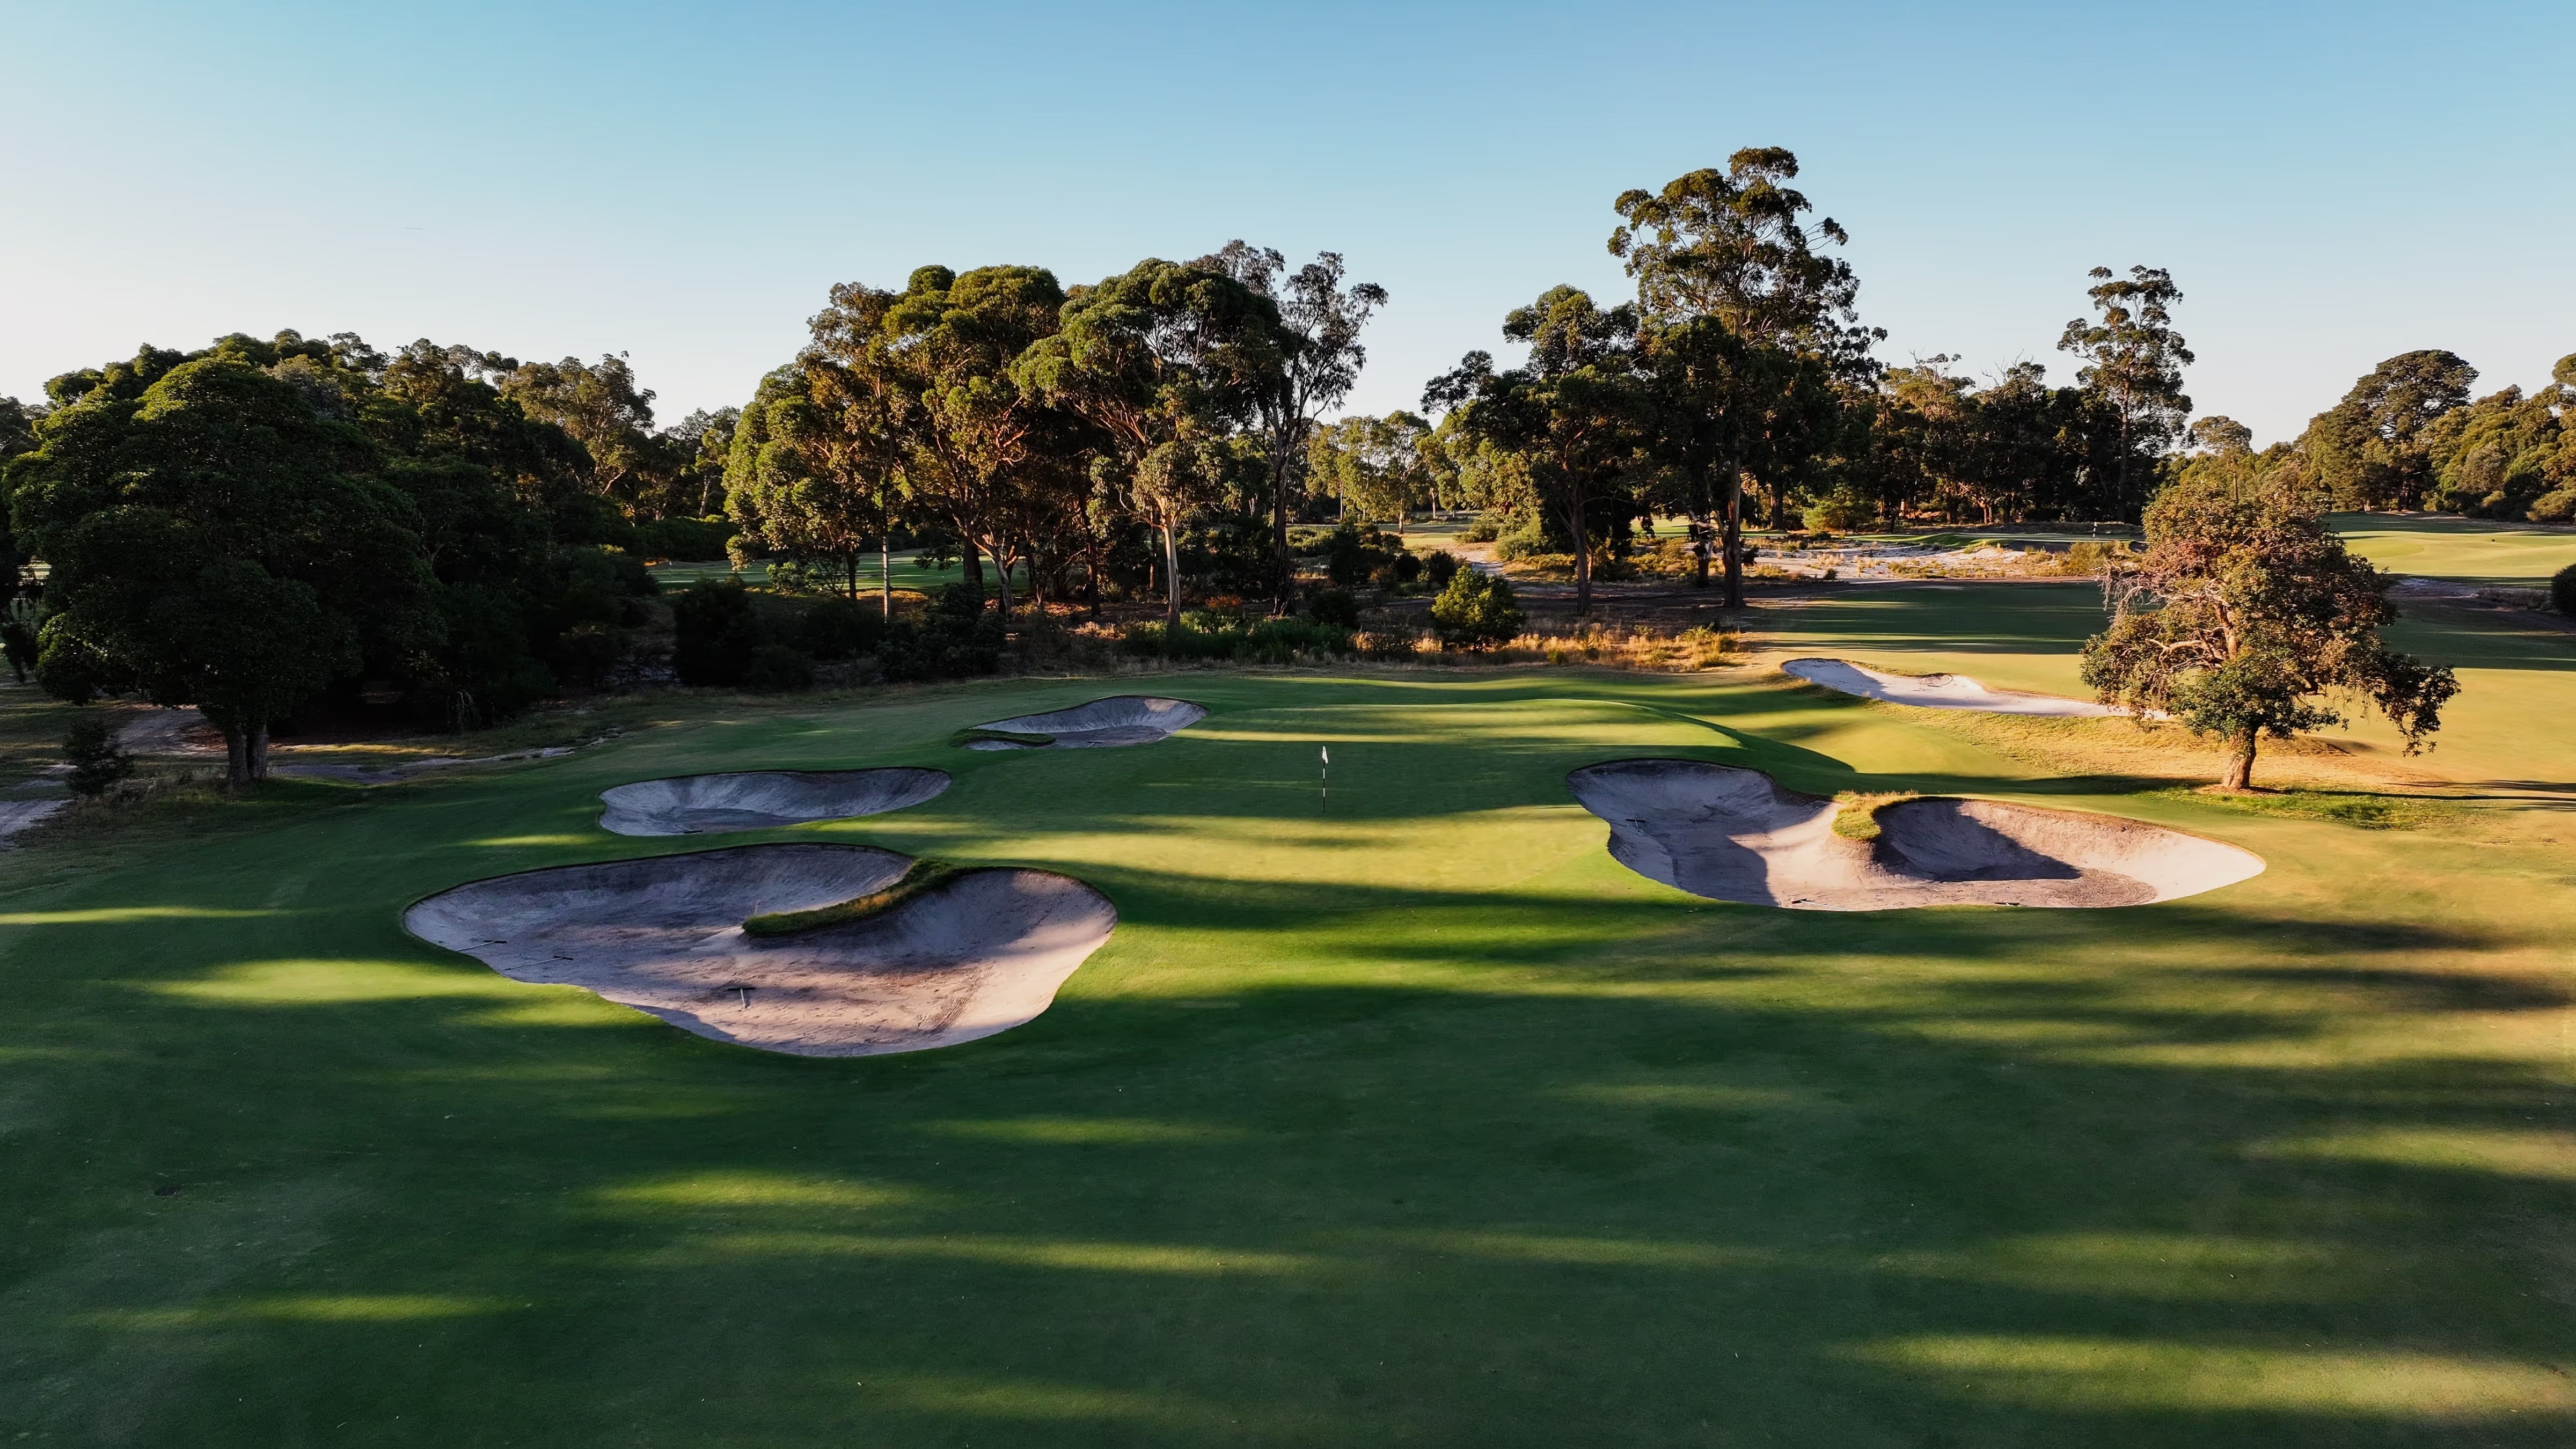
A much underrated hole by those who dismiss it as being too long and flat. The green and its terrific looking surrounding bunkers are a model for anyone trying to build a difficult hole on a relatively flat piece of ground. Usually it takes a long iron or a 3 wood and if the pin is tucked close to the bunkers only a perfect long shot sets up a birdie putt.
Hole Stats
Championship
201m / Par 3 / 220 yd
Blue
201m / Par 3 / 220 yd
Green
159m / Par 3 / 174 yd
Red
159m / Par 3 / 174 yd
.avif)
8th Hole
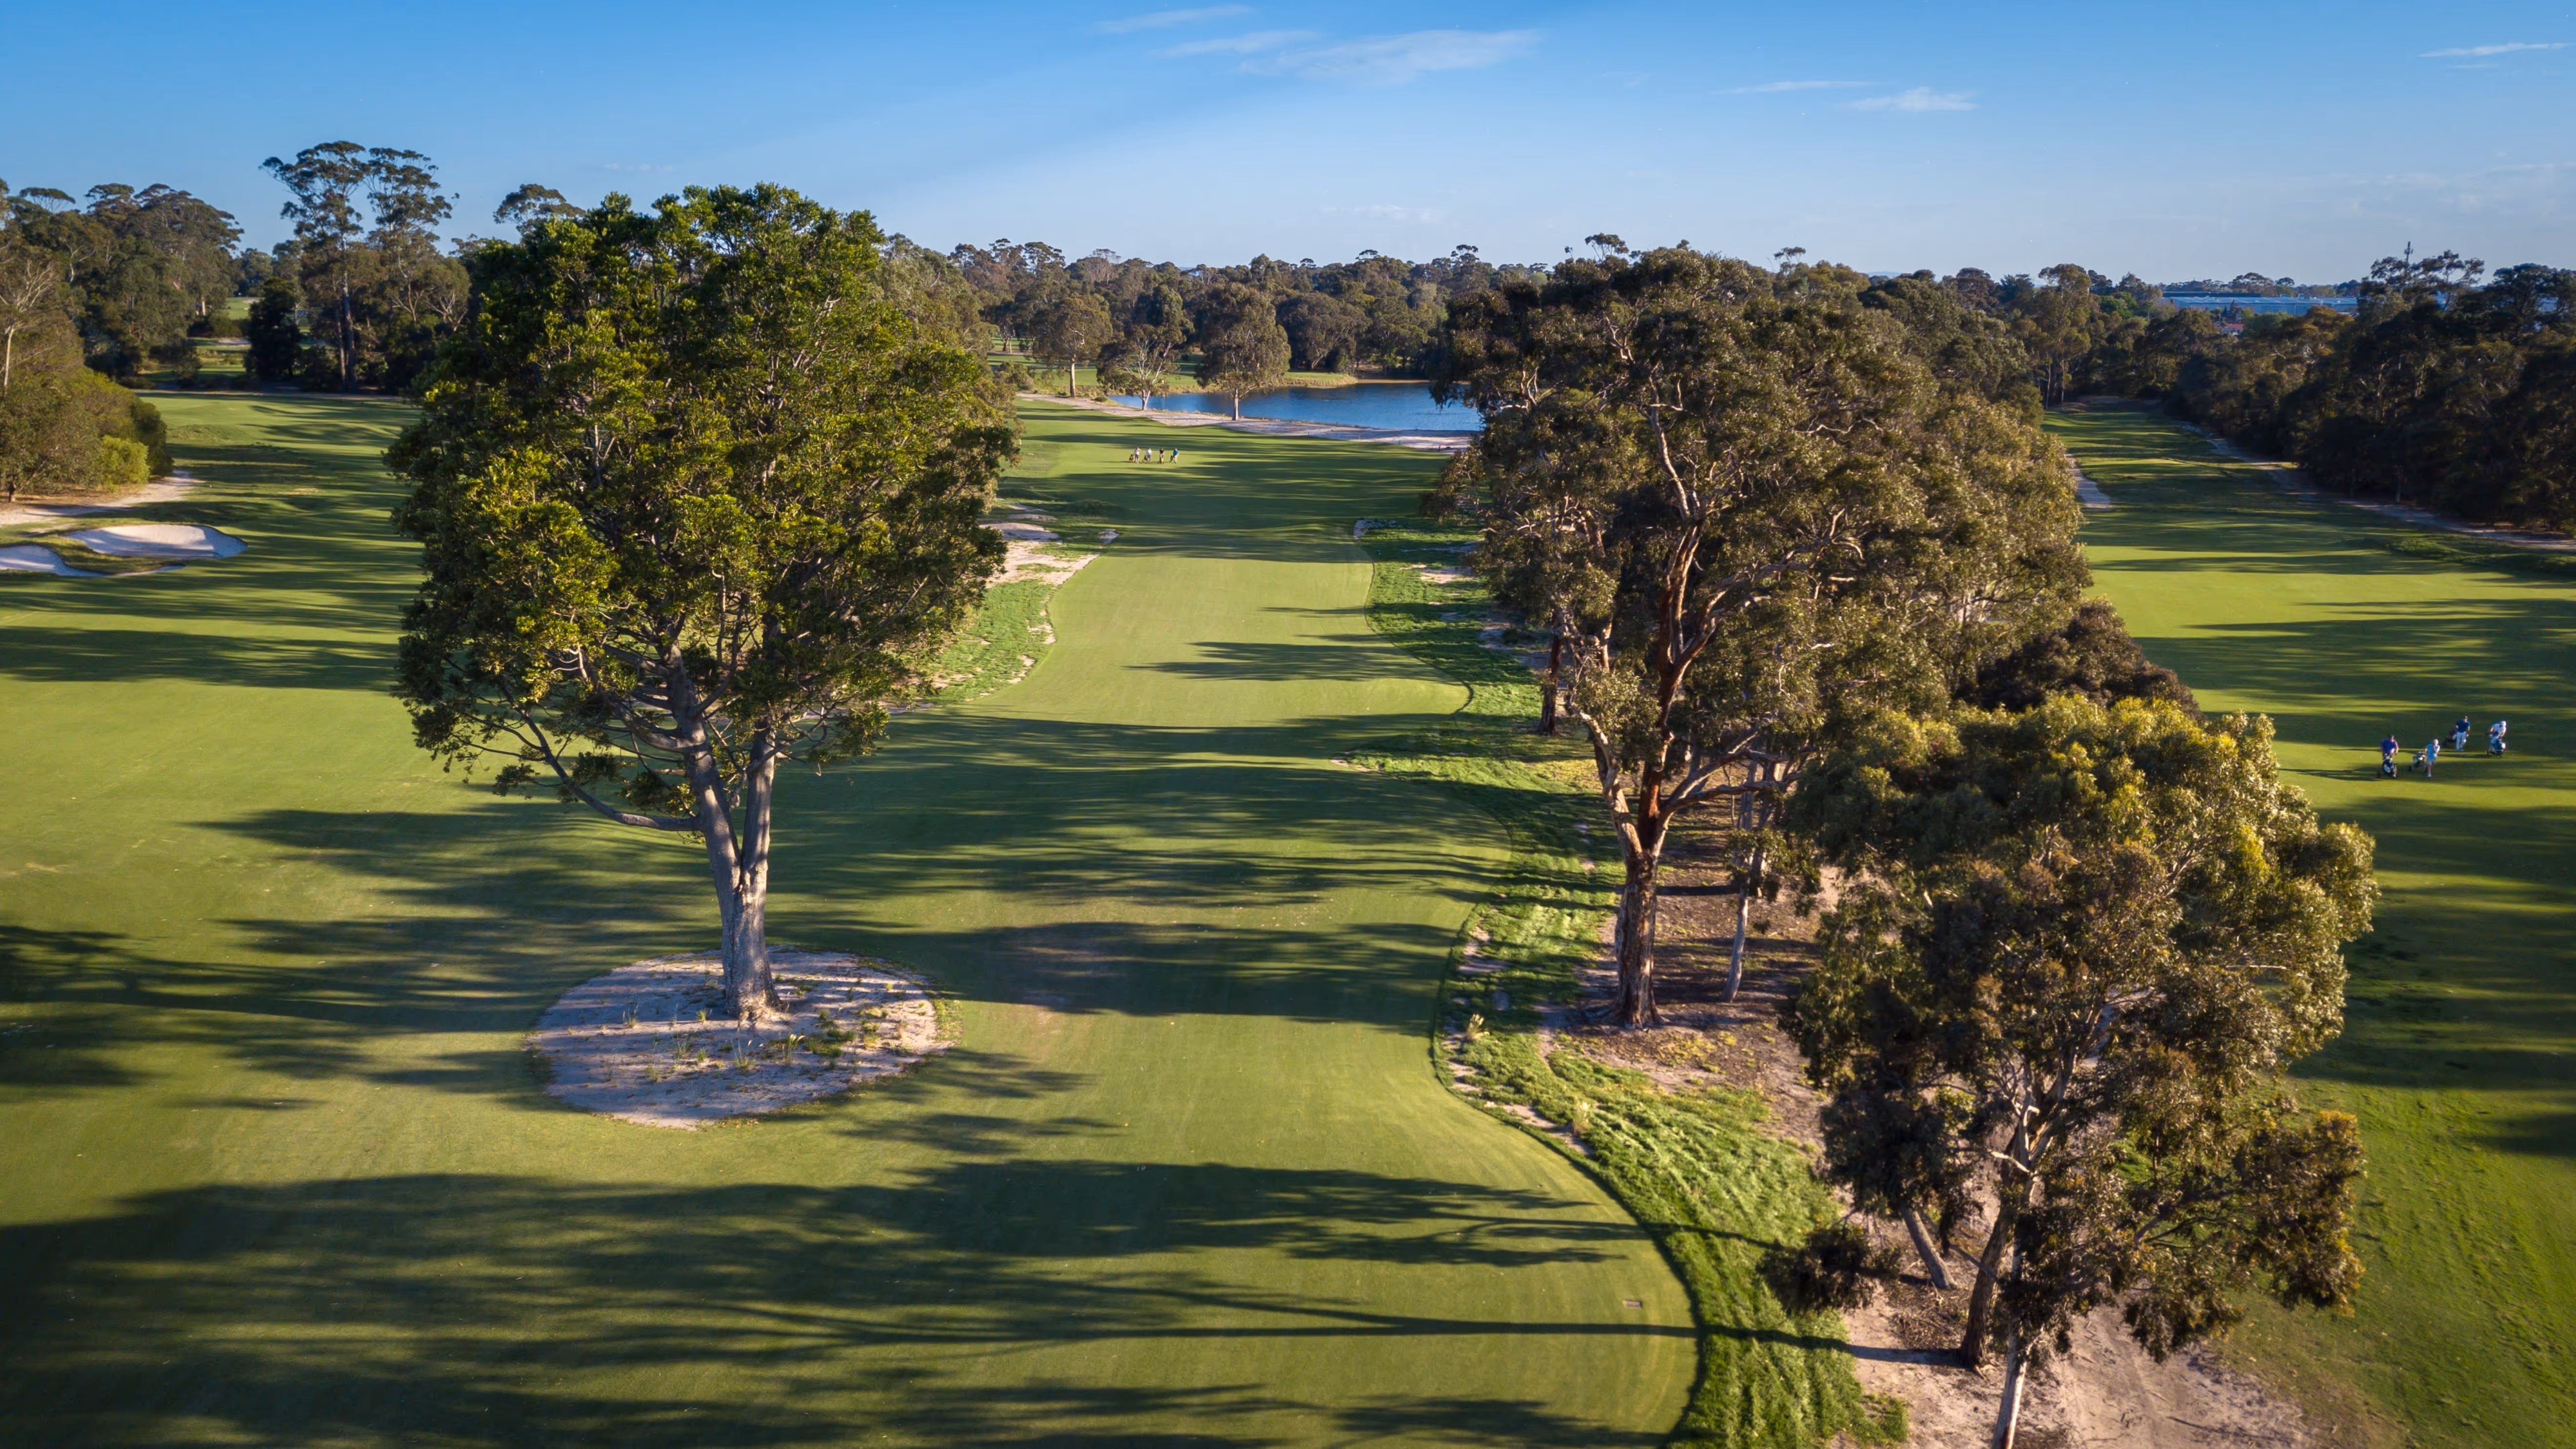
Another two shot par five for the good player but one lined with trees all the way up both sides. It bends to the right but a drive too far right forces a long low fade around the corner trees if the player hopes to reach the green. The green again is the feature and a swale guards the front and runs all the way around the right side. The most difficult pin placements are in the left side of the green and a miss into the deep left hand bunker makes it awfully difficult to get up and down.
Hole Stats
Championship
476m / Par 5 / 521 yd
Blue
476m / Par 5 / 521 yd
Green
456m / Par 5 / 499 yd
Red
400m / Par 5 / 437 yd
.avif)
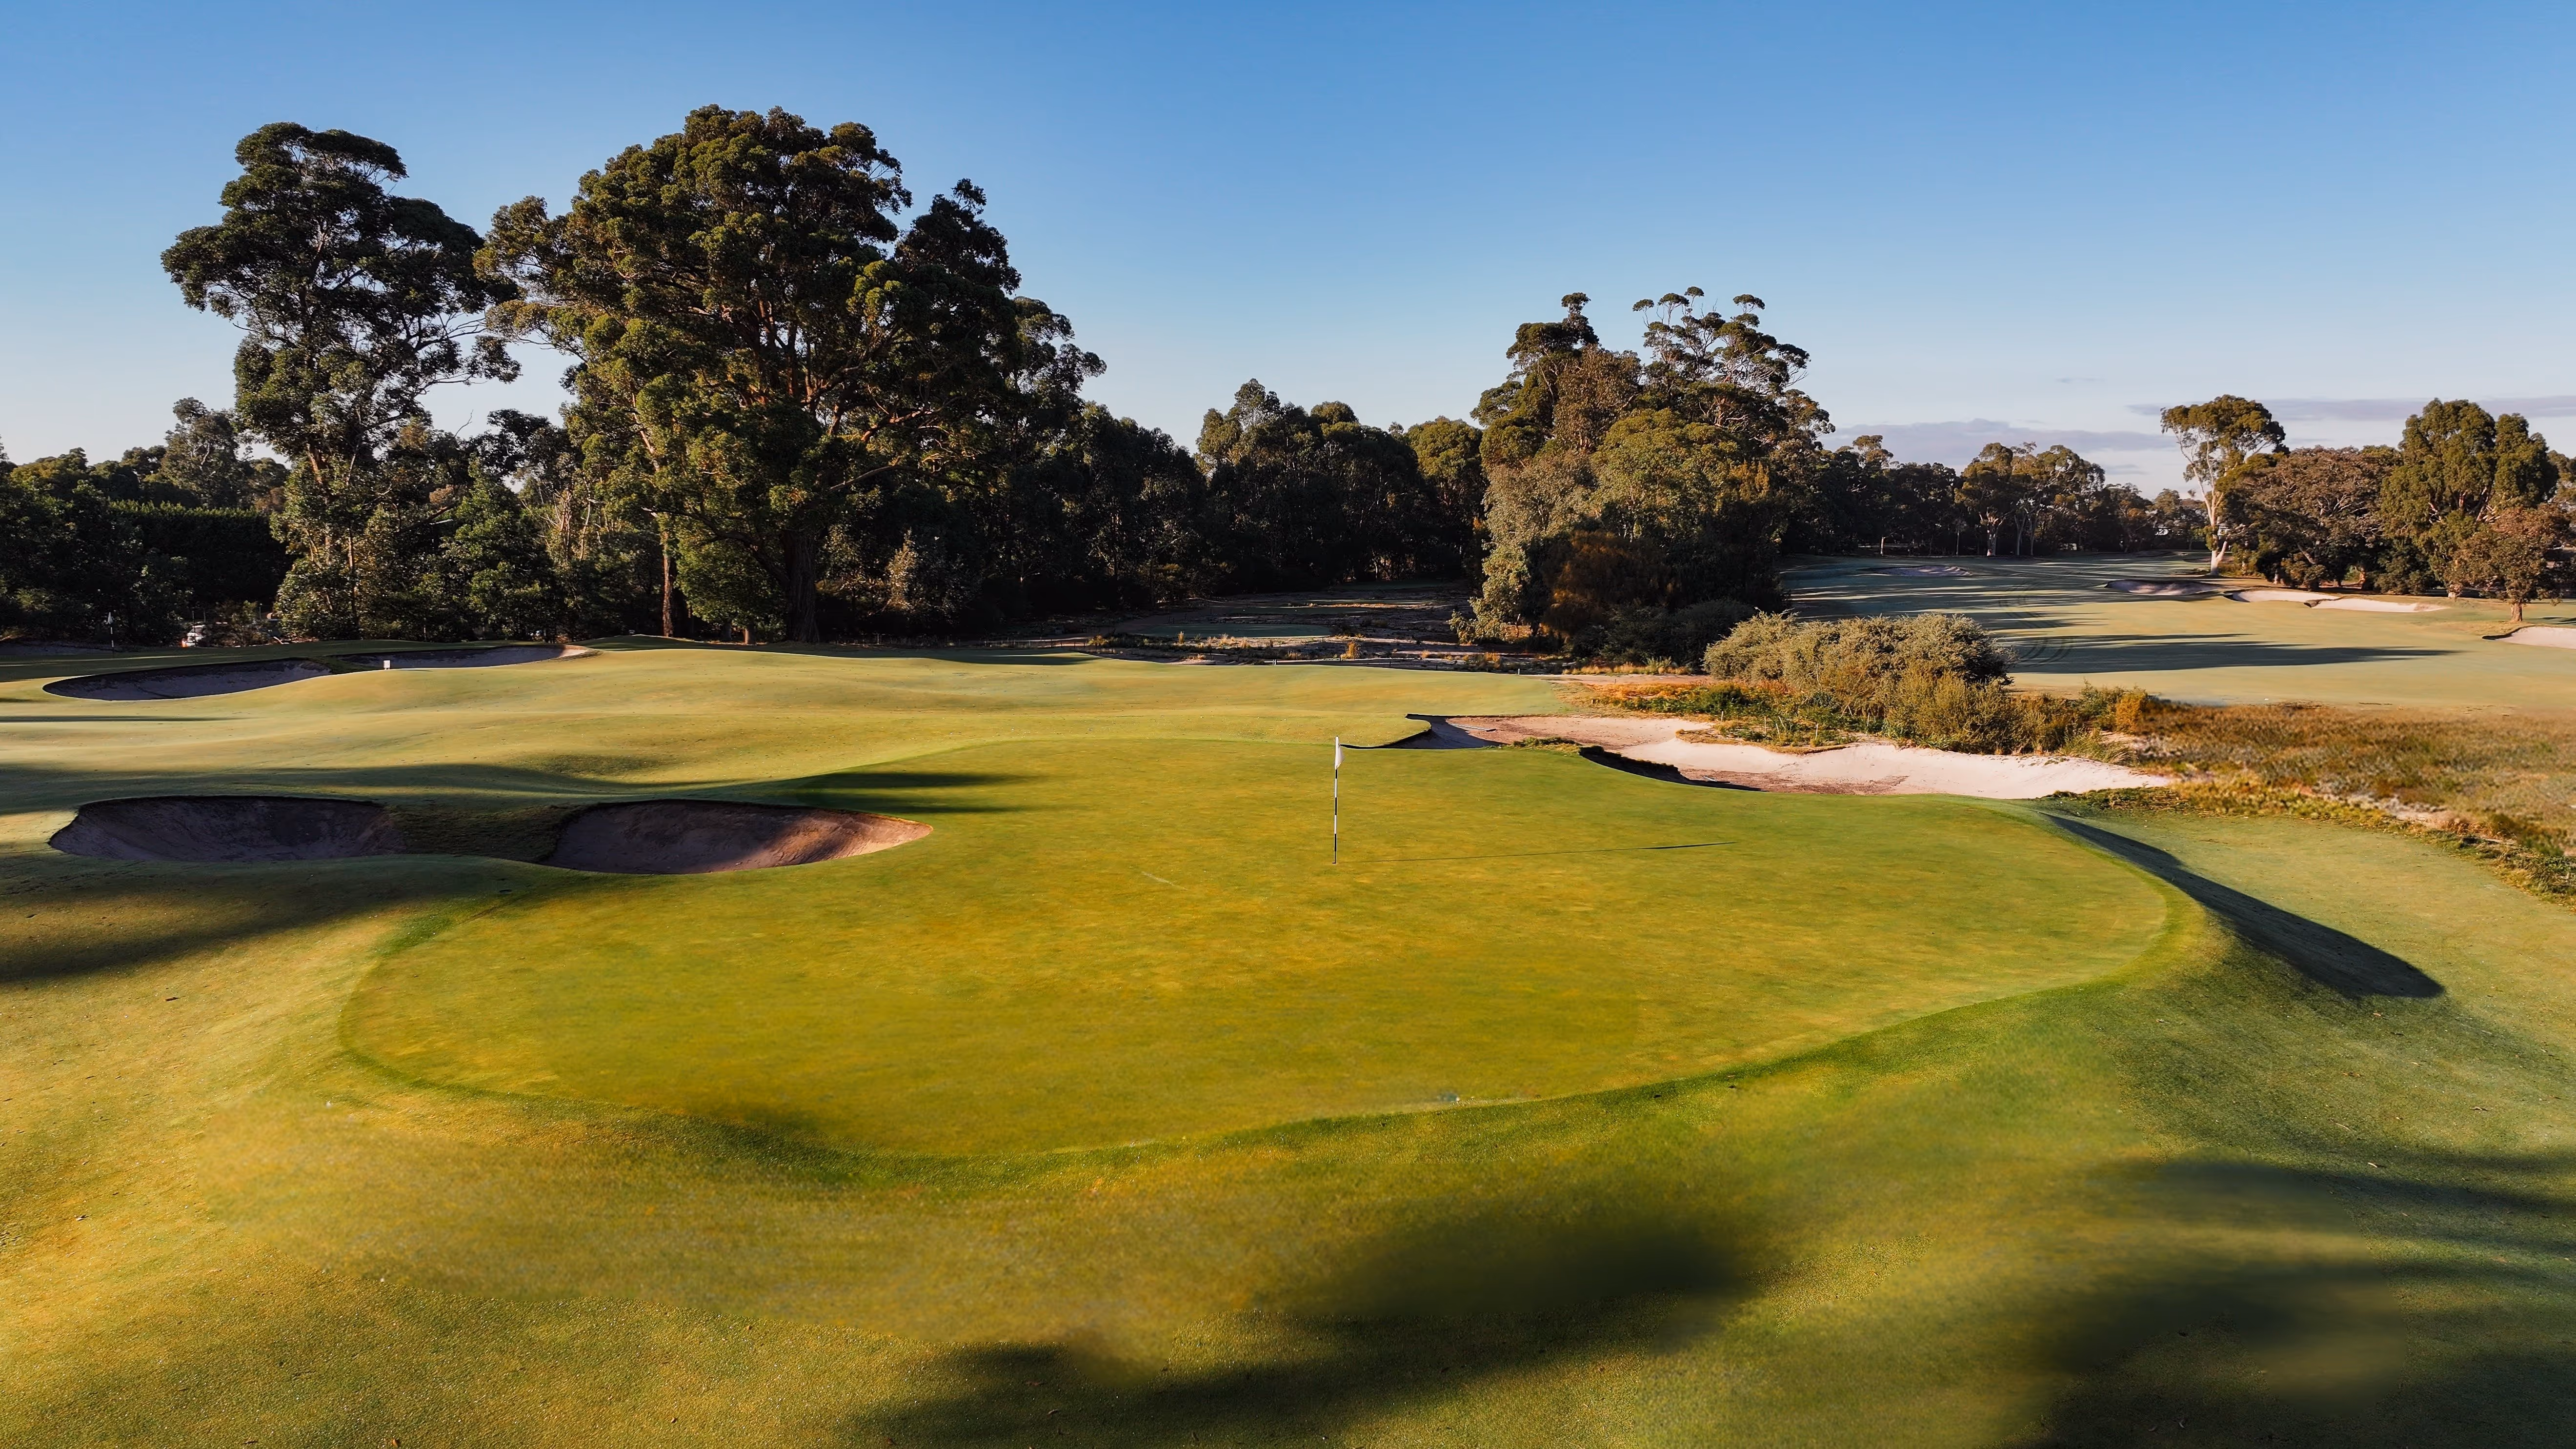
9th Hole
The 9th hole is a long par 4 with a sharp dogleg right. Most play down to the corner with a long iron or a three wood and if the driver comes out it has to be perfectly faded around the corner or it runs through the fairway. The second shot can vary between a four iron down to an eight or nine. This is the most beautifully contoured and shaped green on the golf course – being on in two is no guarantee of a par.
Hole Stats
Championship
395m / Par 4 / 432 yd
Blue
395m / Par 4 / 432 yd
Green
379m / Par 5 / 414 yd
Red
379m / Par 5 / 414 yd

10th Hole
This hole is a dogleg to the left that perfectly suits a long draw from the tee and whilst it plays its full length in the winter the extra summer run makes it not as daunting a proposition as its length suggests. The two tiered green is relatively large and the greenside bunkers only catch the wayward approach shot.
Hole Stats
Championship
418m / Par 4 / 457 yd
Blue
418m / Par 4 / 457 yd
Green
358m / Par 5 / 417 yd
Red
381m / Par 5 / 392 yd
11th Hole
A medium length par three where the ideal shot and the club selection is entirely dictated by the pin placement. The back pin is guarded by a back left bunker that eats right into the green and catches any shot that is even marginally pulled. Like the 2nd this is not a difficult hole to hit the middle of the green but it demands a fine tee shot to get into the corners where the most difficult pin positions are placed.
Hole Stats
Championship
154m / Par 3 / 168 yd
Blue
154m / Par 3 / 168 yd
Green
140m / Par 3 / 153 yd
Red
123m / Par 3 / 135 yd
12th Hole
The 12th is a shortish par four where the only place not to drive is into the left hand fairway bunkers. Unless it’s played into an unusually strong wind the second shot will only be with a short iron but downhill putts are rarely made on this green so it’s important to get your approach under the hole.
Hole Stats
Championship
370m / Par 4 / 405 yd
Blue
370m / Par 4 / 405 yd
Green
330m / Par 4 / 361 yd
Red
319m / Par 4 / 349 yd
.jpg)
.avif)
13th Hole
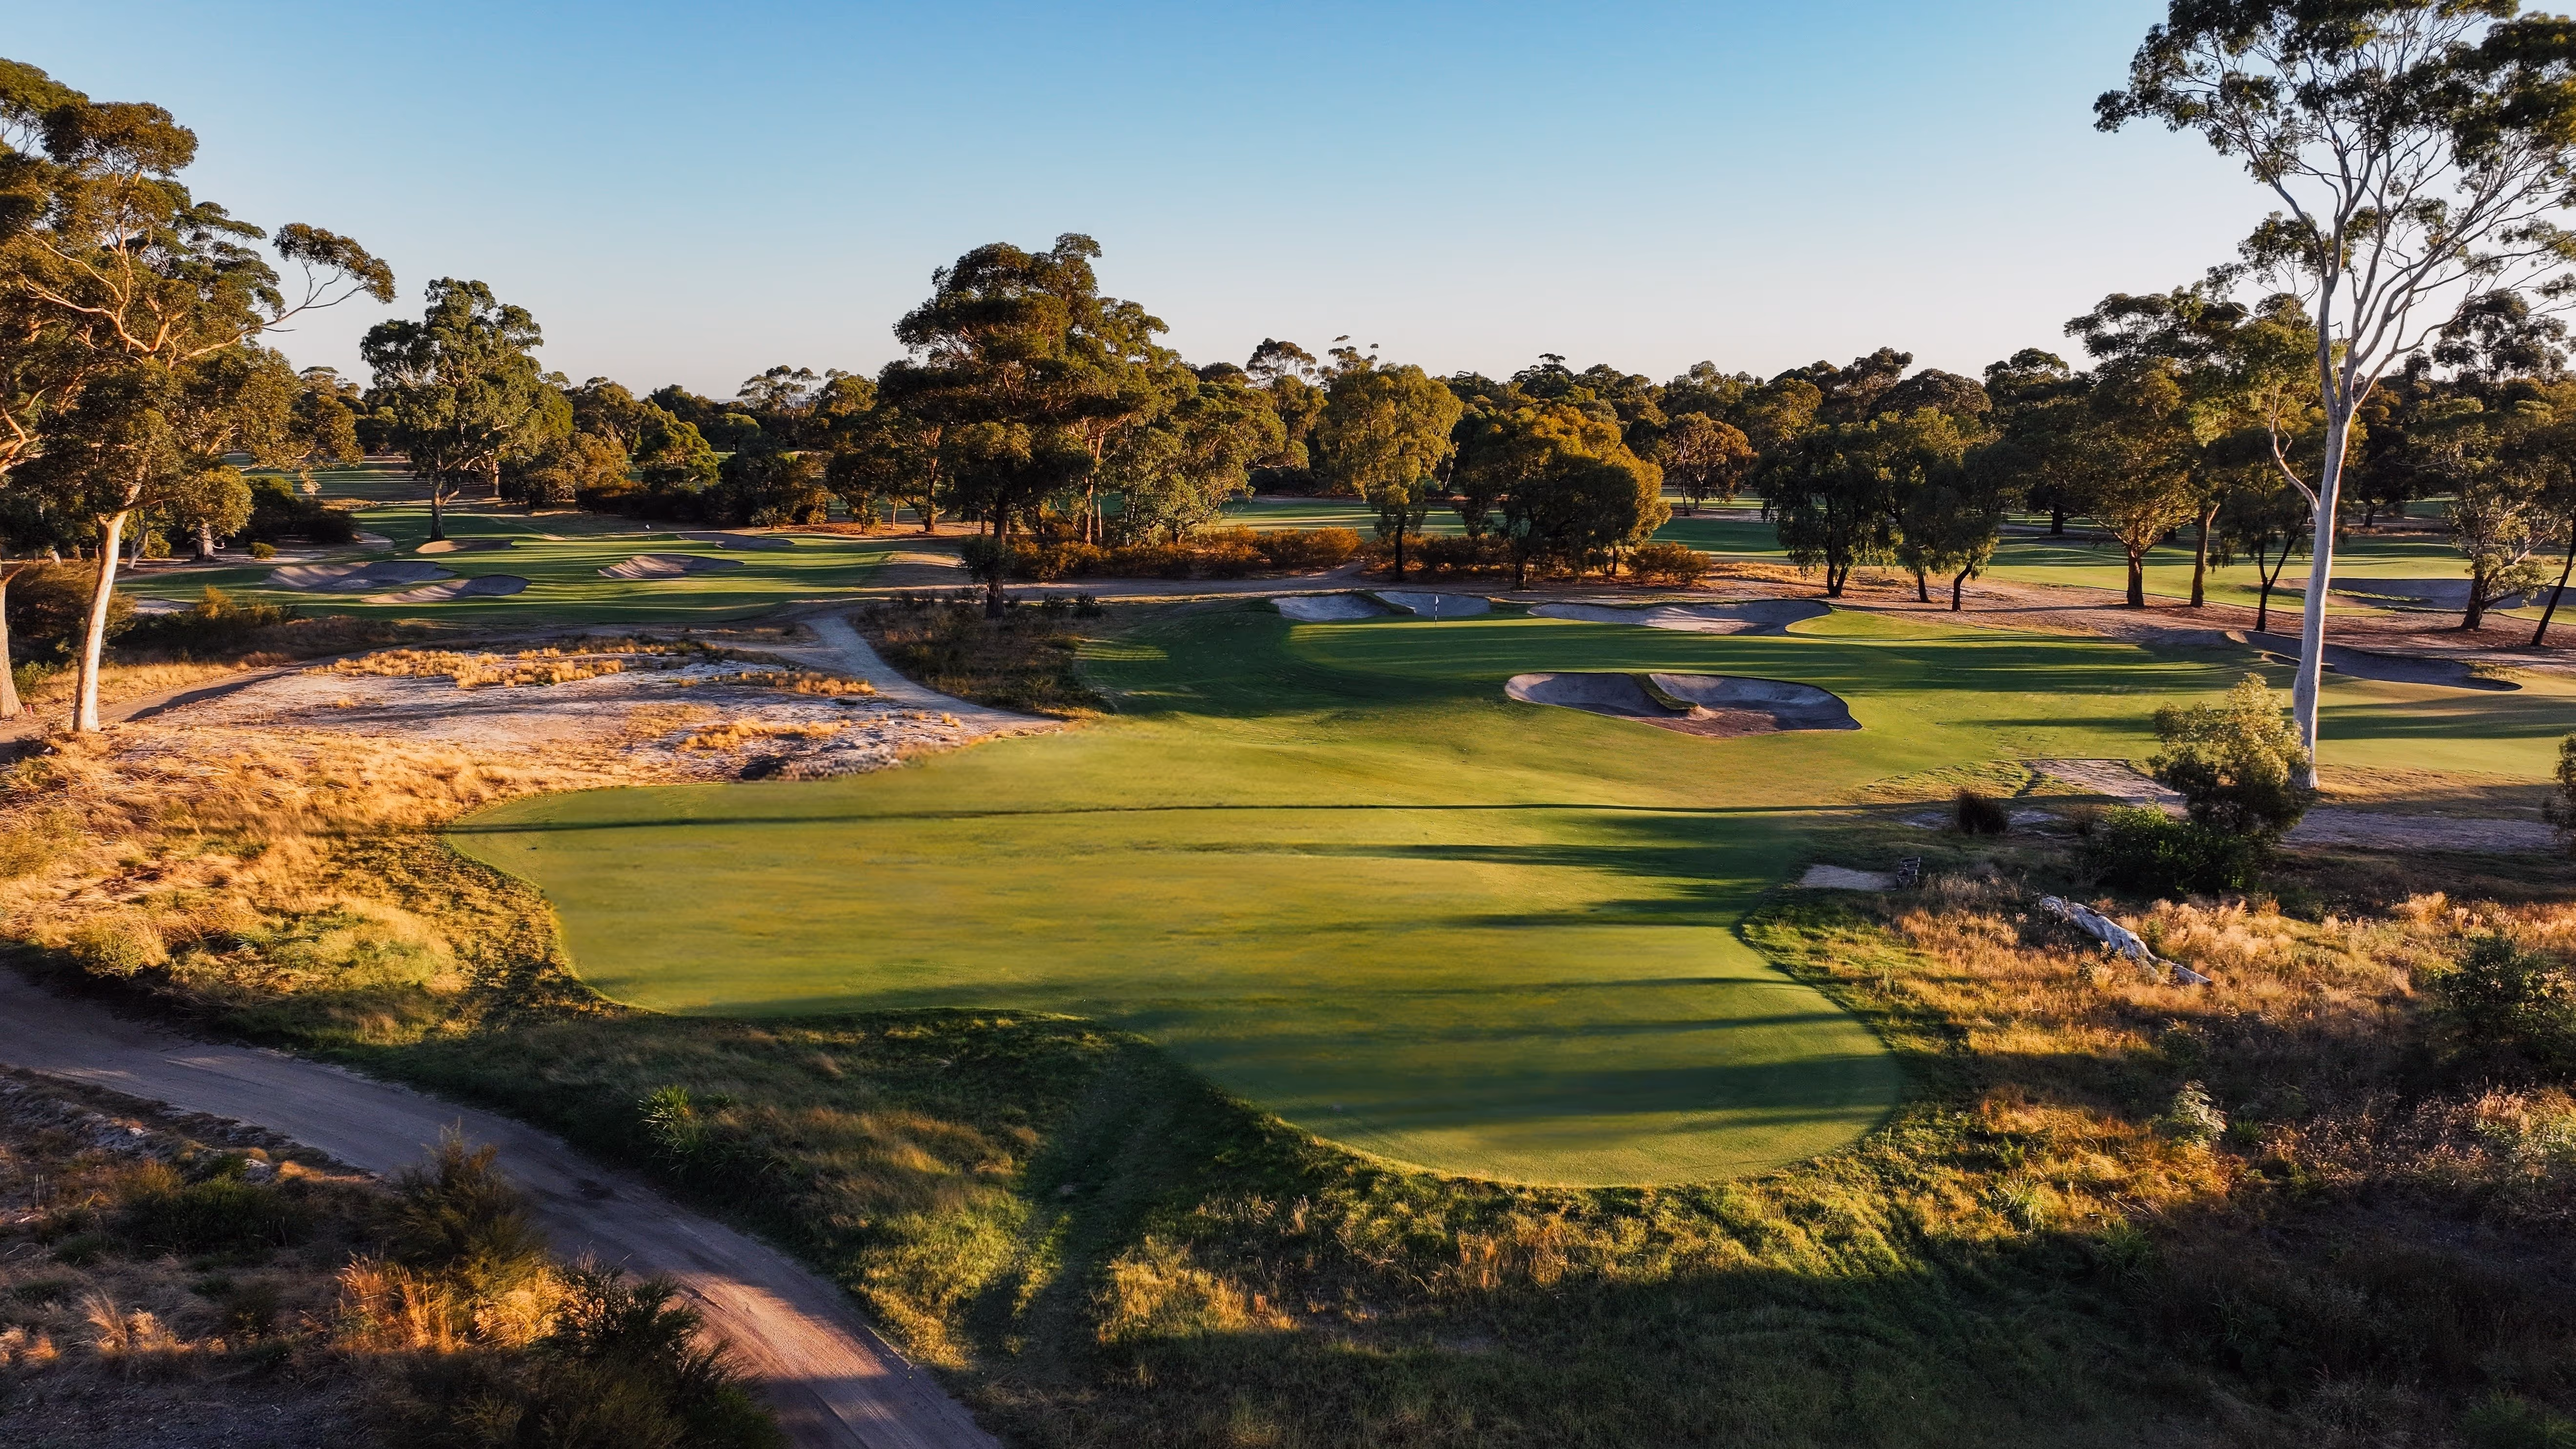
A hole that is both visually appealing and challenging. A large cavernous bunker guards the front right of the green with the only safe lay up area short left. The green slopes sharply from back to front and the wind rarely assists on this hole so a par here is well earned.
Hole Stats
Championship
146m / Par 3 / 159 yd
Blue
146m / Par 3 / 159 yd
Green
131m / Par 3 / 143 yd
Red
109m / Par 3 / 119 yd
14th Hole
This is the last of the four par five holes and one easily reachable in two shots by the good player. The green opens up from the left side of the fairway and the ideal drive either carries the deep left hand fairway bunkers or just skirts past them. A big bunker guards the front right of the green but getting up and down from here isn’t particularly difficult so many attack the flag in the hope of a three, but with the knowledge that missing short in the sand is no disaster.
Hole Stats
Championship
546m / Par 5 / 596 yd
Blue
503m / Par 5 / 550 yd
Green
428m / Par 5 / 468 yd
Red
408m / Par 5 / 446 yd
.jpg)
15th Hole
This is probably the most difficult of Metropolitan’s par fours and again the strategy is simple and clear. A long bunker with a high lip sits into the left side of the fairway and a green that angles from its front left corner to the back right clearly favours an approach from close to the fairway bunker. A greenside bunker closes off the flag for those approaching from the right and only a big high fade will get the job done for those who fly their drives too far to the right.
Hole Stats
Championship
427m / Par 4 / 467 yd
Blue
427m / Par 4 / 467 yd
Green
337m / Par 4 / 368 yd
Red
337m / Par 4 / 368 yd
16th Hole
This short par four doglegs sharply right around several deep fairway bunkers that have proved pivotal in deciding at least two Australian Opens. Bob Shearer in 1979 and Ian Baker-Finch in 1986 both drove into the bunkers and made killer bogeys that cost them their chance in those tournaments. Some can drive far enough to reach the green but it’s almost impossible to keep such a long shot on the small sloping green. Often the pin placement dictates the best place to play to from the tee with the most difficult pin to get close to being behind the front right bunker, when the flag is there it’s often easier to approach from 70 metres than it is from 30. A wonderful example of how great a well designed short par four can be.
Hole Stats
Championship
345m / Par 4 / 377 yd
Blue
319m / Par 4 / 348 yd
Green
264m / Par 4 / 289 yd
Red
264m / Par 4 / 289 yd
17th Hole
A single deep bunker that is almost impossible to hit the green from, sits in the left side of the driving area. It’s the one place not to go. Some curiously sited trees (but favorites of the members) 60 metres short of the green make for a blind second for those who have driven to the right, although that is the only effect they have in the play of the hole. The green is relatively large, not in truth that difficult to hit and only when the pin is tucked close to the bunkers do they have much influence on the approach.
Hole Stats
Championship
411m / Par 4 / 449 yd
Blue
411m / Par 4 / 449 yd
Green
317m / Par 4 / 347 yd
Red
317m / Par 4 / 347 yd
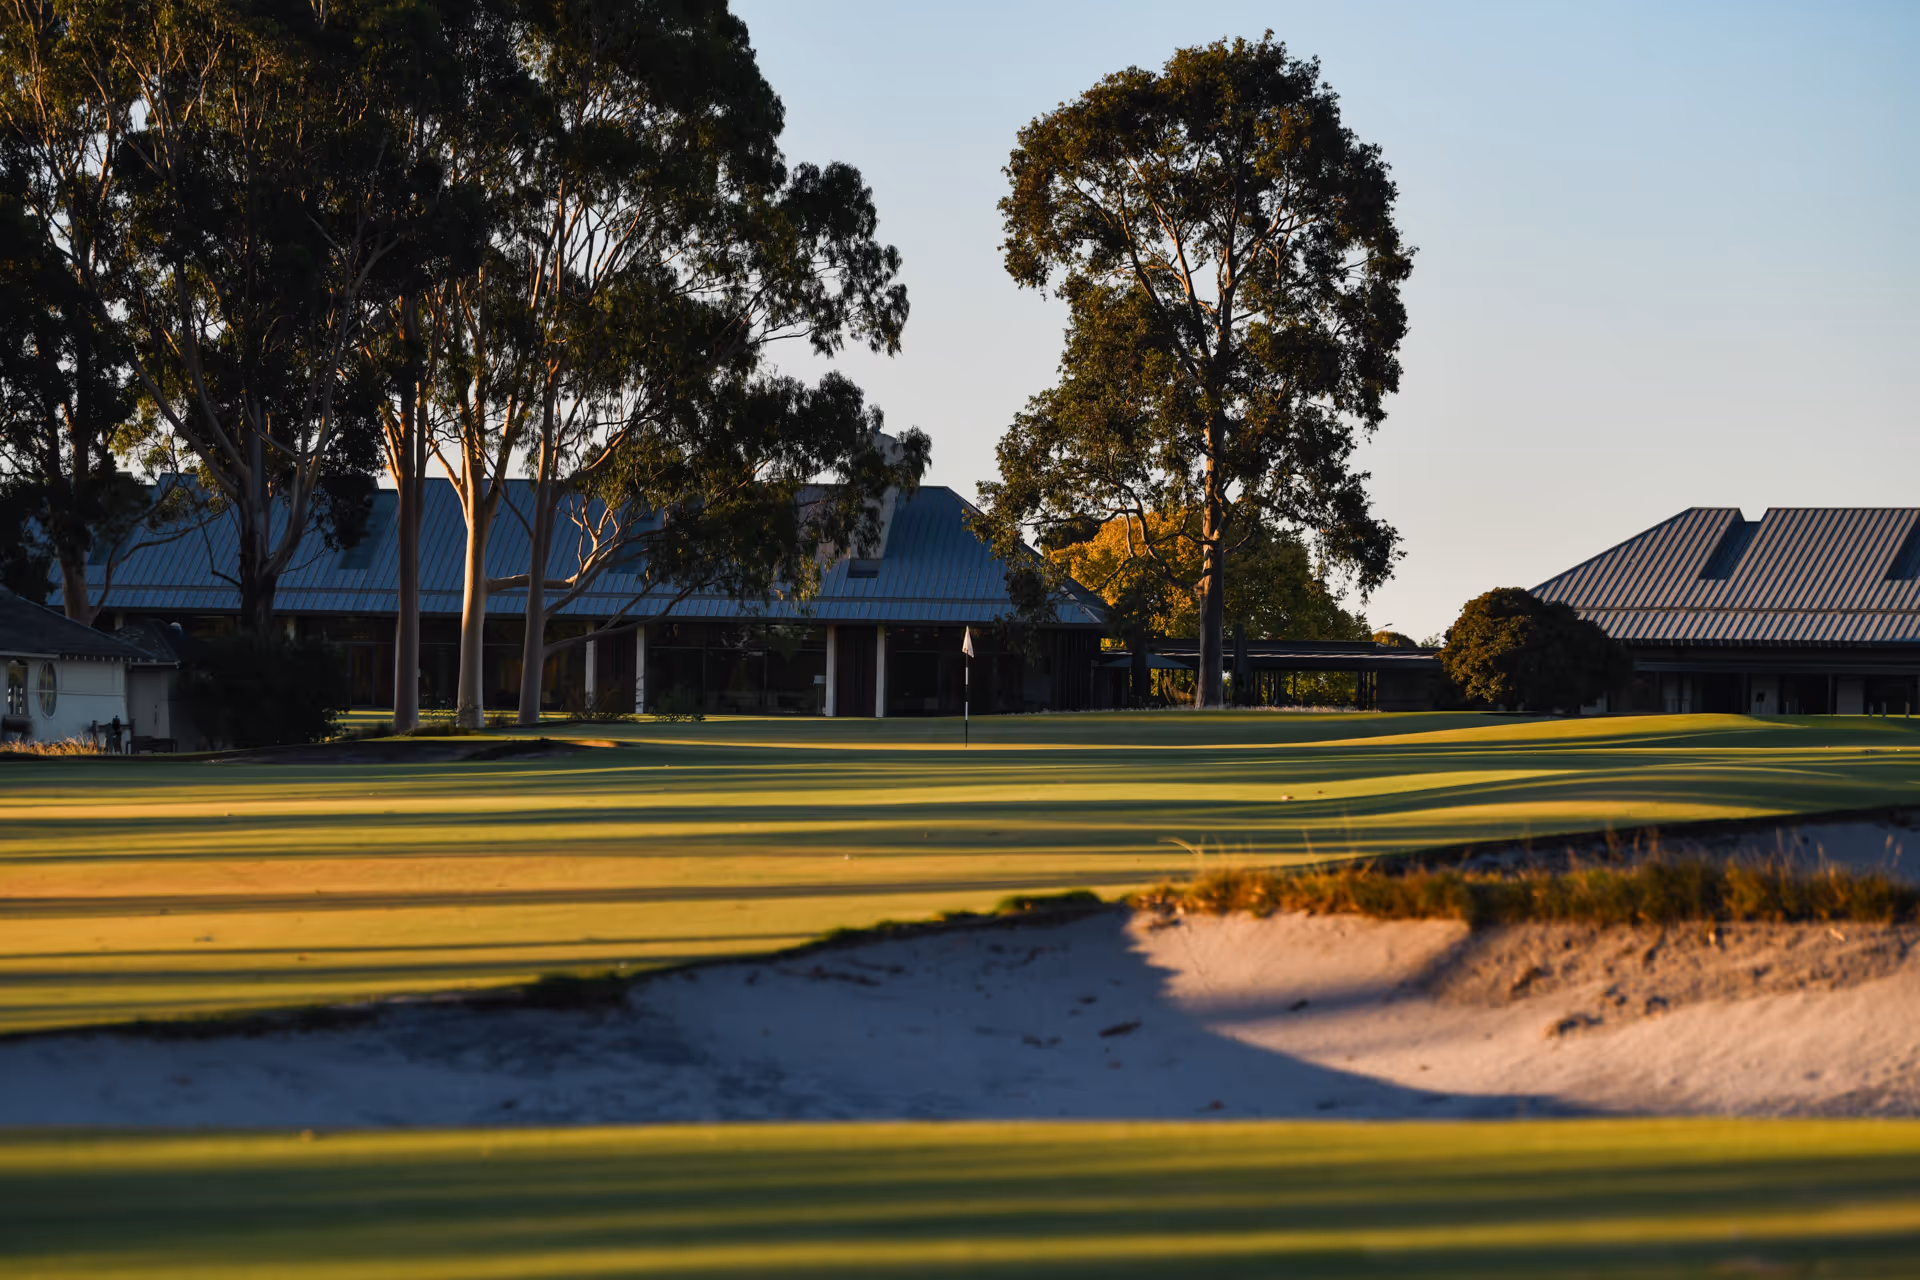
18th Hole
The championship tee added for the 1997 Australian Open stretched this hole out to 434 metres and into a wind from the north it’s a brutally difficult hole. The hole is actually dead straight and it is the blocked drive that is caught by the fairway bunkers down the right, but when the flag is on the left of the green it’s clearly best to approach from close to the bunkers. In the 1979 Australian Open, Greg Norman hit two terrific shots, the second with a five iron, just under the tier of the two level green and then three putted to lose by one to Jack Newton. Eighteen years later in 1997, from almost exactly the same spot, Norman three putted in the playoff with Lee Westwood to lose the Open again.
Hole Stats
Championship
434m / Par 4 / 474 yd
Blue
400m / Par 4 / 437 yd
Green
325m / Par 4 / 355 yd
Red
325m / Par 4 / 355 yd
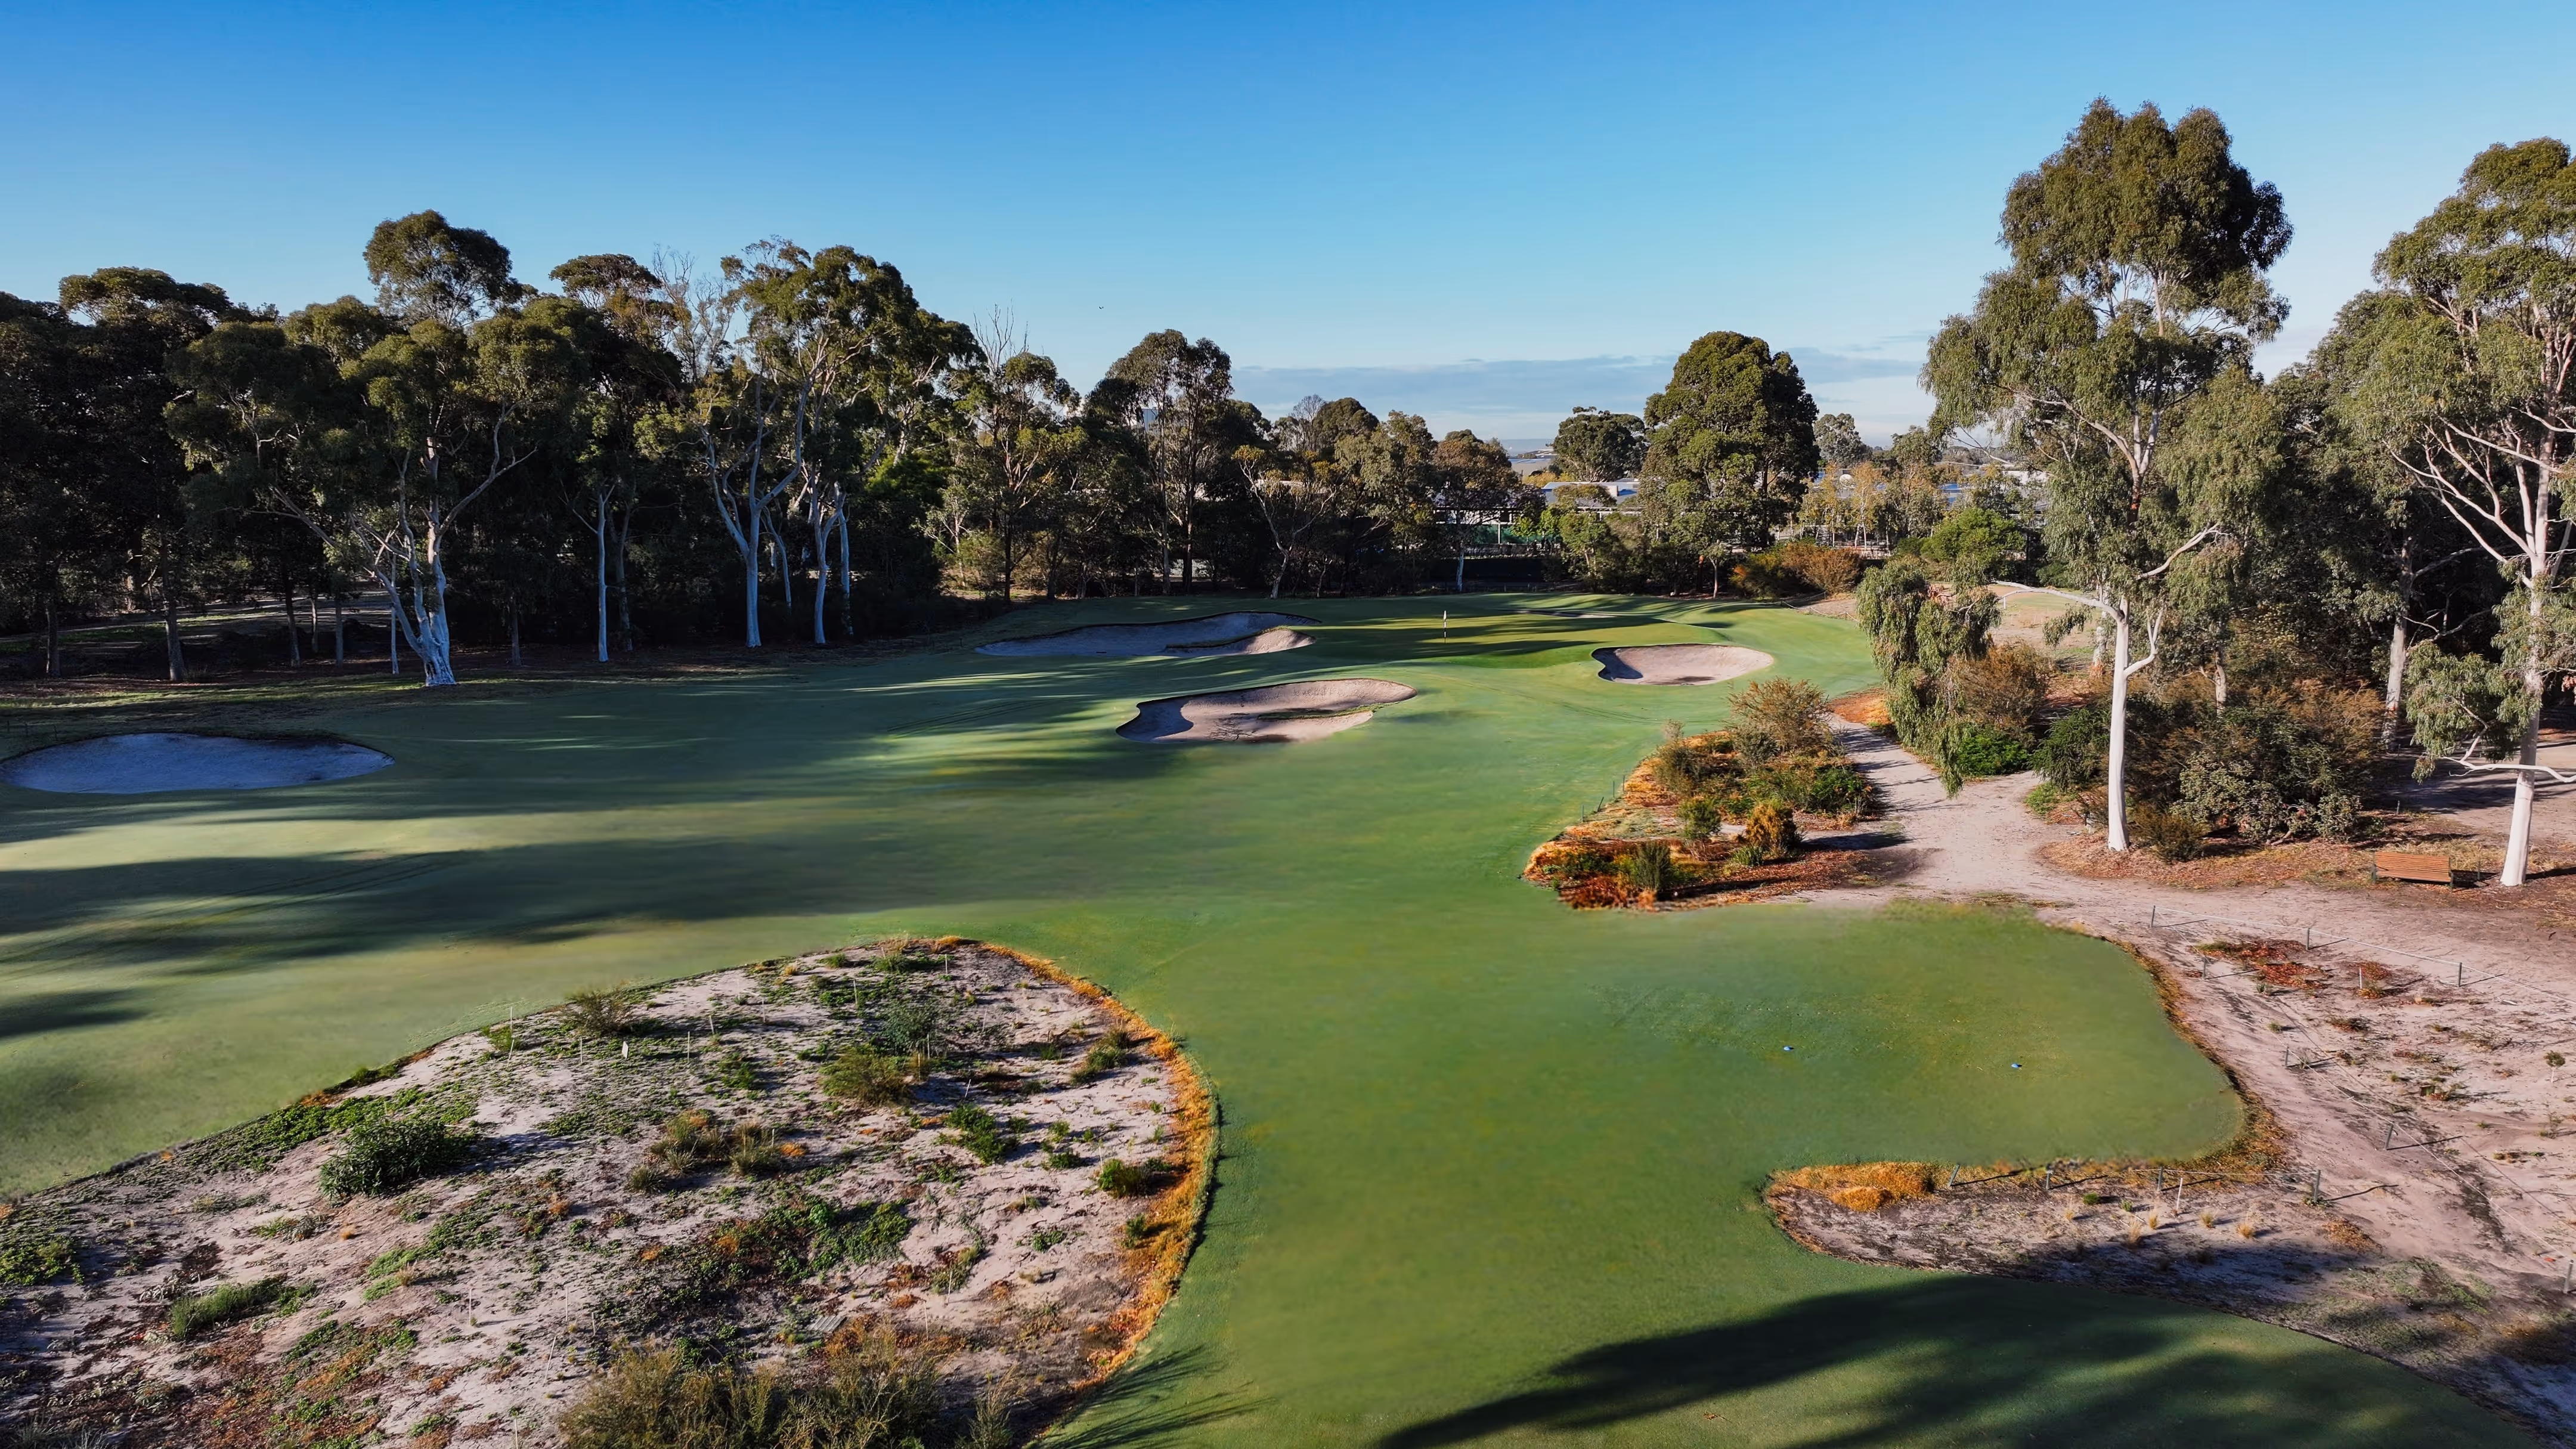
19th Hole
The 19th hole is a much admired Par 3 amongst the members. The design brief was to create a hole of similar look and feel as the rest of the layout, rather than simply creating an ‘extra hole’. Players are faced with a challenging uphill tee shot to a green that is one of the most undulating on the course. Hitting this green in regulation provides no guarantee of making par.
Hole Stats
Championship
162m / Par 3 / 178 yd
Blue
142m / Par 3 / 156 yd
Green
122m / Par 3 / 133 yd
Red
113m / Par 3 / 124 yd
Contact us to discuss your golf enquiry with our team